Changing the shape and texture of 3D primitives
Select a 3D primitive with the Object tool to access shape and appearance settings from the Tool Settings and Advanced Tool Settings palettes.
Changing the shape
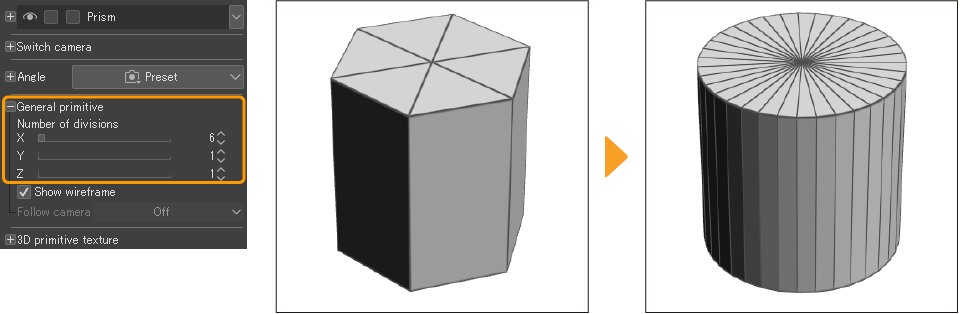
You can change the number of faces of a 3D primitive by adjusting the sliders under General primitive > Number of divisions under General primitive. For spheres, prisms, pyramids, and polygons, the number of divisions determines the shape of the primitive.
Changing the color
You can change the color of the primitive with the Primitive > Color setting. This opens the "Color Settings dialog" where you can select a color.
Adding a texture
Importing an image file as a texture
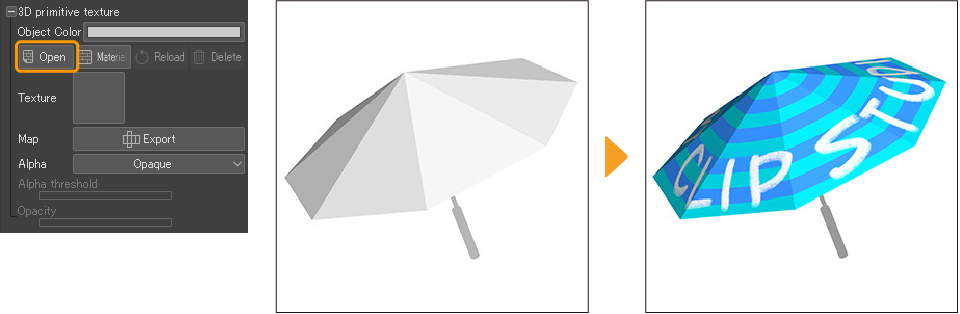
To import an image file, tap the 3D primitive with the Object tool, then go to the Tool Settings palette > Primitive color > File. In the dialog, select an image file to import as a texture for the 3D primitive.
You can import the following file formats: Clip Studio Format (extension: clip), bmp, jpeg, tga, png, tiff, Adobe Photoshop Document (extension: psd), and Adobe Photoshop Big Document (extension: psb).
Memo | For Plane and Polygon 3D primitives, importing an image file changes the scale of the primitive to match the aspect ratio of the texture. |
Using an image material as a texture
Image materials can be imported from the Material palette and used as textures for 3D primitives.
Importing with the Tool Settings Palette
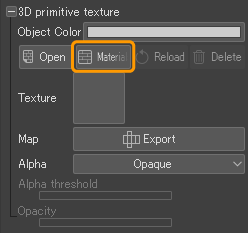
Select the 3D primitive with the Object tool, then in the Tool Settings palette > Primitive color, tap Materials to open the Add a texture dialog. Select the image material you wish to use and tap OK to apply it to the 3D primitive.
Importing with the Material Palette
Select the 3D primitive with the Object tool, then select an image material from the Material palette and tap the Paste to canvas icon at the bottom of the palette. You can also drag and drop image materials from the Material palette onto the 3D primitive.
Adjusting the texture appearance
When you select a 3D primitive with the Object tool, you can use the Tool Settings palette to adjust the size and opacity of the texture.
Adjusting opacity
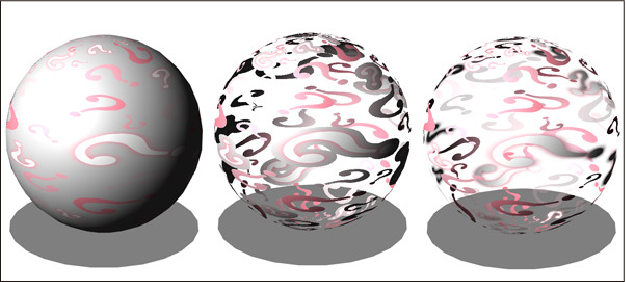
Use the Alpha setting to specify how to treat the opacity of the color or texture. The options are Opaque, Remove with threshold, and Semi-transparent. You can also change this setting from the Advanced Tool Settings palette > Primitive category.
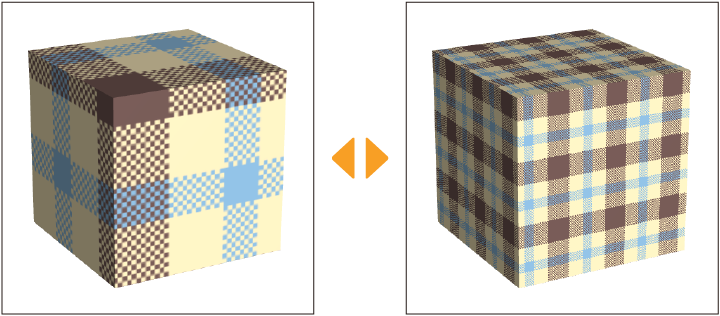
Adjusting texture size and position
You can adjust the size, pattern, and position of the texture from the Texture settings category > Tiling, Scale ratio, and Position settings. You can also change these from the Advanced Tool Settings palette > Texture settings category.
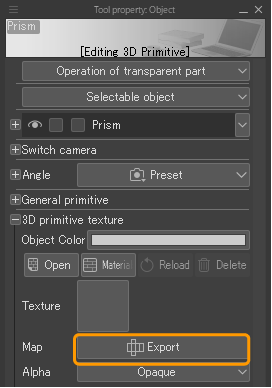
Exporting a UV Map
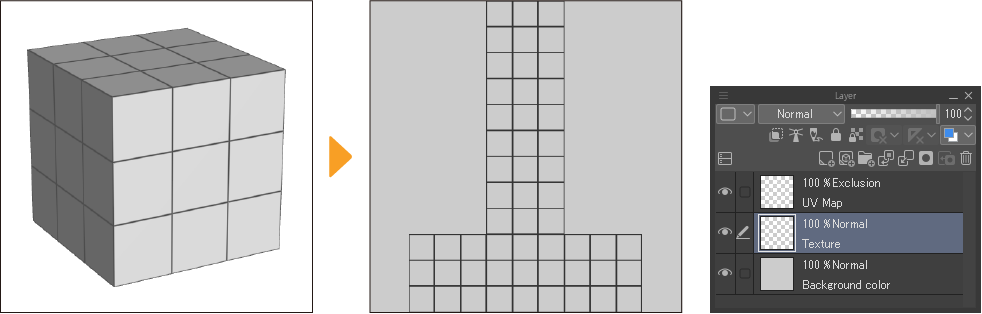
A UV map is a flattened version of the shape, like an unfolded piece of paper. To export a UV Map, tap the 3D primitive with the Object tool, then go to the Tool Settings palette > Primitive > Map setting and tap Export. If you export in Clip Studio format (extension: clip), you can export a UV map that reflects the colors and texture set to the 3D primitive.
The exported UV map file is divided into three raster layers: Texture, which consists of the image or image material used for the texture, Background Color, which is filled with a single color, and UV map, in which the lines of the UV map are mapped out to serve as grid guide lines.
The exported UV map can be drawn on and edited. After editing, you can apply the new texture to the 3D primitive by importing it with the Primitive category settings.
Setting up a normal map texture
A normal map is a type of texture that mimics the dimensionality of bumps or grooves on a polygon. You can apply normal map textures to 3D primitives to express shadows and contours.
Memo | You can create textures for normal maps in Clip Studio Paint. See "Normal map" for details. |
Select the 3D primitive you want to apply a normal map to, then go to the Advanced Tool Settings palette > "Normal map" category. Select the type of file you want to import as a normal map.

You can import the following file formats: Clip Studio format (.clip), BMP, JPEG, PNG, WebP, TIFF, Targa, Adobe Photoshop document (.psd), Adobe Photoshop Big document (.psb).
Adjusting the size and position of the texture
To adjust the size or position of the normal map texture, use the settings in the Tool Settings palette or Advanced Tool Settings palette > Texture settings category. You can change the Tiling, Scale ratio, and Position. See "Texture settings" for details.
Making primitive materials follow the camera
You can make 3D primitive planes and polygons turn to always face the camera when it rotates around the object from the Tool Settings palette > General primitive settings > Follow camera.
When this setting is turned off, the material will rotate according to the camera position like a normal 3D material. When turned on, the 3D primitive rotates to face forward relative to the camera. If you select Only horizontal, the 3D primitive rotates to face forward only when the camera is rotated horizontally.

Registering 3D primitives as materials
You can register 3D primitives with customized polygon divisions, colors, and textures as materials.
To do this, select the 3D primitive with the Object tool and tap the Save 3D primitive to Material palette icon in the Object Launcher, or tap Register material in the Advanced Tool Settings palette > Primitive category.
![]()
The "Material Properties" will open. Specify the material name and save location, then tap OK to register the 3D primitive to the Material palette.
Memo | You cannot register materials in Clip Studio Paint DEBUT. |
Registering 3D image materials
You can register layers with multiple 3D primitives, 3D drawing figures, or 3D head models as 3D image materials.
To do this, select the 3D layer with the Object tool and use the Edit menu > Register material > Image.
The "Material Properties" will open. Specify the material name and save location, then tap OK to register the layer arrangement of 3D objects as a 3D image material to the Material palette.
For details on importing a 3D image material, see "Importing 3D image materials".