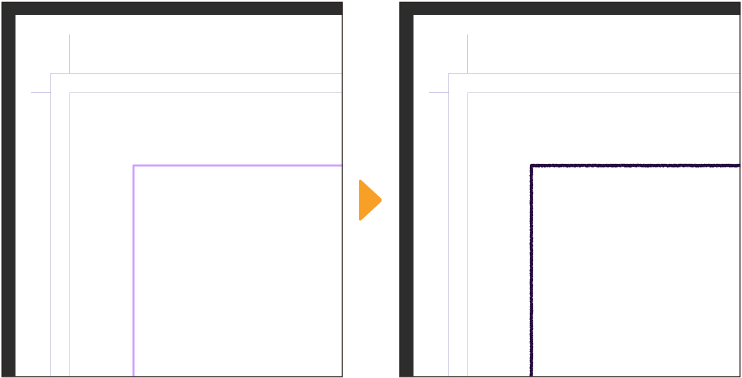
Frames and Panels
You can create comic frames from the Layer menu or with the Create frame sub tool. When you draw on a layer inside a frame folder, only the areas within the frame will show.
Once you have made a comic frame, you can divide it with the Divide frame tool or edit it with the Object sub tool.
Memo | Comic frames are not available in Clip Studio Paint DEBUT. |
Creating a frame from the Layer menu
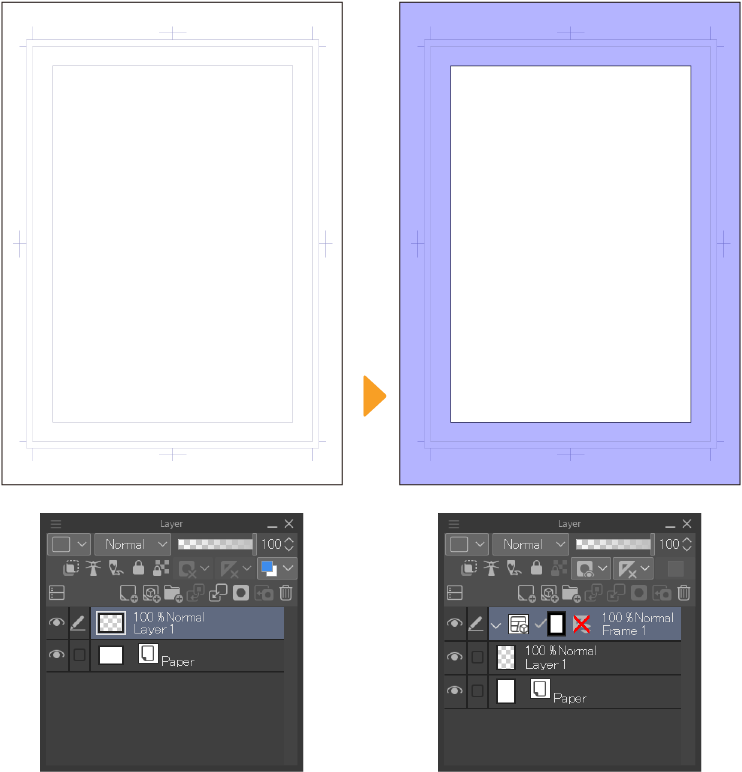
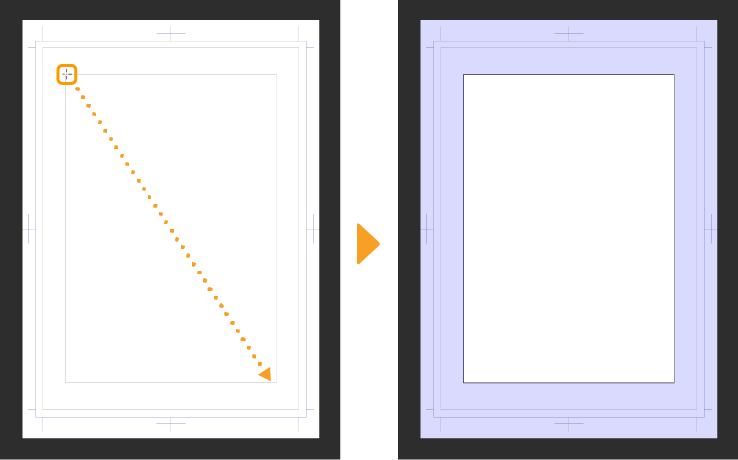
You can create a frame in the shape of the inner border using the Layer menu > New Layer > Frame Border folder. The inner border is the innermost border shown in purple on the canvas when working on a comic project.
Memo | For more information on the inner border, see "What are the inner border, trim border and bleed width?". |
Select the Layer menu > New Layer > Frame Border folder to open the New frame folder dialog.
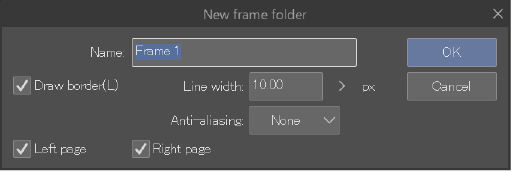
Use the dialog to adjust the settings and then tap OK.
·Draw border: When this is on, the frame borders and a ruler will be drawn on the canvas. When this is off, only the ruler will be created, and the frame lines will be invisible.
·Line width: Adjust the thickness of the border lines.
·Anti-aliasing: Choose whether to use anti-aliasing on the frame border lines. When anti-aliasing is turned on, lines are less jagged and have a smooth border. You can select the strength from Weak, Middle and Strong. Select None if you do not want to use anti-aliasing.
·Left page/Right page (EX only): This option is available when editing a two-page spread. You can specify on which page to create a frame border folder.
After you tap OK, the frame will be drawn on the canvas and a new frame border folder will be added to the Layer palette. A layer mask is also created in the frame border folder.
Drawing frames with the Frame Border tool
You can also create frames using the Comic tool > Create frame tool group.
On the Tool palette, select the Comic tool. Then from the Sub Tool palette, tap a sub tool from the Create frame group.
·Rectangle frame: Use this to create rectangular frames by dragging the tool on the canvas.
·Polyline frame: Use this to create custom frame shapes with straight lines and corners.
·Frame border pen: Use this to freely draw the shape of the frame.
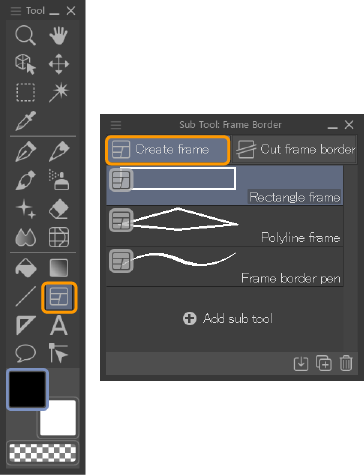
You can then adjust the width of the border line from the Tool Property palette using the Brush size setting.
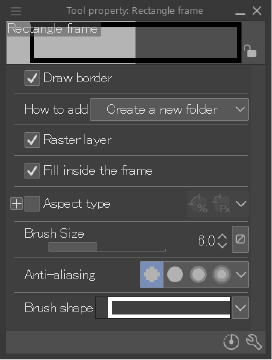
To draw with the Rectangle frame tool, hold and drag. As you draw, the comic frames will snap to the inner border. When the frame is drawn, a new frame border folder will also be added to the Layer palette.
You can draw circular or polygonal frames with the Rectangle frame tool by going to the Sub Tool Detail palette > Figure category and changing the Figure option to Ellipse or Polygon.
You can access more settings, such as the brush shape, from the Tool Property and the Sub Tool Detail palettes, under the "Create frame", "Figure", and "Shape operation" categories. Other settings, such as for the line shape and color, are the same as brush tools.
Snap settings
If the frame does not snap to the inner border or canvas when you are drawing it, check the following settings.
·Check that the View menu > Snap > Snap to Canvas/Inner Border is turned on. When turned on, you can snap to the trim margin, inner border, and canvas.
In the Sub Tool Detail palette > Correction category for the current tool, check that Enable snapping is turned on.
When the View menu > Snap > Snap to Canvas/Inner Border is turned on, only the tools in the Frame border tool group will snap to the canvas, inner border, and trim margins. When this setting is turned off, other drawing tools and objects can also snap to the canvas edge and the inner border. |
Using frame templates
You can use frame templates to quickly set up frame folders on the canvas.
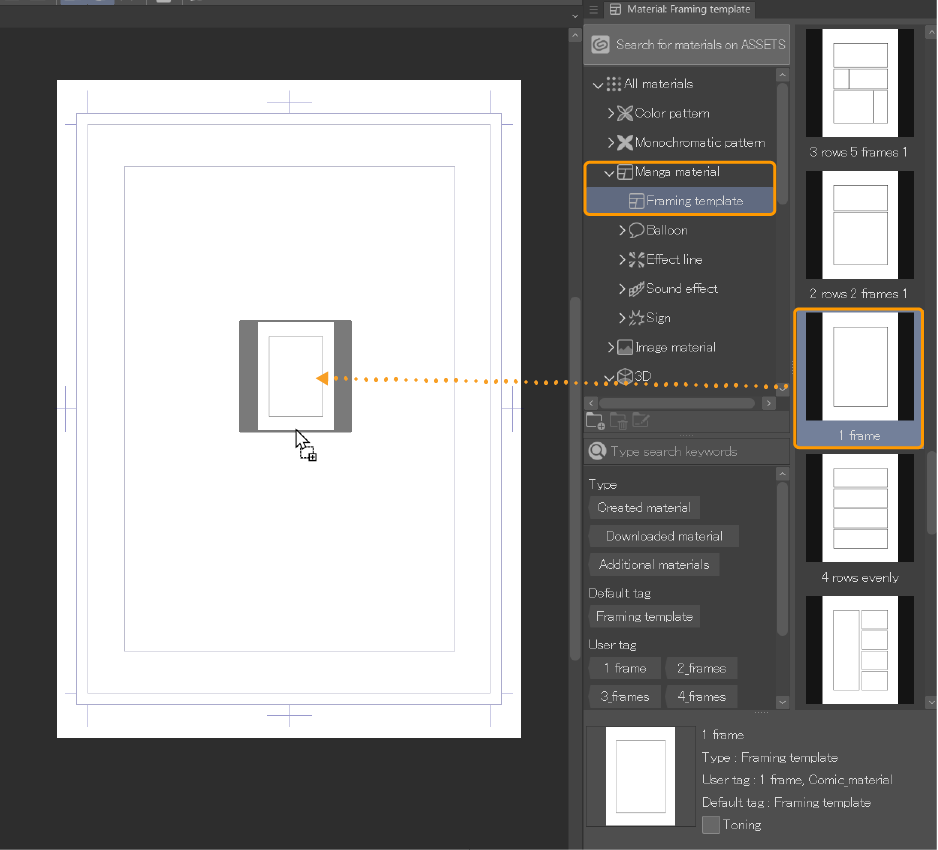
Default frame materials can be found in the Material palette > Manga material folder. Drag and drop a material onto the canvas to add the frame lines to the canvas and create the frame border folders in the Layer palette.
There are many frame templates to choose from with different arrangements of comic frames.
Memo | You can register your own frame border folders as template materials. For details, see "Creating a template material". |
Dividing a comic frame
Dividing comic frames with the Divide frame border tool
You can divide comic frames with the Divide frame border sub tool.
To access the Divide frame border sub tool, in the Tool palette > select the Comic tool. From the Sub Tool palette, select the Frame border sub tool group > Divide frame border sub tool.
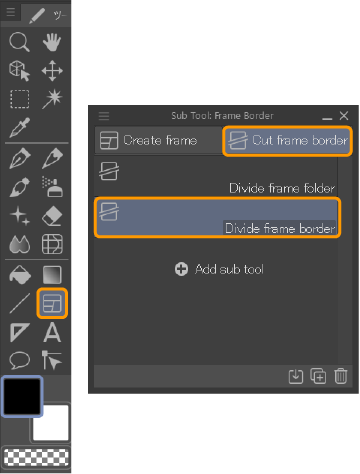
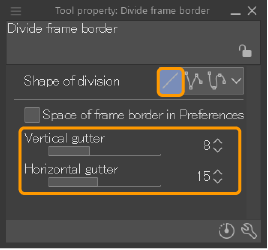
In the Tool Property palette, you can adjust the method for dividing frames and the size of the gaps between frames using the Vertical gutter and Horizontal gutter settings.
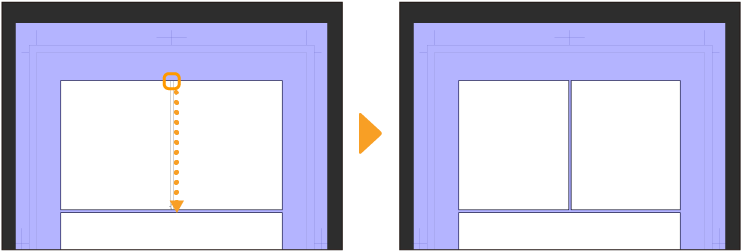
Drag and hold to see a preview of the new frame borders after division. When you release the tool, the frame will be divided at the chosen position.
You can access more settings for the Divide frame border and Divide frame folder sub tools from the Tool Property or Sub Tool Detail palettes, such as the shape of the dividing line and how frames are divided in the folders.
Dividing a comic frame equally
You can divide an existing comic frame into multiple equally sized frames using the Layer menu.
Select the frame with the Object sub tool and then select the Layer menu > Ruler/Frame > Divide frame border equally.
The Divide frame border equally dialog will appear.
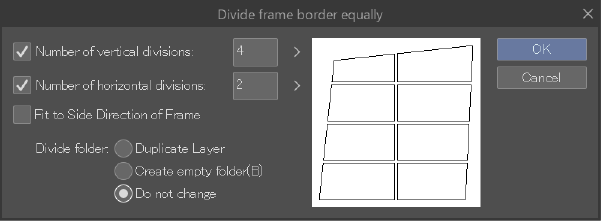
·Number of vertical divisions: Turn this on to divide the frame vertically into the number of frames entered.
·Number of horizontal divisions: Turn this on to divide the frame horizontally into the number of frames entered.
·Fit to Side Direction of Frame: When on, the frame divisions will follow the shape of the border. When off, the frame will be divided vertically and horizontally.
·Divide folder: Set how the frame border folders will change after division.Duplicate Layer creates a new frame folder for each new frame, containing a copy of the layers in the existing frame border folder.Create empty folder creates an empty frame border folder for each new frame.Do not change means that the frame is divided without creating any new folders.
Adjust the settings and tap OK to divide the frame.
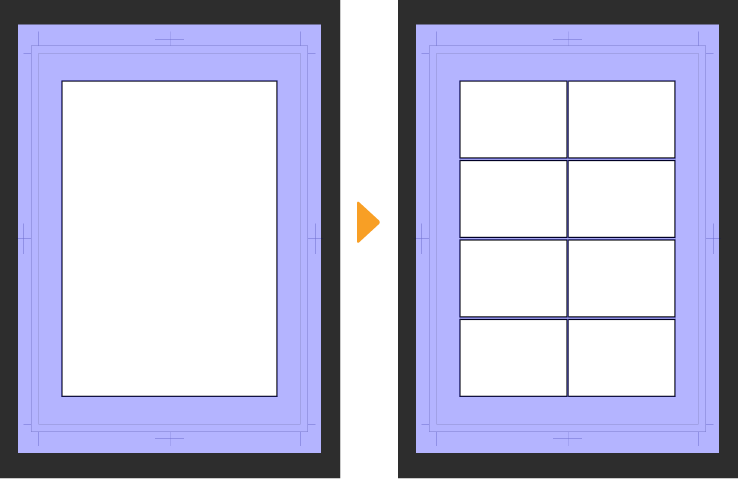
Editing a comic frame
You can edit comic frames with the Object sub tool. You can use this to resize frames, as well as change the shape, move, or rotate them.
When a comic frame is transformed, the layers in the frame folder are not affected.
Click on the comic frame you want to edit on the canvas using the Operation tool > Object sub tool. An outer bounding box will appear around the frame and handles will appear on the frame outline.
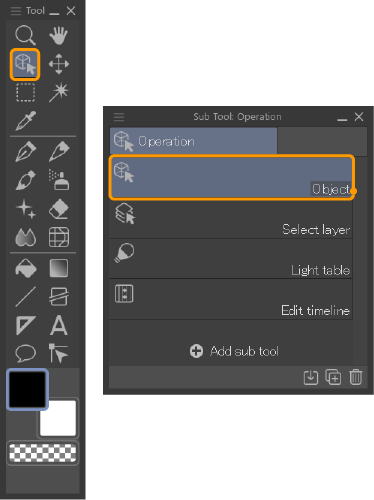
You can also edit the shape of frames with the Edit menu > Transform command. Select the frame and go to Edit menu > Transform and select any option except Mesh Transform. For more details on transforming options, see "Transforming Images".
Aside from the Object tool, you can edit the thickness and shape of the frame lines using the Correct line tool. For details, see "Correct Line tool".
You can set how adjacent comic frames move from the Tool Property and Sub Tool Detail palettes.
When Keep gutters aligned is set to All, the entire frame gutter will shift when the frame is resized. When set to Horizontal & adjacent, only the vertical gutter of the edited frame will move, and frames above and below will not move.
Changing a comic frame size
When a comic frame is selected with the Object tool, drag the handles of the outer bounding box to adjust the entire comic frame size.
You can also drag the central handles on the comic frame border to adjust the height or width of the comic frame. When adjusting the size with the central handles and Keep gutters aligned is turned on, the adjacent frames will also adjust accordingly.
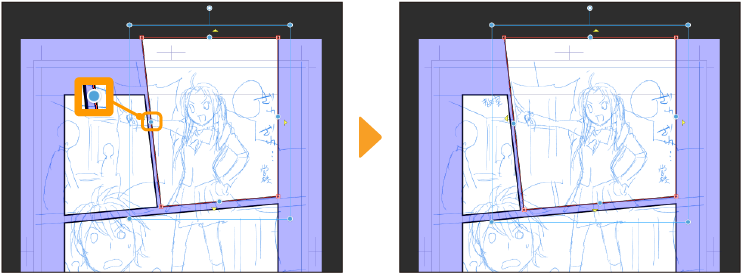
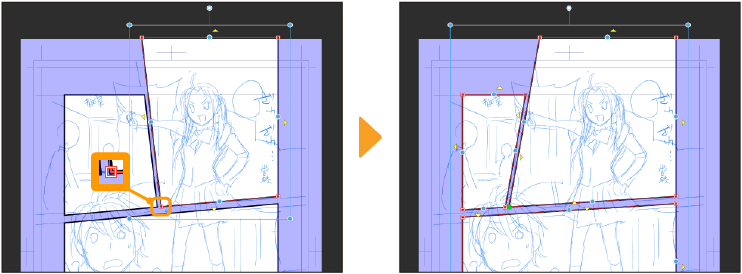
Changing a comic frame’s shape
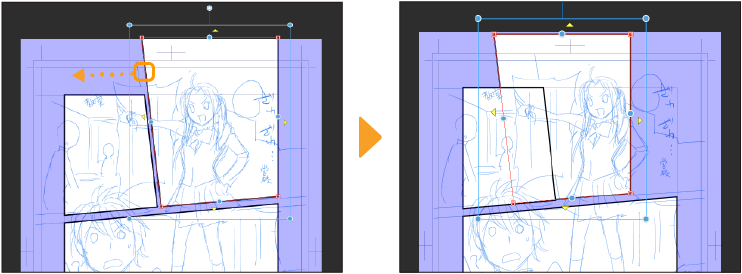
Drag the handle at the corner of the frame border to transform the frame border to adjust the shape of the frame.
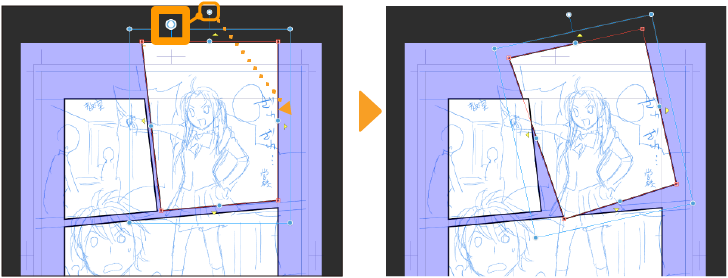
Rotating a comic frame
Dragging the rotation handle allows you to rotate the comic frame. Hold down shift while dragging to rotate in increments of 45 degrees.
Moving a comic frame
You can move a comic frame by dragging anywhere on the border line except for the handles.
Enlarging a comic frame to the edge of the canvas
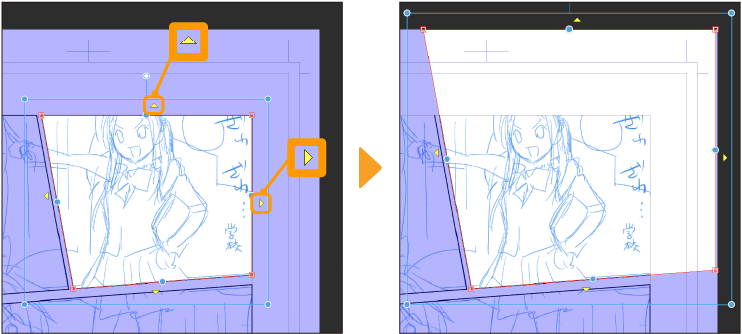
To extend a frame to the edge of the canvas, select the frame and tap the triangle icon.
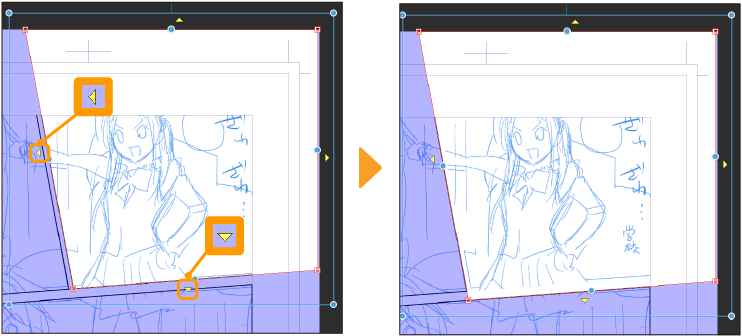
You can also tap the triangle icon to remove the gutter between comic frames.
Changing the thickness, color, and line style of a comic frame
You can edit the look of the comic frame with the settings in the Tool Property palette. Select the comic frame and check that bounding box and handles are displayed on the frame. You can select multiple frames to edit them at once.
Changing a comic frame’s width
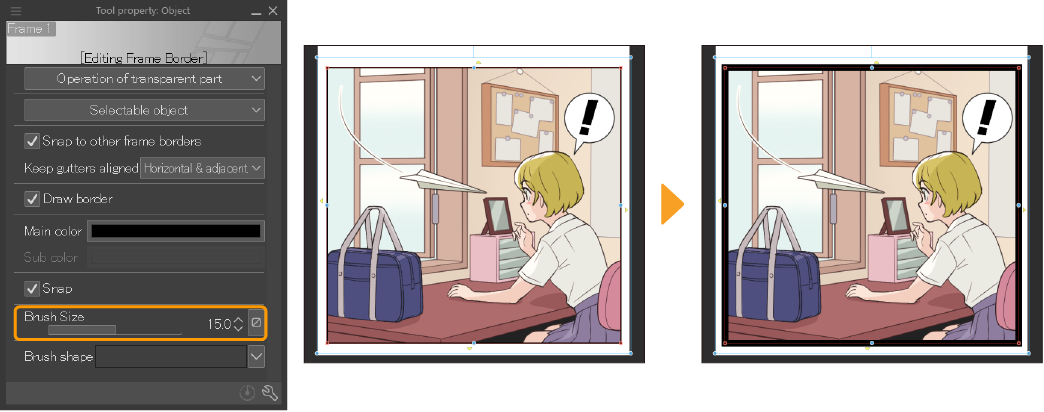
You can adjust the comic frame’s width with Brush Size on the Tool Property palette.
Changing a comic frame’s color
Tapping the Main color icon on the Tool Property palette opens the Color settings dialog where you can change the color of the frame. You can also change it by selecting the frame and then the desired color from the Color Wheel or Color Set palette.
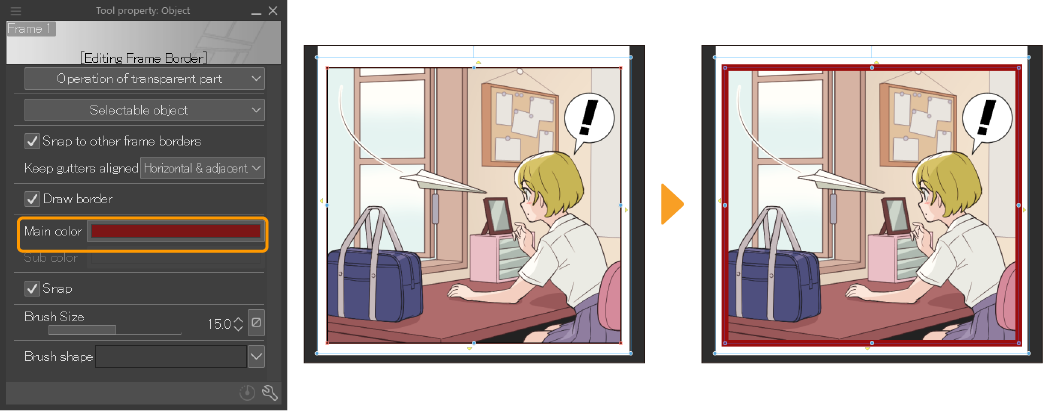
If the color of the frame does not change, set Expression color of border in the Layer Property palette to color.
Changing the line style
You can select a line’s style from the Brush shape pull-down menu in the Tool Property palette.
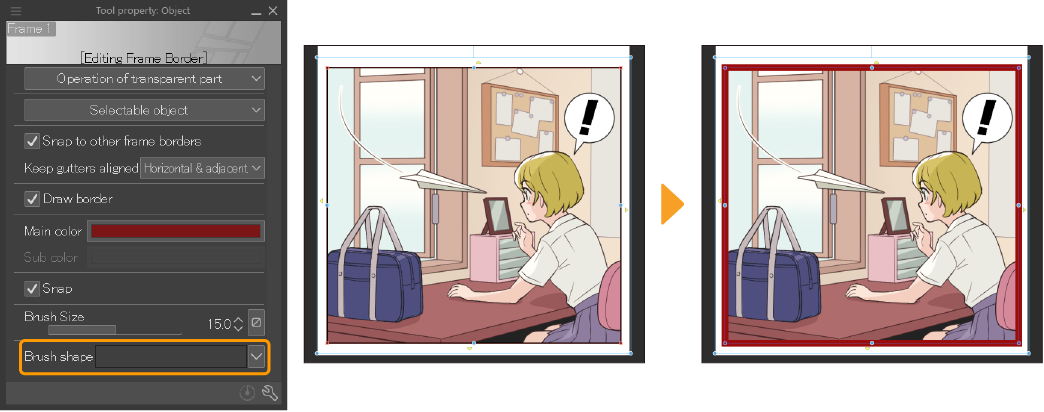
Merging comic frames
You can merge comic frames with the Layer menu. The method differs slightly depending on whether you are merging layers from the same frame border folder or different ones.
Merging comic frames from different frame border folders
In the Layer palette, select the frame folders you want to merge. You can select multiple layers by tapping the checkbox next to the eye icon in the Layer palette. Then Select the Layer menu > Ruler/Frame > Combine frames to open the dialog. Here you can set how the frame border folder will combine. Tapping OK will merge the selected frames.
When merging comic frames that are in different frame border folders, comic frames that are not adjacent to each other can also be merged, but the frame border will not change.

(1) Combine border: Frame border folders can be merged at the same time as frames. Layers are then stored in the combined frame border folder.
(2) Combine only folder: Frames can be combined into a single frame border folder without any changes to them. Layers in each frame border folder are stored in the combined frame border folder.
(3) Create common folder: Frames can be combined into a single common folder without any changes to them. The original frame border folders and layers will remain.
Merging comic frames in the same frame border folder
In the Layer palette, select the layers for the comic frames you want to merge. On desktop, you can hold down Shift and tap on the comic frames you want to merge. Then select Layer menu > Ruler/Frame > Combine frames to merge them.
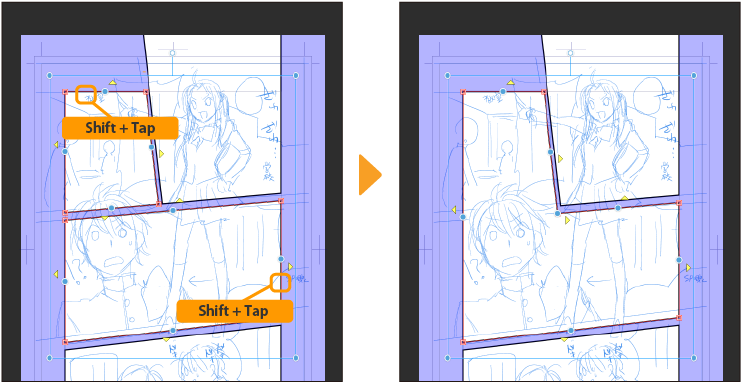
Deleting comic frames
Select the frame you wish to delete from the canvas and either tap Delete on the command bar or press delete on your keyboard.
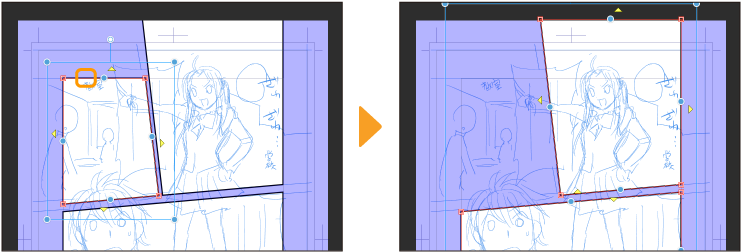
If all frames in a frame border folder are selected, a confirmation message will appear when deleting the comic frame.
If you select Delete with layer, the layers in the frame border folder will also be deleted. If you select Delete only border, only the frames in the border folder will be deleted.
Advanced settings for frame editing
You can access more settings such as linking adjacent frames when transforming a frame and moving a frame so that it snaps to other frames from the Tool Property and the Sub Tool Detail palettes of the Object tool when a frame border folder is selected, under the Operation and Frame Border categories.
Other settings are the same as brush tools.
Memo | For details, see the "Settings Glossary". |
Drawing with comic frames
Create a layer in the frame border folder and draw on it. When drawing on a layer inside a frame border folder, only the areas within the frame will show, because the areas outside the frame border folder are masked. Even if you draw outside the comic frame, it will not show on the canvas.
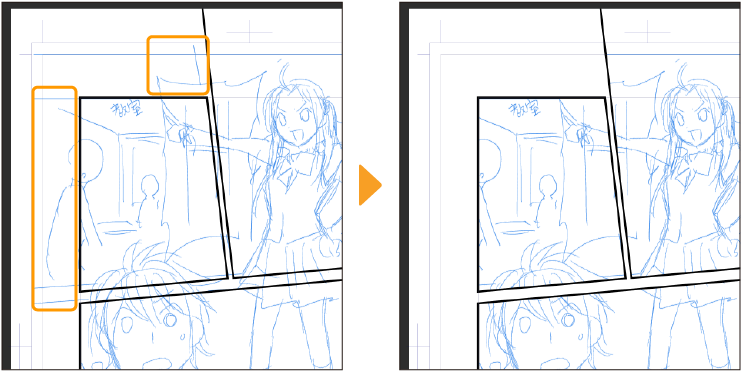
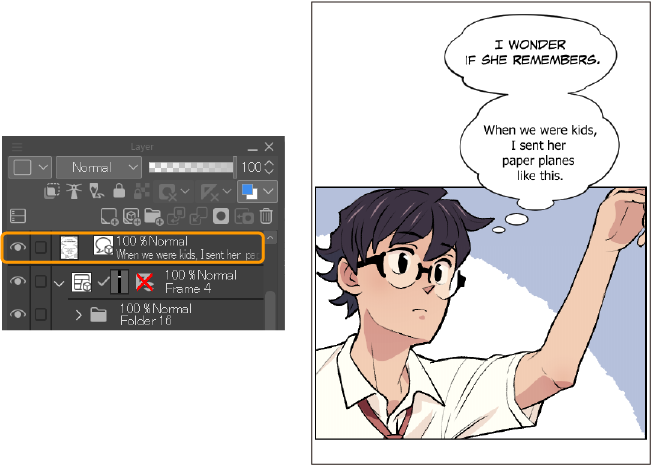
If you want to draw beyond the comic frame and have it show, create a layer above the frame border folder. Layers created above a frame border folder will display areas outside the comic frame. You can use the same method to draw elements that overlap multiple comic frames.
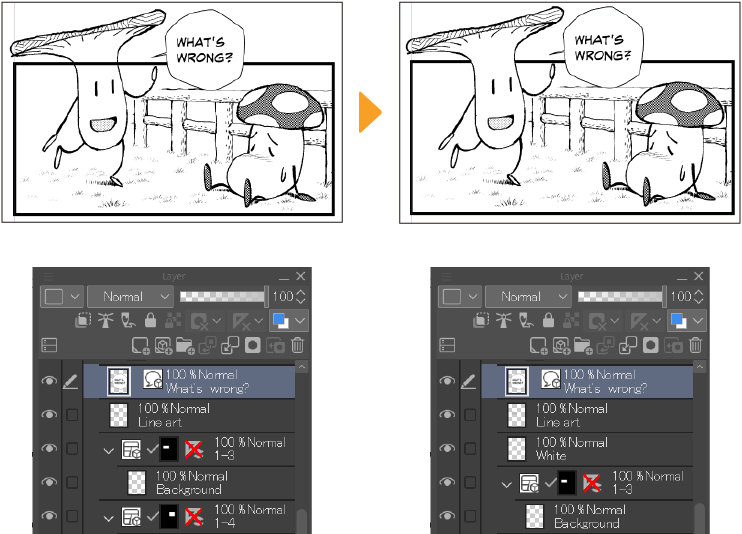
To avoid comic frame lines showing underneath your artwork, create a layer between the line art layer and the frame border folder and paint with white over the areas you don’t want to see the comic frame.
Using a comic frame as a ruler
You can draw along the border of a comic frame with pen tools by snapping to the border line. An advantage of drawing with a ruler is using pen pressure to create lines of varied thicknesses.
Select the Operation tool > Object sub tool, then select a frame border folder. Turn off Draw Border on the Tool Property palette to removes the frame, leaving only the outline.
Check that the ruler icon is enabled next to the frame border in the Layer palette. If it is marked with a red cross, tap the icon to enable the ruler.
Using a drawing tool with snapping enabled, you can now draw lines along the ruler by creating a layer above the frame folder.
