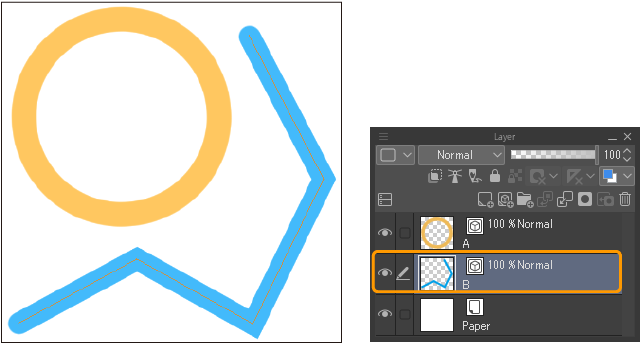
Vector layers
A vector layer is a layer that allows you to edit lines that have already been drawn. While standard raster layers record a layer’s information using pixels, vector layers record the start point, end point, and curvature of each line.
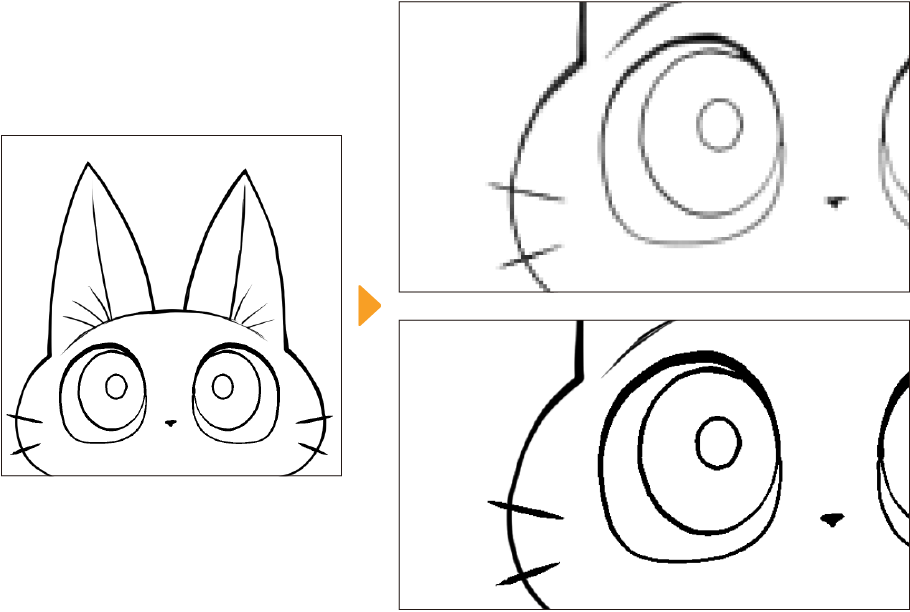
This allows you to zoom in and scale lines without losing image quality.
Lines drawn in the vector format are made from a “path” and “control points”. You can use these to edit lines that have already been drawn, such as changing the brush tip or brush size, or adjusting the shape of the lines using handles and control points.
Using vector layers
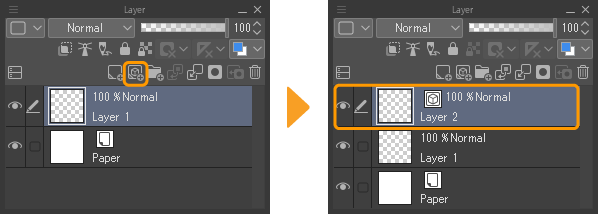
You can create a new vector layer from the Layer menu or Layer palette menu > New Layer > Vector Layer, or using the New Vector Layer icon in the Layer palette.
When you create a vector layer using the icon in the Layer palette, it will be created automatically with the default canvas settings.
If you create a new vector layer using the menu command, the following dialog will appear with options to set the layer name, expression color, and blending mode.

You can use any type of drawing tool or figure tool on a vector layer.
Memo | The following tools cannot be used on vector layers: Gradient tool, Fill tool, Blend tool. The Color mixing setting for pen and brush tools will also be disabled when drawing on a vector layer. |
You can convert other layer types into vector layers using the Layer > Convert layer command. Depending on the original layer, the newly created vector layer may look slightly different from the original layer.
Editing vector lines with the Object tool
You can use the Object tool to transform and adjust the shape of vector lines.
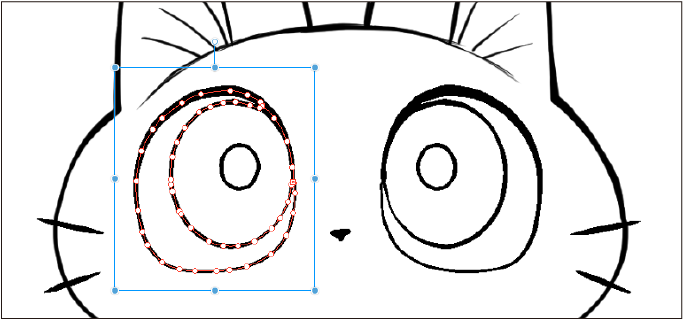
First, select a line with the Operation > Object tool to highlight the vector line and show the control points.
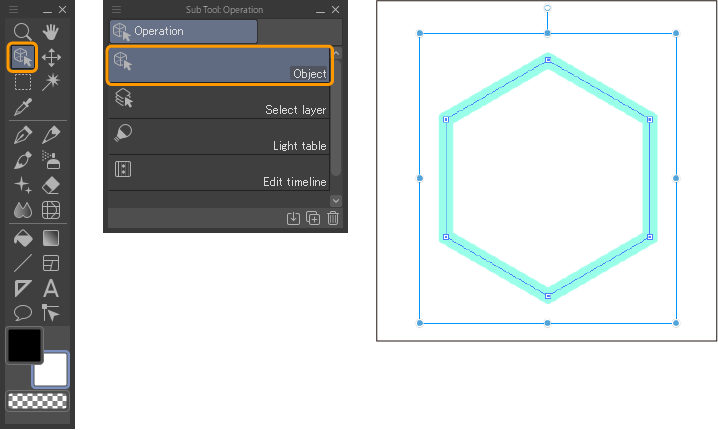
Selecting vector lines
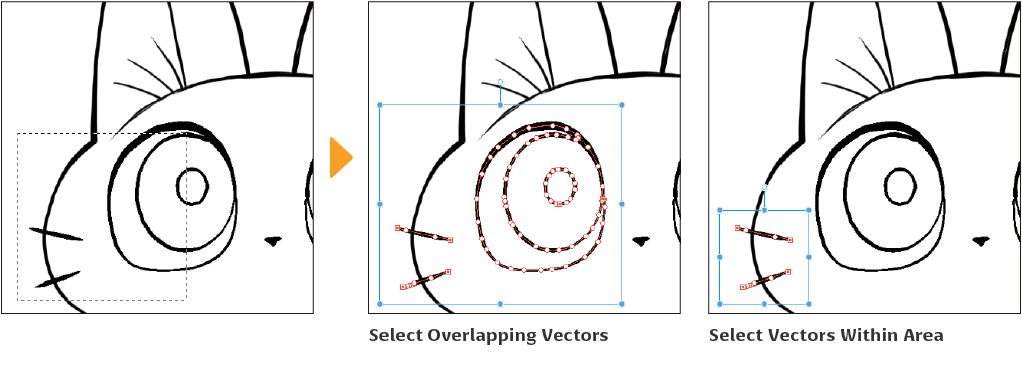
When there is a selection area on the canvas, you can use Select menu commands to select vector lines and highlight the control points.
·Use the Select menu > Select Overlapping Vectors to select all lines that have part of their vector path within the selection area.
·Use the Select menu > Select Vectors Within Area to only select lines that are entirely contained in the selection area.
Transforming vector lines
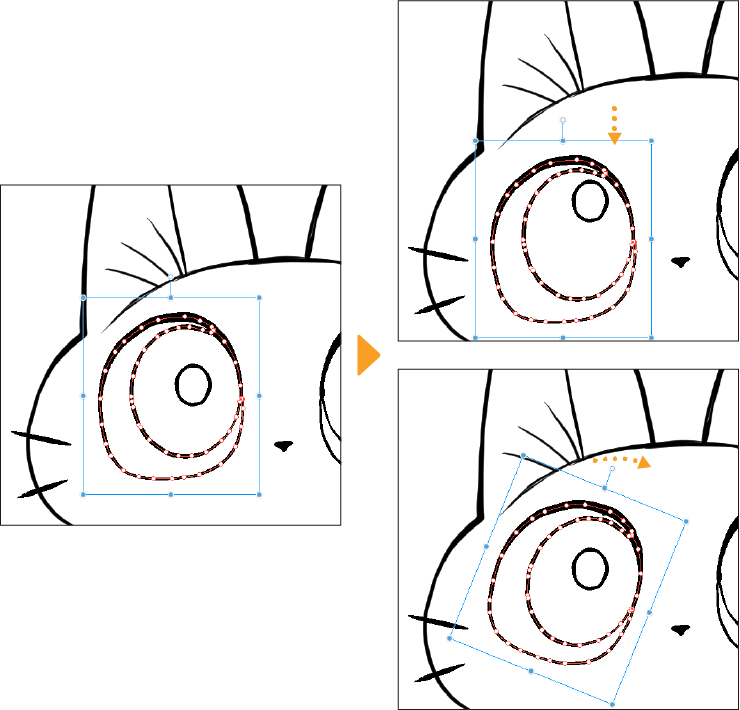
When a vector line is selected, you can do simple transformations using the Object tool.
·Tap an empty area inside the bounding box and drag to move the entire line
·Scale up and down using the handles on the bounding box
·Use the rotation handle at the top of the bounding box to rotate the line
The transformation mode can be changed in the Tool Property palette > Mode, and you can also easily move control points by dragging them with the Object tool.
You can set whether the thickness of the line adjusts when scaling up and down by toggling the Adjust line thickness when scaling setting. When turned on, the line thickness will adjust proportionally.
Changing color, brush size, and brush shape
You can also change the properties of the vector line in the Tool Property palette and Sub Tool Detail palette when a line is selected with the Object tool.
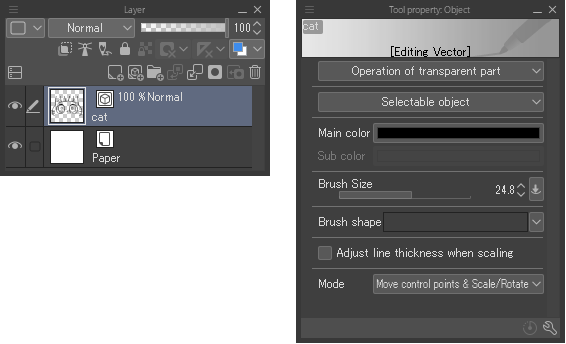
Simply edit the settings in the Tool Property or Sub Tool Detail palette to change the line color, thickness, brush tip shape, and so on.You can change settings in the following categories: "Correction", "Operation", "Transform", and "Vector", as well as settings for brush tools.
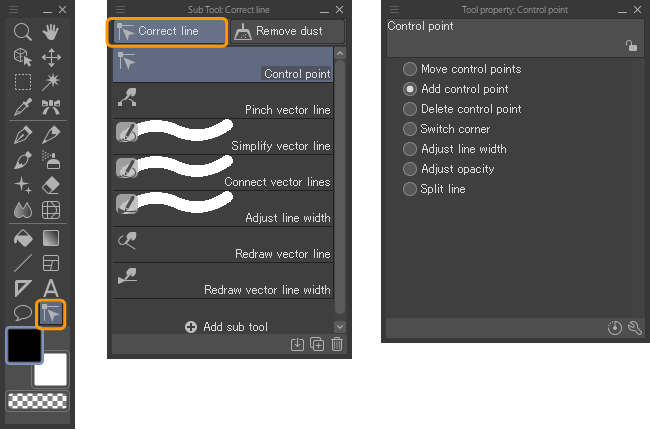
Correct Line tool
You can use the following sub tools in the Correct line tool group to edit the shape of vector lines.
Control point
The Control point sub tool edits vector lines by changing the parameters of selected control points.
This sub tool has seven modes for different types of adjustment: Move control points, Add control point, Delete control point, Switch corner, Adjust line width, Adjust opacity, and Split line.
You can change the mode in the Tool Property palette > Mode.
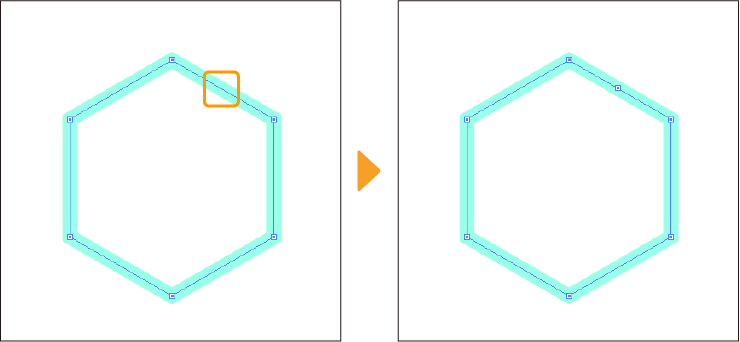
Add control point
Tap on the path to add a new control point. The “+” cursor will appear when you can add a control point. You can also drag and move existing control points in this mode.
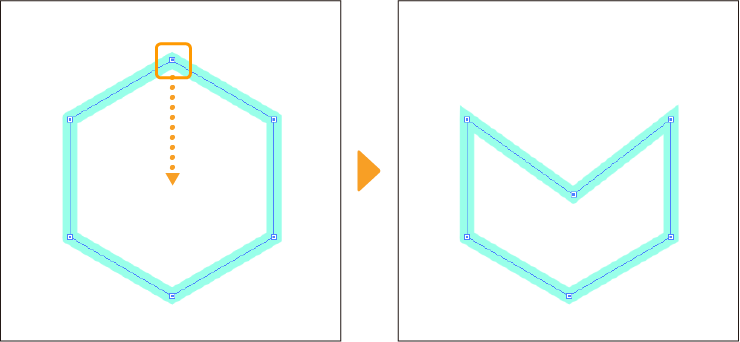
Move control points
Move control points by dragging and releasing.
Delete control point
Tap a control point to delete it from the line. The “-” cursor will appear when you can delete a control point.
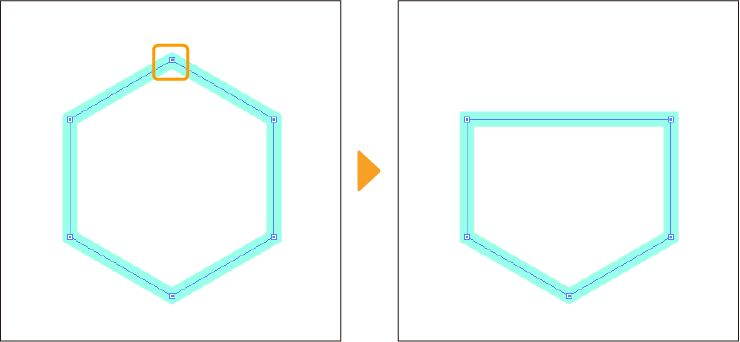
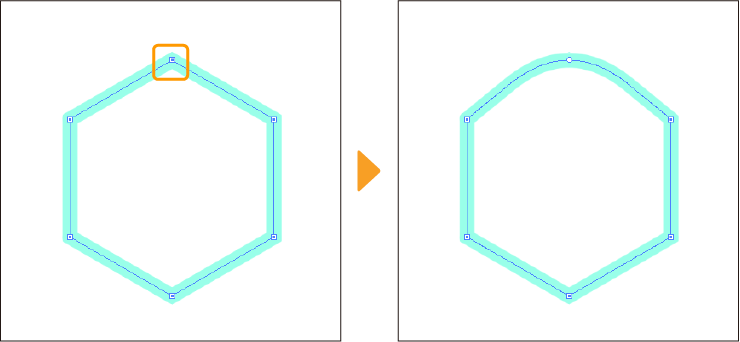
Switch corners
Tap on a control point to switch it from a curve to a corner and vice versa.
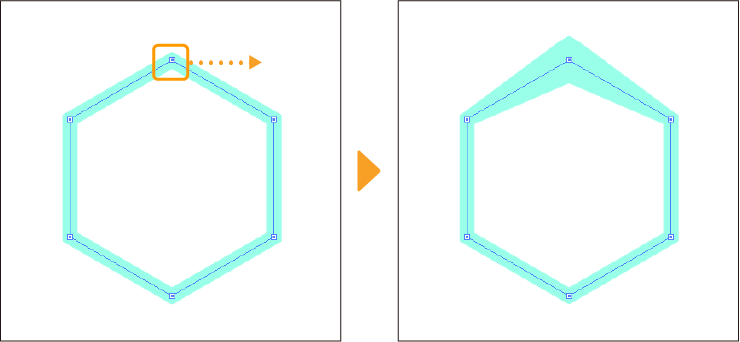
Adjust line width
Tap a control point and drag left to make the line around the control point thinner, or drag right to make the line thicker.
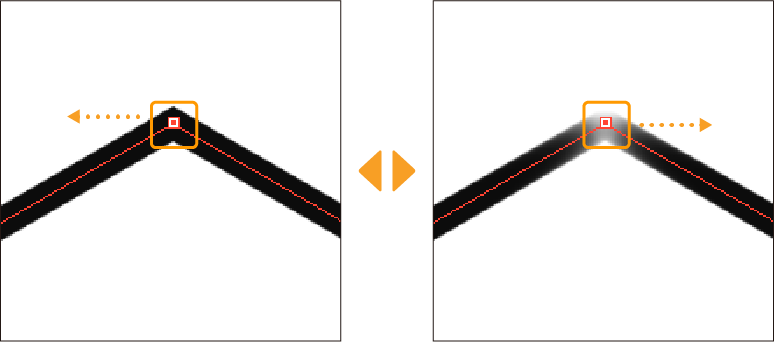
Adjust opacity
Tap a control point and drag left to make the line around the control point more transparent, or drag right to make the line more opaque.
Split line
Tap a control point to split the line in two.
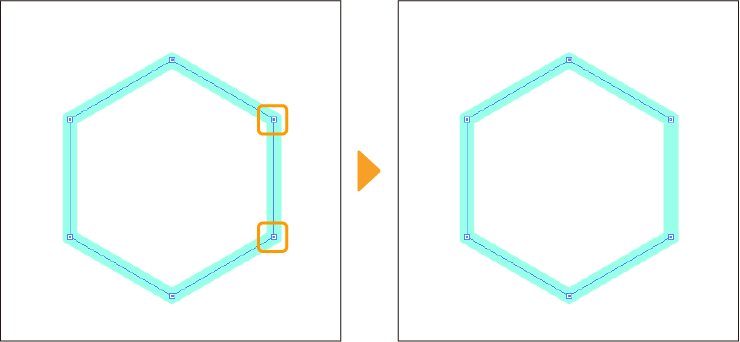
Pinch vector line
You can use the Pinch vector line sub tool to grab and drag parts of the line to reshape it.
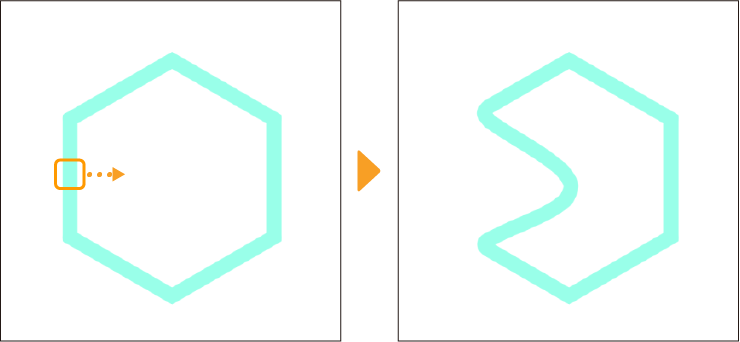
The Pinch vector line sub tool has the following settings in the Tool Property and Sub Tool Detail palette.
Fix end: Select whether to lock the position of the start and end points.
Pinch level: Sets how much of the line is pinched. When the value is higher, the pinching effect will apply to more of the line.
Pen pressure: When turned on, higher pen pressure will make the pinch level stronger. This is turned on by default.
Effect range: Sets the size of the pinching range around the cursor. A smaller range will be more precise, and a larger range allows you to adjust lines further from the clicked point.
Add control point: Adds control points to the line after the transformation. When turned off, no control points are added. This is useful if you want to move straight lines.
Connect lines: When turned on, dragging and overlapping the ends of two lines will connect the lines.
Snap to symmetry ruler: When turned on, transformations will be reflected if a symmetry ruler is active. This is turned on by default.
Simplify vector line
The Simplify vector line sub tool simplifies lines by reducing the number of control points. This can be useful for cleaning up hand-drawn vector lines which can have unneeded control points.
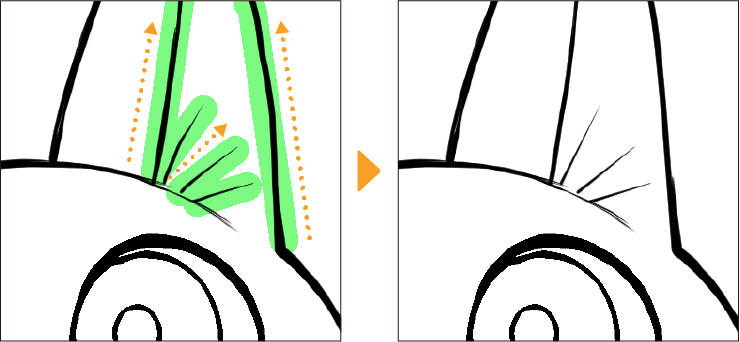
The Simplify vector line sub tool has the following settings in the Tool Property palette.
Simplify: Adjust the amount of simplification. The larger the value, the more control points will be removed.
Smooth corner: Set whether to smooth out angles. When turned on, angles get smoothed out; when turned off, the shape of the corners remain as they are).
Process whole line: When turned on, clicking anywhere on the line will simplify the entire line.
Convert curve: You can change the curve type when you simplify a line. You can select from Straight line, Spline, Quadratic Bezier, and Cubic Bezier.
Connect lines: When turned on, lines that are close together will be connected. Use the slider to adjust the strength of the effect.
Delete shorter line: Erases short lines in the target area. Use the slider to adjust the strength of the effect.
Brush Size: Adjust the size of the tool.
Connect vector line
The Connect vector line sub tool connects the ends of lines close together on a vector layer.
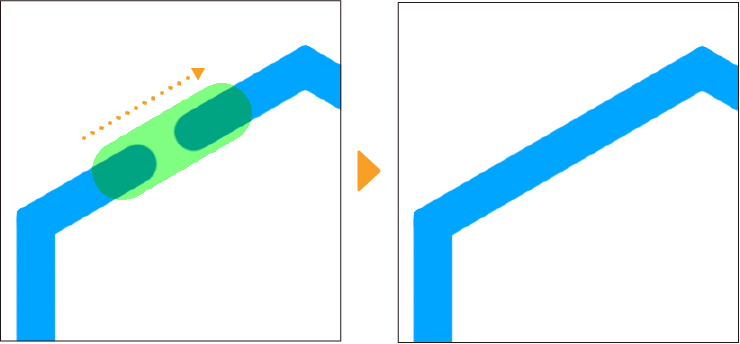
The Simplify vector line sub tool has the following settings in the Tool Property palette.
Simplify: Adjust the amount of simplification. The larger the value, the more control points will be removed.
Connect lines: When turned on, lines that are close together will be connected. Use the slider to adjust the strength of the effect.
Connect lines with different properties: This is a sub-setting of Connect lines. When turned on, you can connect lines even if the color or brush tip shape is different.
Brush Size: Adjust the size of the tool.
Adjust line width
The Adjust line width tool scales the line width up or down without reducing line quality.

Thicken/Narrow: Adjusts the line thickness by a specified amount. Tapered lines will become rounded at the end.

At least 1 pixel: This sets the minimum line thickness at 1 pixel and prevents the line from disappearing when narrowing a line.
Scale up width/Scale down width: Adjusts the line thickness based on the current width and a specified scale. Tapered lines will stay pointed and not become rounded.

Process whole line: Changes will apply to the entire line, not only the touched areas.
Brush Size: Adjust the size of the tool.
Redraw vector line
The Redraw vector line sub tool lets you change a drawn vector line by drawing over it again.
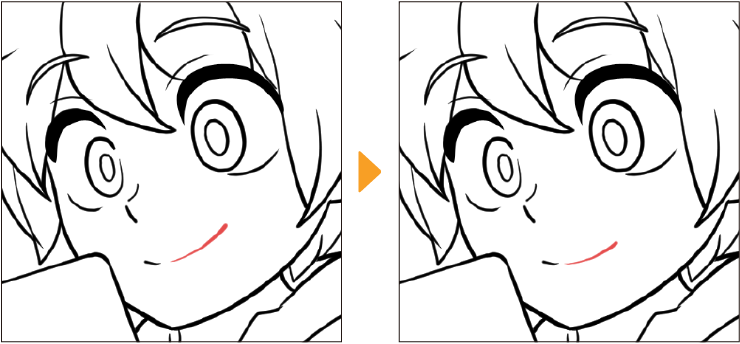
The Redraw vector line sub tool has the following settings in the Tool Property palette.
Fix end: Select whether to lock the position of the start and end points.
Connect lines: When turned on, dragging and overlapping the ends of two lines will connect the lines.
Simplify: Adjust the amount of simplification. The larger the value, the more control points will be removed.
Stabilization: Adjust the stabilization (correction) of the pen.
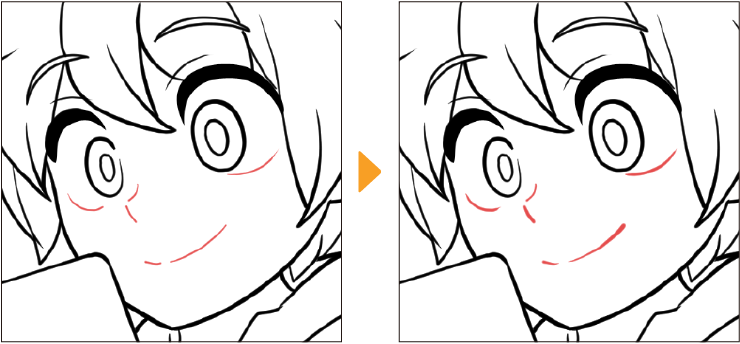
Redraw vector line width
The Redraw vector line width tool lets you trace a vector line to change the width. This tool corresponds to pen pressure.
Snap to control points
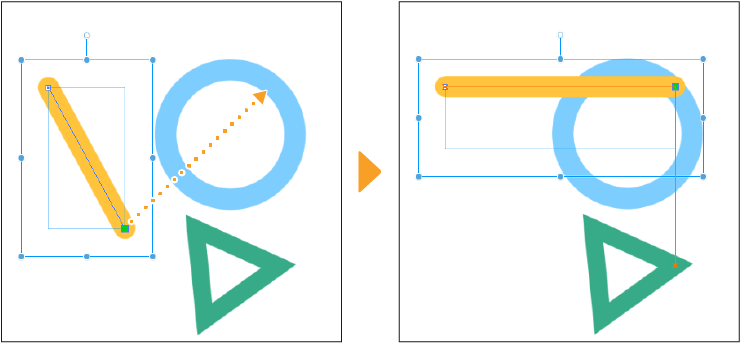
When the View menu > Snap > Snap to control points is turned on, you can snap control points to each other. As well as vector layers, you can snap control points on balloon layers, frame border folders, rulers, special rulers, and more.
When moving control points with the Object sub tool or Control point sub tool, control points will snap in the following ways.
·When moving only one control point, it will be placed so that it is directly above, below, or to the side of a neighboring control point.
·When moving multiple control points, they will be arranged so that they are directly above, below, or next to neighboring control points.
You can only snap to control points at the end of a line or at a corner.
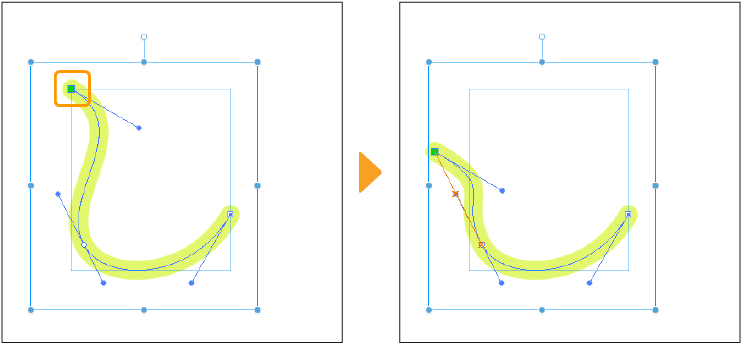
When using the Object sub tool or the Control point sub tool to move control points on a cubic Bezier curve, control points will snap in the following ways:
·When moving a directional point, it will be placed so that it is directly above, below, or to the side of the anchor point connected to that directional point.
·When moving an anchor point, it will be placed on the tangent (straight line formed by the anchor point and the direction point) of the adjacent anchor point.
Memo | Turn guide lines on to make it easier to see the snap position. See "Show guides while snapping". |
Vector eraser
Lines drawn on a vector layer can be freely erased with the Eraser tool, similar to a Raster layer. However, you can also use special vector eraser settings to take advantage of the vector format, for example, erasing entire lines with one touch, or erasing up to intersecting lines.
Find the vector eraser in the Eraser tool group. The vector eraser settings appear in the Tool Property palette.
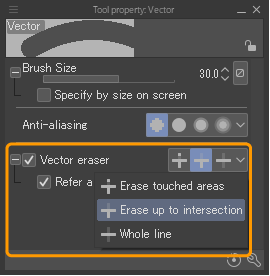
You can set the eraser to erase only touched areas, up to intersections, or the entire line.
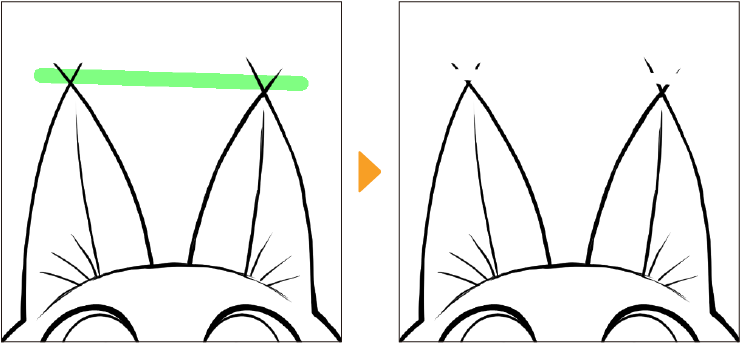
Erase touched areas
This setting only erases the areas passed over with the Eraser tool, like a regular raster layer.
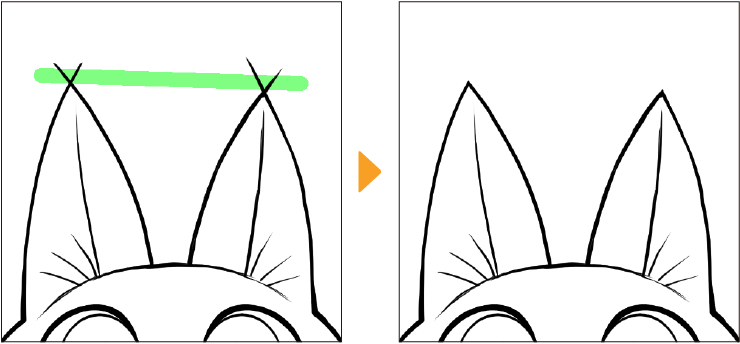
Erase up to intersection
This setting erases lines up to the point where two lines intersect.
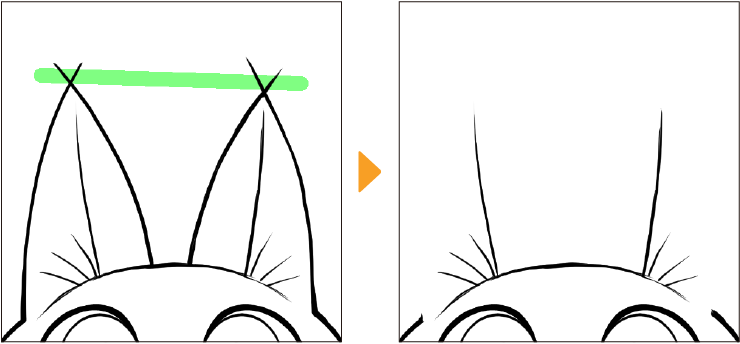
Erase whole line
This setting erases the entirety of any touched lines.
When using Erase up to intersection, you can choose whether to refer to all vector layers or only the selected layer by toggling Refer all layers in the Sub Tool Detail palette > Erase section.
You can set other eraser tools to use vector eraser settings by going to the Sub Tool Detail palette > Erase and turning on Vector eraser. Tap the eye icon to display the settings in the Tool Property palette.
Memo | On raster layers, you can erase using any brush tool by drawing with transparency. However, using a brush tool set to transparency on a vector layer will result in a transparent vector line with control points. To avoid this, erase on vector layers only using eraser tools or brush tools set to Erase blending mode. |
Vector to ruler
You can create a ruler shaped like a selected vector line using the Layer menu > Ruler/Frame > Ruler from vector.
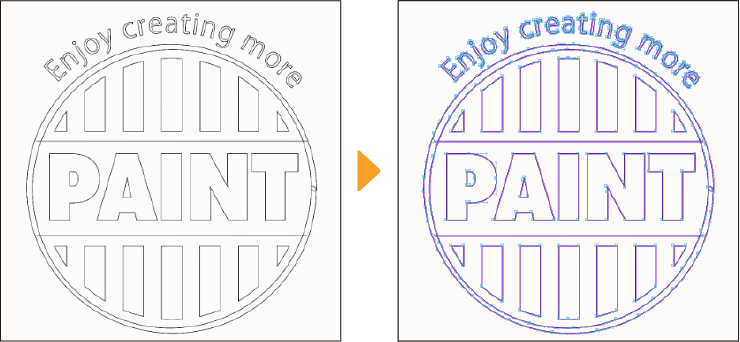
Using this, you can redraw lines with pressure along the ruler. This is useful if importing vector lines from other software, where pen pressure cannot be imported to Clip Studio Paint.
Importing and exporting vectors
You can import and export vector data as SVG files.
Important | When vector data is imported or exported, only the line shape is recorded, so the color, brush tip shape, and line thickness cannot be transferred. |
Importing vector data
To import vector (SVG) files, use the File menu > Import > Vector.
You can import multiple files at once. Each file will be registered as a separate layer. Once imported, vector lines can be edited as usual.
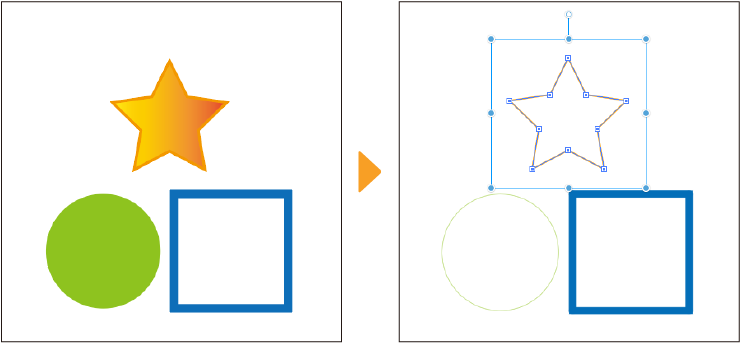
You can also paste vector data copied from other software such as Illustrator.
If vector lines copied from other vector software are not pasting correctly, please check that Preferences > Command > Paste > When SVG code is saved to clipboard is set to Convert to vector lines.
Exporting vector data
To export vector layers as an SVG file, first select the vector layer you would like to export.
You can select multiple layers at once to export them as a single SVG file.
Go to the File menu > Export vectors to export the layers as an SVG file.
You can also copy and paste vector data to other applications.
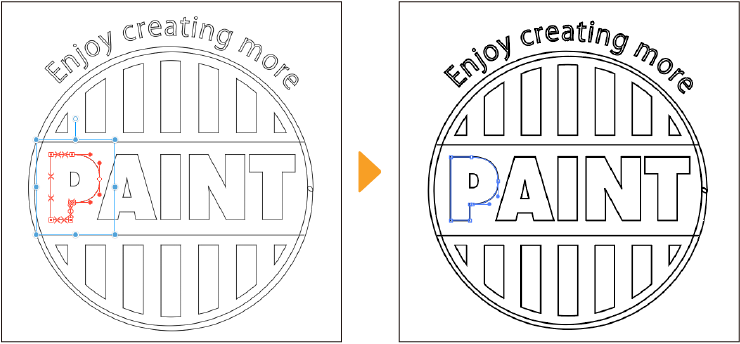
First select the vector layers, then use the Edit menu > Copy vectors as SVG to copy SVG data to the clipboard. You can now paste the vectors in the target application at a uniform thickness.
Vector path settings
You can show or hide vector paths by toggling the settings in the View menu > Show vector path.
Show vector paths on selected layers: Show vector paths only for layers selected in the Layer palette.
Show all vector paths on vector layers: Show vector paths for all visible vector layers in the file.
Show control points at beginning and end: Shows only the first and last control points.
Show all control points: Shows all control points on the line.
