3D Hand Models
Clip Studio Paint includes 3D hand models to help you with character illustration. You can adjust the finger length, nail shape, and hand size of the model. You can also pose them using sliders and apply hand pose materials.
Important | 3D layers with 3D hand models cannot be edited in Clip Studio Paint Ver. 4 and earlier. You can set the model to be visible even when opened in Ver. 1 or earlier from Preferences > "File" > Save in compatibility mode. |
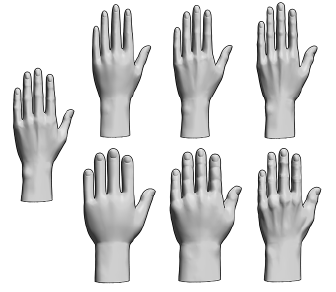
You can find the 3D head models in the Material palette > 3D > Hand model. There are 7 preset hand shapes, each available in left and right. Drag a material to the canvas to use and edit it.
Posing the hands
There are two ways to pose a 3D hand model: Slider mode and Manipulator mode. You can switch between modes using the buttons at the top of the hand model.
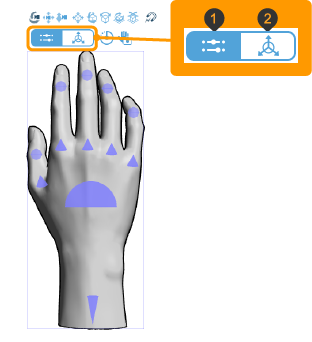
(1)Slider mode
You can intuitively pose the hand using the handles and sliders. For more details, please refer to "Posing with slider mode".
(2)Manipulator mode
Similar to the hands on a 3D drawing figure, you can pose it by dragging parts or using manipulators. For more information on how to set poses, please refer to "Posing body parts" and "Rotating body parts with local manipulators".
You can also edit hand models with the "Root Manipulator" and "Object Launcher".
Whether you choose the Slider mode or Manipulator mode, you can pose the model by doing the following:
·Use the Tool Settings palette or Advanced Tool Settings palette > Pose > Hand Pose setting. For more details, please refer to "Adjusting the hand pose".
·Go to the Tool Settings palette or the Advanced Tool Settings palette to launch the Hand Scanner and pose your hand with the camera. For more details, please refer to "Hand Scanner".
·Go to the Material palette to import hand pose materials. For more details, please refer to "Importing pose materials".
Memo | The 3D hand model can display a guide texture on the surface that indicates the midline of the hand and the positions of bones and joints. In the Tool Settings palette or the Advanced Tool Settings palette, turn on Show hand details in the "Hand model" category. |
Posing with slider mode
Select the Slider Mode with the mode switch button. Handles will appear on the 3D hand model.
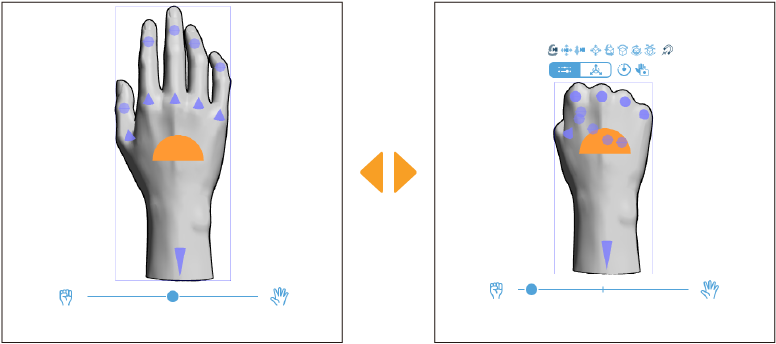
When you tap a handle, the color will change and a slider will appear below the hand model. The movable parts will depend on where you tap.
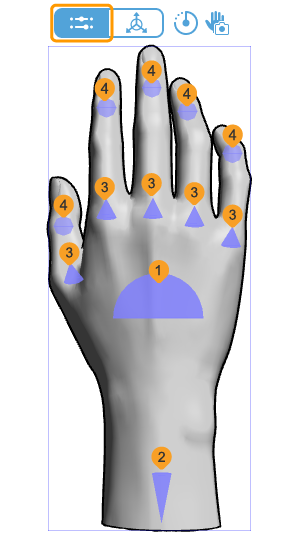
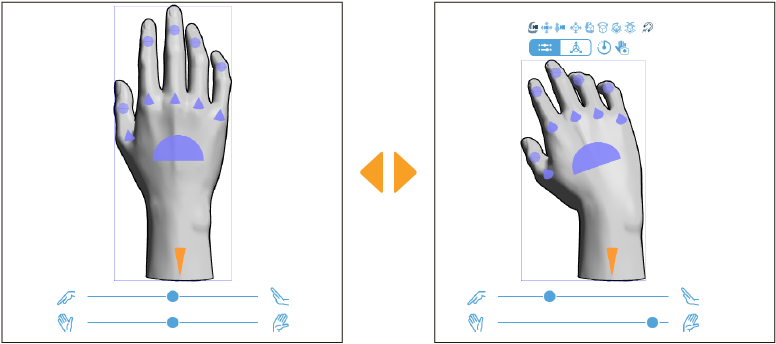
(1)Hand
Open and close all fingers at once.
(2)Wrist
Tilt the hand back, forth, left, and right.
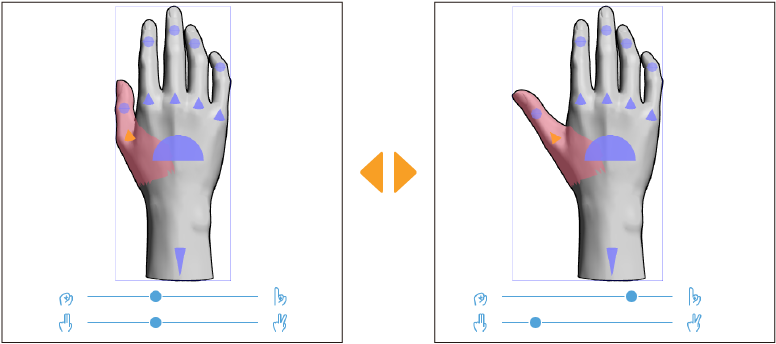
(3)Fingers
Move the selected finger left or right with the top slider. Bend the finger with the bottom slider.
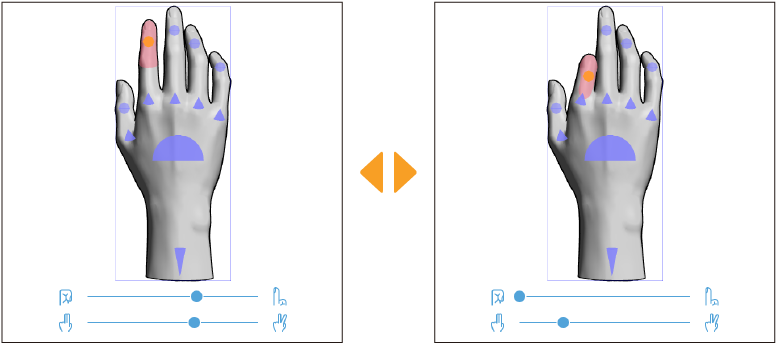
(4)Fingertips
Move the second joint of the finger from side to side with the top slider. Bend the second joint of the finger with the bottom slider.
Resetting the pose
You can reset the hand model to its default pose by doing the following:
·Slider mode: Tap the Initial Pose button which is located above the hand model.
·Manipulator mode: Tap the Initial Pose button in the Object Launcher below the hand model.
·Go to the Tool Settings palette or the Advanced Tool Settings palette and tap Initial Pose.
Flip between left and right hands
You can swap between left and right hands without changing the pose of the 3D hand model.
Go to the Tool Settings palette or Advanced Tool Settings palette > Pose category and select either Left Hand or Right Hand from the Flip Horizontal setting.
Registering hand pose materials
You can save a 3D hand model pose as a pose material.
Go to the Tool Settings palette or Advanced Tool Settings palette and select Register pose. The "Add material dialog"will appear. Enter a material name and select a location to save and tap OK to register it as a pose material in the Material palette.
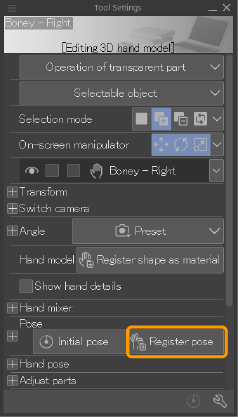
Registered hand pose materials can be applied to 3D drawing figures and 3D character materials as well as to 3D hand models.
Combining hand shapes
You can blend 3D hand models imported from the Material palette by using the Hand mixer setting in the Tool Settings palette or the Advanced Tool Settings palette.
The Hand mixer section displays the 7 preset hand models. Tap the number in the lower right corner of the hand model you want to blend, and use the slider to adjust the shape of the hand model.
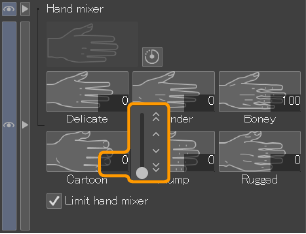
The larger the value, the more that preset will affect the hand model.
Additionally, if you set one hand model to 100 and the other hand models to 0, the hand shape will be the same as the hand model set to 100.
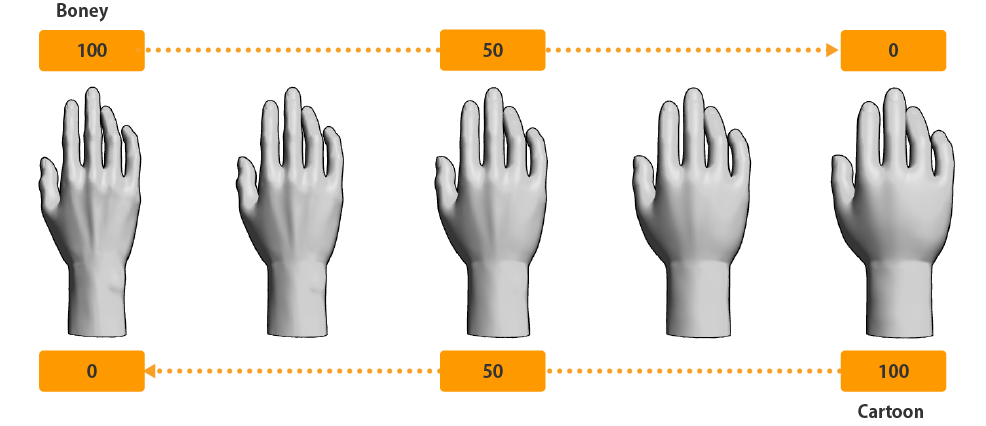
If the total sum of the values for the hand model exceeds 100, the shape of the hand will easily become distorted. Turn on Limit hand mixer in the Tool Settings palette or Advanced Tool Settings palette to prevent the hand shape from becoming distorted.
To adjust the hand model part by part, please refer to "Adjusting individual parts of the 3D hand".
The adjusted hand model can also be registered as a material. For how to register the shape, see "Register a 3D hand model as a material".
Reset blended hand model to default
To revert the blended hand model back to the default model, tap the reset icon above the Hand mixer in the Tool Settings palette or Advanced Tool Settings palette.
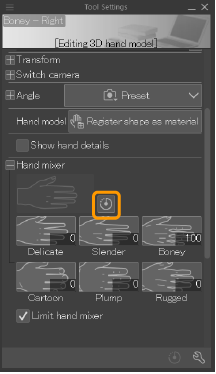
Memo | This method only allows you to reset the entire blended hand model to the default form. To reset the settings of individual parts adjusted using Adjust parts, please refer to "Resetting parts to the default appearance". |
Adjusting individual parts of the 3D hand
3D hand models can be adjusted part by part from the Adjust parts category of the Tool Settings palette or Advanced Tool Settings palette. You can edit the following; All fingers, Thumb, Index finger, Middle finger, Ring finger, Little finger, Palm, and Wrist.
From the hand selection image, select the part of the hand that you want to adjust. If the Tool Settings palette or Advanced Tool Settings palette is too narrow, a pull-down menu will be displayed instead of the hand selection image.
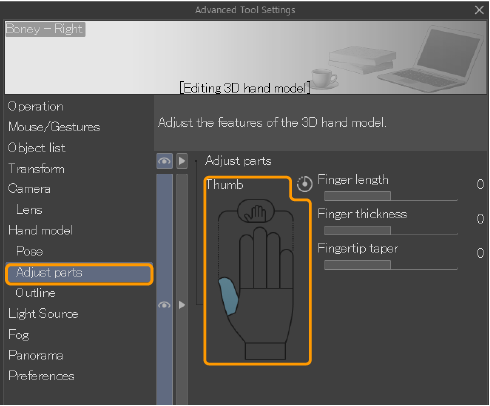
Operate the sliders to change the shape of the part.
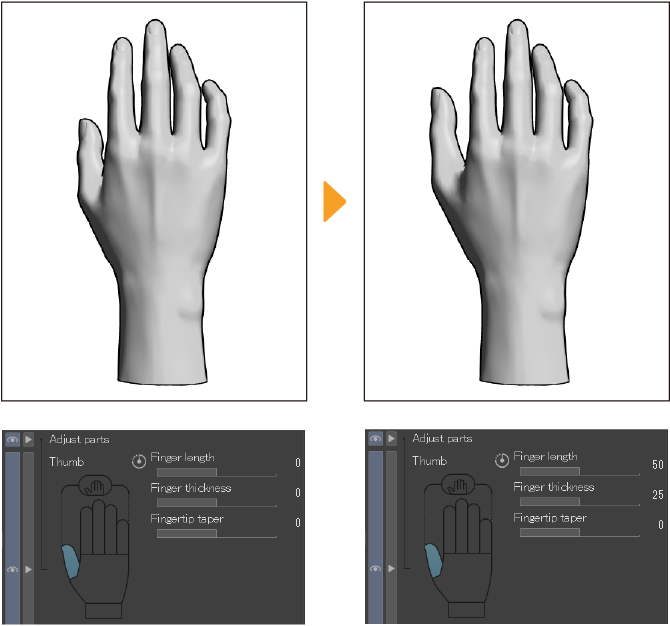
Changing the 3D hand appearance
In the Advanced Tool Settings palette > "Adjust parts" category, you can adjust the length and thickness of the 3D hand model parts, as well as the shape of nails, blood vessels, and other features.
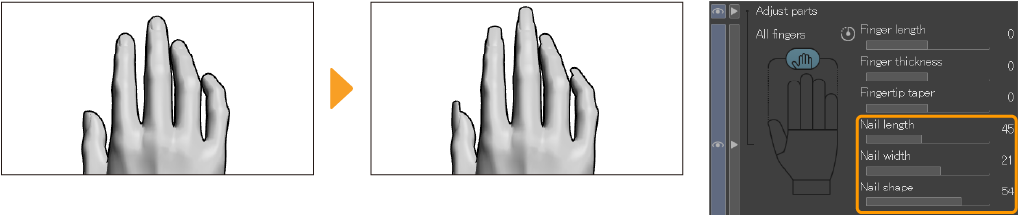
Modify nail length and shape
If you select All fingers, you can adjust the nail length, nail width, and nail shape.
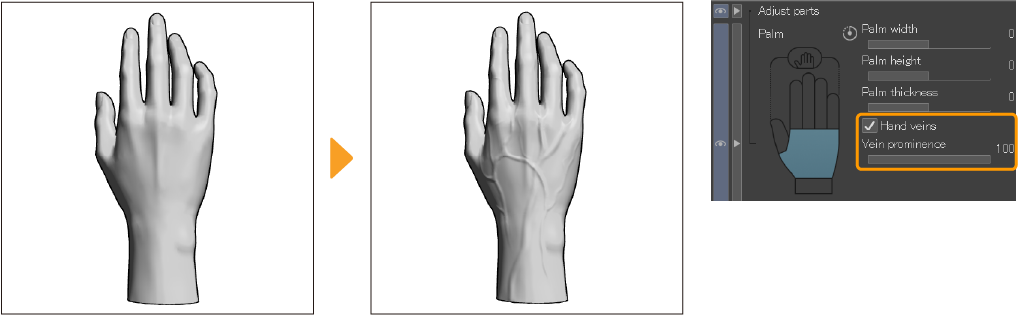
Show veins
If you select Palm, you can turn on Hand veins to display veins on the back of the hand and wrist. The visibility of the veins can be adjusted with the Vein prominence setting.
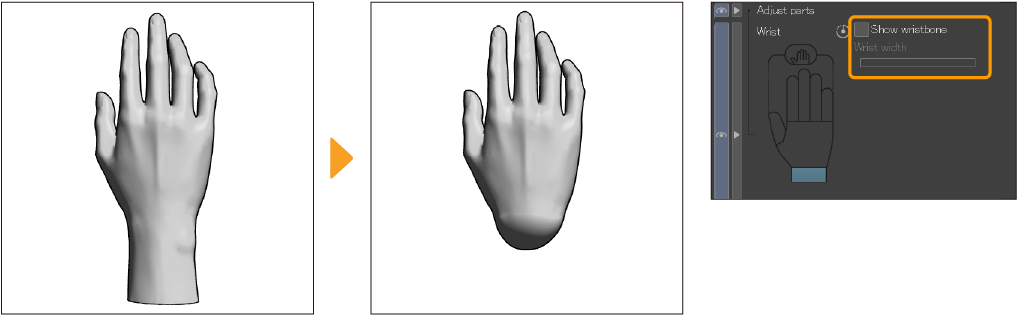
Change the wrist size and appearance
If you select Wrist, you can adjust the wrist size and also toggle the display of the wrist on or off.
Resetting parts to the default appearance
You can reset the hand parts to their default state by going to the hand selection image, selecting the hand part you want to reset, and then tapping the reset icon.
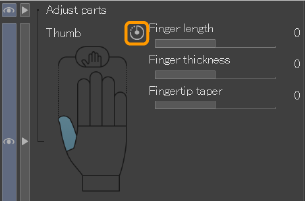
For fingers, selecting All Fingers from the hand part selection image will reset the shape of all fingers to their default state. This will not reset the shape of the palm or wrist.
Register a 3D hand model as a material
You can register customized 3D hand shapes as materials.
Select the 3D hand model with the Object tool, and open the Tool Settings palette or Advanced Tool Settings palette > "Hand model"category > Register shape as material.
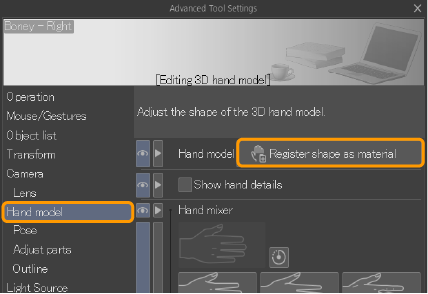
The "Add material dialog"will appear. Enter a material name and select a location to save and tap OK to register it as a hand shape material in the Material palette.