Setting light source and shadows
You can set how light sources and shadows appear on 3D layers in Clip Studio Paint.
Applying a light source to 3D materials
You can apply a light source to a 3D layer by selecting it with the Object tool.
To apply light settings for the entire 3D layer, go to the Advanced Tool Settings palette > "Preferences" category and open the Rendering settings dialog.
In the Rendering settings dialog, turn on Apply light source in the 3D layer settings section.
y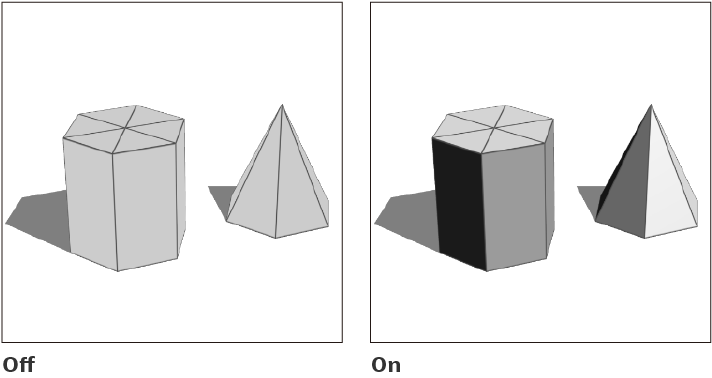
You can set the following kinds of light for a 3D layer.
Directional light 1 and 2
Directional light is light that illuminates the 3D material from a specific direction. You can adjust the direction, light color, and intensity of the light source.
There are two types of directional light, Directional Light 1 and Directional Light 2, which can illuminate a 3D material from multiple directions. Normally, Directional Light 2 is hidden.
Ambient light
Ambient light is light that evenly covers a 3D material from all directions. You can adjust its color and intensity. The ambient light can be added from an image or a panorama material. See "Setting up ambient light" for details.
Applying a light source to a specific 3D material
To apply a light source to a specific 3D material, select it with the Object tool, then do one of the following.
·In the Tool Settings palette, turn on Apply light source.
·In the Advanced Tool Settings palette > "Preferences" category, turn on Apply light source.
y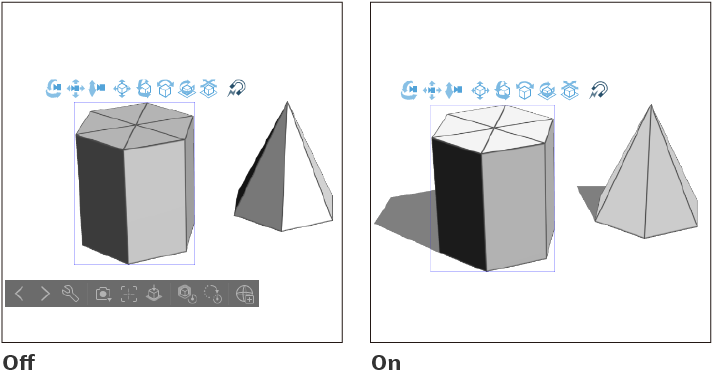
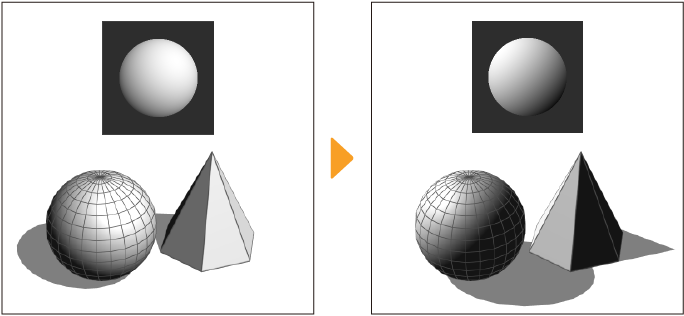
Changing the direction of a light source
After turning on Apply Light Source, you can set a directional light source for the entire 3D layer. You can set directional light by dragging the Light Source ball in the Tool Settings palette or Advanced Tool Settings palette > "Light Source" category. When the direction of Directional Light 1 is moved, the shadows of the 3D material will move accordingly.
The light source ball in the Tool Settings or Advanced Tool Settings > Light Source category applies to Directional Light 1 by default. You can set Directional light 2 by first selecting it in the Object List and then dragging the light source ball in the Tool Settings or Advanced Tool Settings > Light Source category. Note that the shadows of a 3D material will not move when changing the direction of Directional light 2.
Memo | ·If the light source ball does not appear in the Tool Settings palette or Advanced Tool Settings palette, select the 3D material or directional light in the Object List. ·If the shadows do not move with the direction of the light source, check that Follow light source is turned on as seen in "Shadow settings for new 3D layers". |
Adjusting the color and intensity of directional light
You can set the color and intensity of the light source for directional light. Under the Light Source ball in the Tool Settings palette, you can adjust the Directional Light 1 settings. The same settings can be adjusted in the Advanced Tool Settings palette > "Light Source" category.
Directional light 1
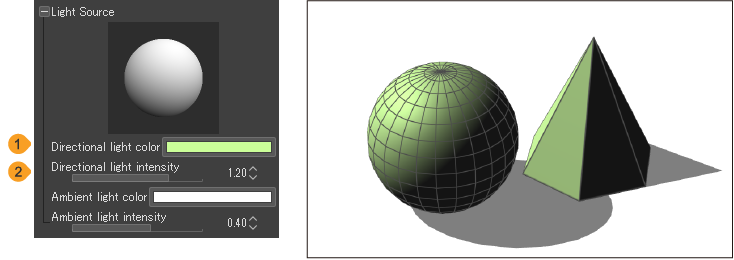
(1)Directional light color
Tap the color icon to open the Color settings dialog and set the light color.
(2)Directional light intensity
You can set the intensity of the directional light. The larger the value, the stronger the light.
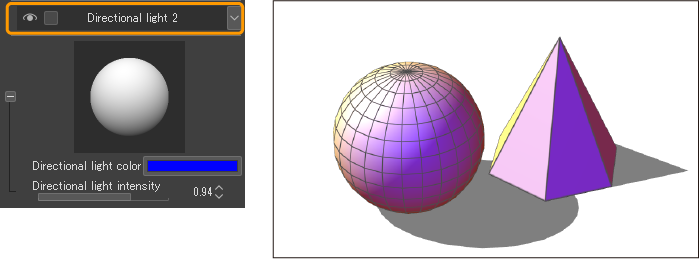
Directional light 2
Select Directional light 2 from the Object List. You can now set the Directional light color and Directional light intensity under Directional light 2.
The figure below shows Directional light 1 set to red and then Directional light 2 set to blue.Directional light 2 can be used to change the appearance of the light.
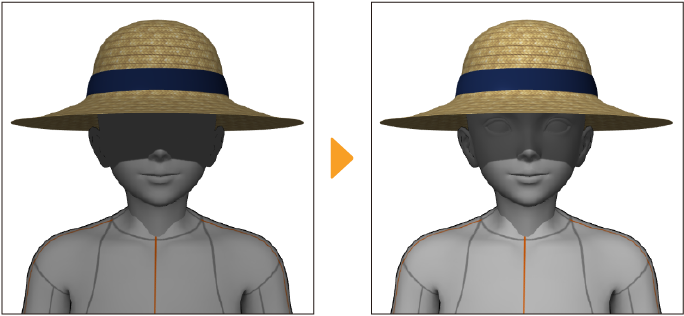
If the light color becomes dark and flat like the below example, you can apply Directional Light 2 to adjust the darkness.
Setting up ambient light
You can set the color and intensity of the ambient light in the Tool Settings palette or Advanced Tool Settings palette > "Light Source" category.
After you select the type of ambient light, you can adjust the intensity. When the value is higher, the light will be applied more strongly.
You can set up the following types of ambient light on 3D layers.
Single color
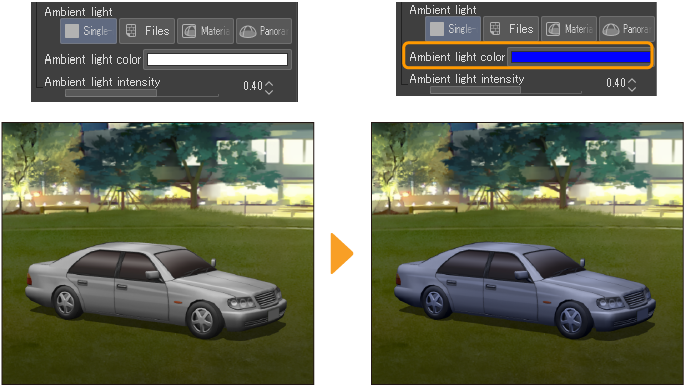
You can apply a single color as the ambient light color. Tap Ambient light color to open the "Color Settings dialog" and change the light color.
File
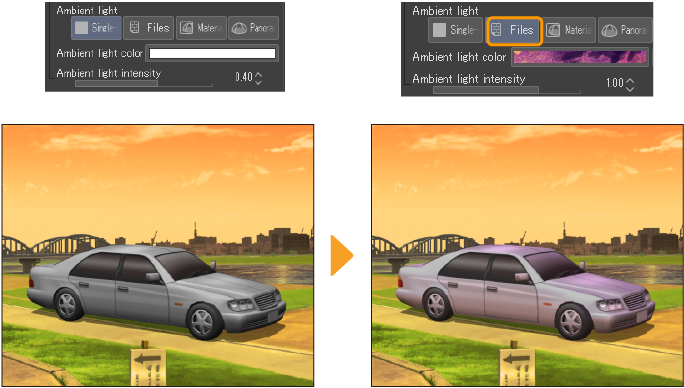
Tap to open the file manager and select an image file to import. The colors of the imported file will be applied as ambient light. You can import the following file formats: Clip Studio format (.clip), BMP, JPEG, PNG, WebP, TIFF, Targa, Adobe Photoshop document (.psd), Adobe Photoshop Big document (.psb).
In Ambient light color, a thumbnail of the image file will be shown. Tap the thumbnail to open the file manager and change to a different image file.
Material
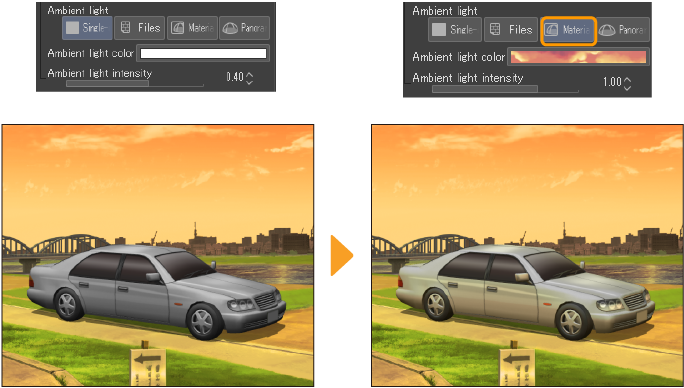
Tap to open the Add a texture dialog and import an image material from the Material palette. See "Add material dialog" for details on the Add a texture dialog.
In Ambient light color, a thumbnail of the image material will be shown. Tap the thumbnail to open the Add a texture dialog and change to a different image material.
Panorama
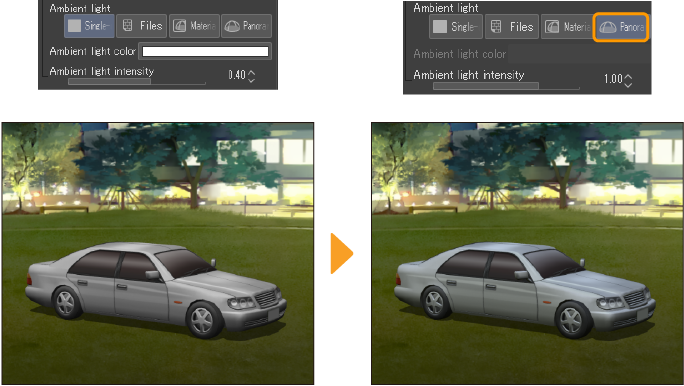
Tap to apply the colors of a panorama material as the ambient light color. If there is no panorama material on the 3D layer, this option will not appear.
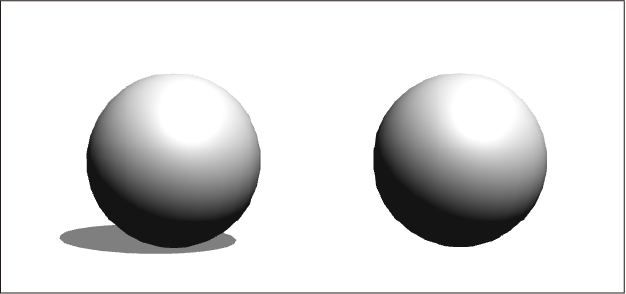
Setting shadows on 3D materials
Showing and hiding shadows on 3D materials
To show shadows underneath a 3D material, select the 3D material and turn on Cast shadows in the Tool Settings palette. Turn the setting off to hide the shadows. The same settings can be changed in the Advanced Tool Settings palette > "Light Source" category.
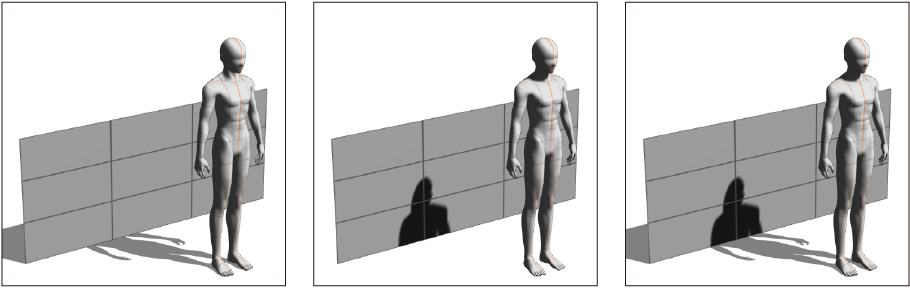
Shadow appearance
You can set how shadows are projected for the selected 3D material from the Tool Settings palette > Shadows setting. The settings are Off, Cast on ground only, Cast on 3D models only, and Cast on ground and models.The same settings are in the Advanced Tool Settings palette > "Light Source" category.
·Off does not display any shadows in the 3D space.
·Cast on ground only displays shadows only on the ground.
·Cast on 3D models only displays shadows only on other nearby 3D models.
·Cast on ground and models displays shadows on the ground and on nearby 3D models.
Shadow settings for new 3D layers
You can how shadows appear on new 3D layers in the Preferences > 3D category. From Shadow appearance, the settings are Don't cast shadows, Cast on ground only, Cast on models only, Cast on ground and models, and Ver. 1.12.6 and earlier.
When set to Ver. 1.12.6 and earlier, shadows on the ground will be cast directly down and will not follow the light source.
For other shadow appearance settings, see "Shadow appearance". Don't cast shadows is the same as Off, and Cast on models only is the same as Cast on 3D models only.
Shadow settings for selected 3D layers
You can change shadow settings for a 3D layer by selecting it with the Object tool, then from the Advanced Tool Settings palette > Preferences category, open the Rendering settings dialog.
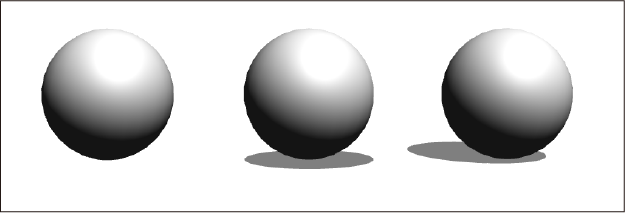
Under 3D Layer Settings > Lighting, you can turn shadows on by tapping Apply light source. Use the pull-down menu to change the shadow appearance to Cast shadows down or Follow light source.
When set to Cast shadows down, shadows on the ground will be cast directly down and will not follow the light source. When set to Follow light source, the position of the shadows will adjust according to the light source.
 p
p