Editing a ruler
You can edit rulers with the Object tool to add or remove control points or move the ruler.
Editing linear rulers, curve rulers, figure rulers, or ruler pens
You can select rulers created with the Linear Ruler, Curve Ruler, Figure Ruler, and Ruler Pen tools, and edit their control points.
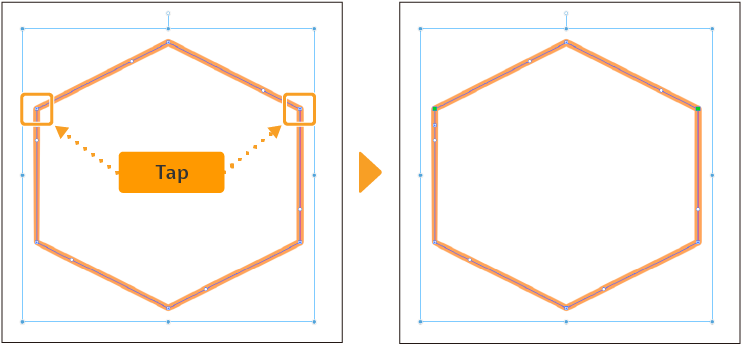
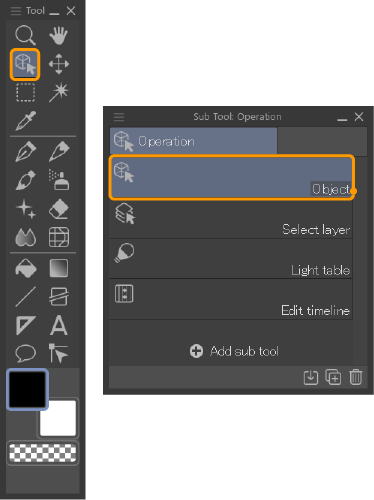
Select a ruler line with the Operation > Object tool to display the handles and control points for the line. You can use these to edit the ruler’s line. Hold Shift and tap to select multiple ruler lines.
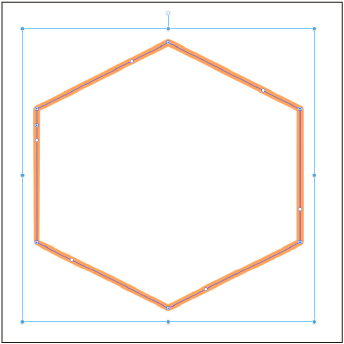
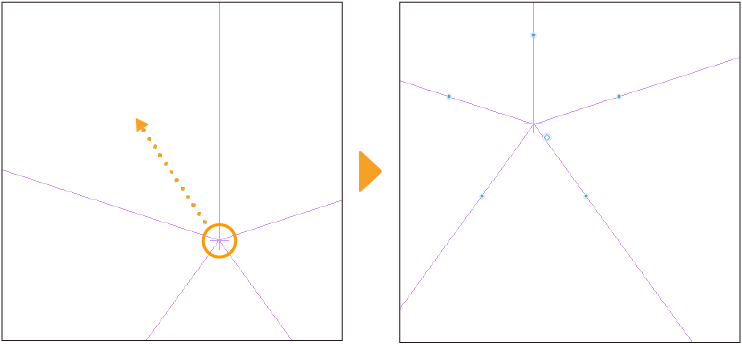
To select a control point, tap it with the Object tool. Hold Shift and tap to select multiple control points.
Moving, rotating, or transforming a ruler
The same methods for moving, rotating, and transforming rulers can be used as described in "Editing vector lines with the Object tool".
Memo | For information on the types of objects that can snap to rulers, see "Objects that can snap". |
Editing with control points
In addition to the Object tool, the Correction tool can be used to edit control points in the same way as when editing vector layers. On Windows and macOS, when the Object tool is selected, right-click to display the context menu from the control point or line to access some of the functions of the Control Point tool.
However, when editing a ruler, you cannot use settings related to line width and color, such as the Adjust line width and Redraw vector line width tools, or the Correction tool > Correct line and Density settings.
Editing special rulers, symmetrical rulers, and guides
To edit a ruler created with the Special Ruler, Symmetry Ruler, or Guide tools, select the Object tool, and then tap the ruler from the canvas to select it. You can edit the ruler with the handles and control points that appear.
Moving a ruler
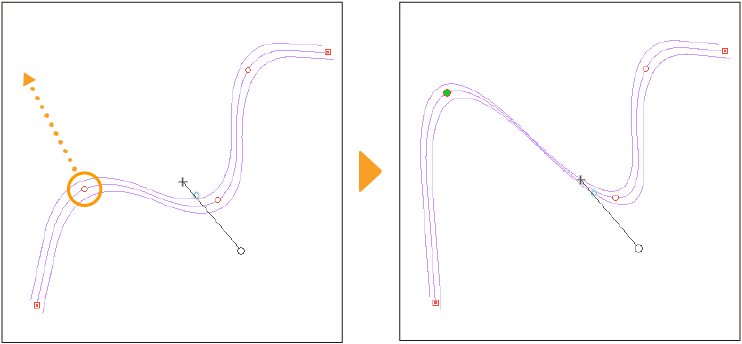
Move the cursor over the ruler and drag to move it.
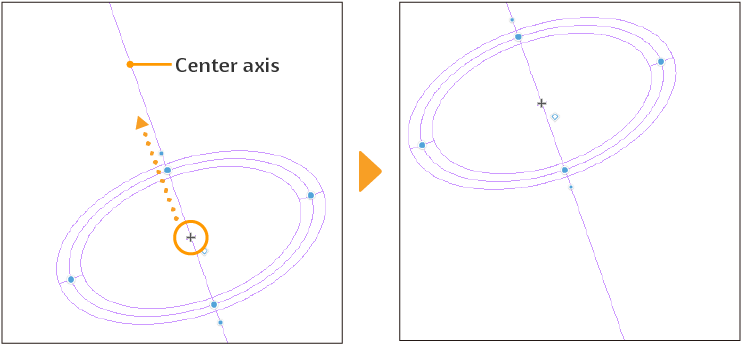
Dragging the center (+) of a concentric ruler allows you to move it along the center axis. Dragging a point other than the center moves the ruler in the same way as other rulers.
Memo | ·For information on the types of objects that can snap to rulers, see "Objects that can snap". ·On some types of rulers, you can only snap some handles. For example, the Concentric circle ruler and Radial curve ruler can only snap the center point. Multiple curve rulers can only snap their control points. |
Transforming a ruler
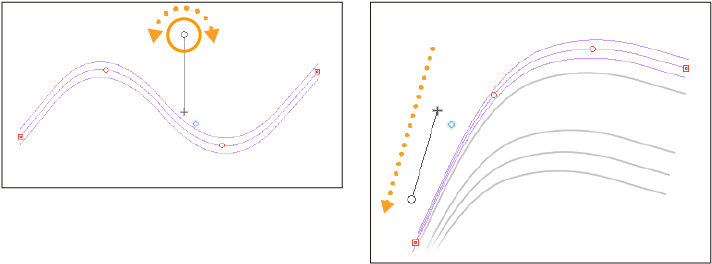
To transform a parallel curve ruler, multiple curve ruler, or radial curve ruler, simply drag a control point on the ruler.
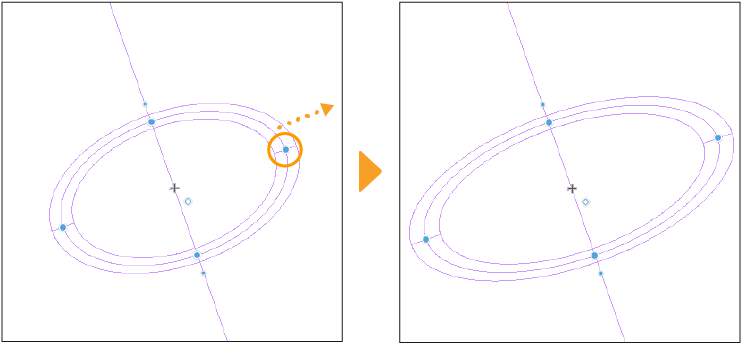
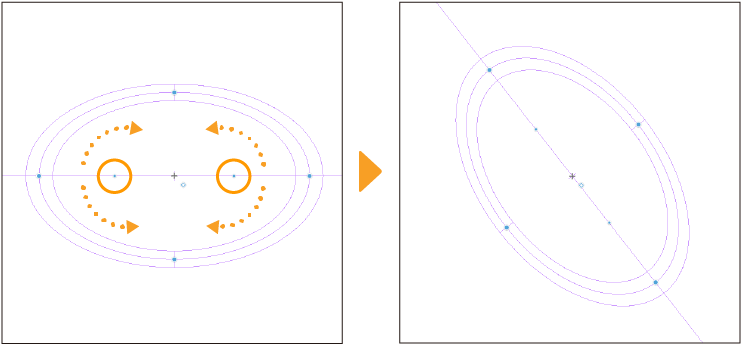
To transform a concentric circle ruler, drag a handle on the ruler.
Rotating a ruler
The method to rotate the ruler varies depending on the ruler type. You can rotate the Parallel ruler, the Concentric circle ruler, and the Symmetrical ruler. In addition to canvas operation, rotation can also be performed by setting the Angle in the Tool Settings palette.
Parallel ruler
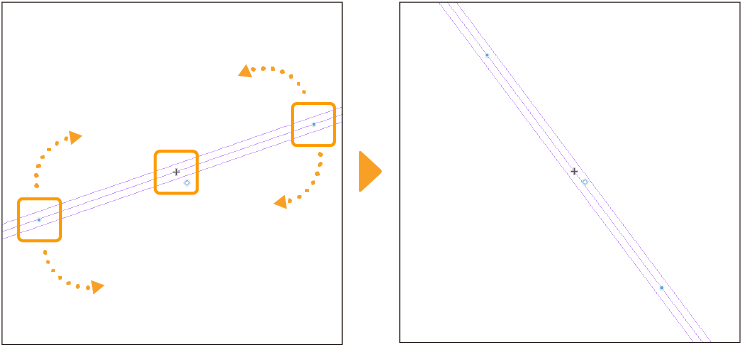
Drag the rotation handles on the ruler to rotate the ruler around its center. You can also drag the center of rotation (+) with the Object tool to move it to a new position.
Multiple curve ruler
For a multiple curve ruler, drag the rotation handle to set how the lines will follow the shape of the ruler. The whole ruler cannot be rotated.
Concentric circle ruler
Drag the rotation handle on the central axis to rotate a concentric circle ruler.
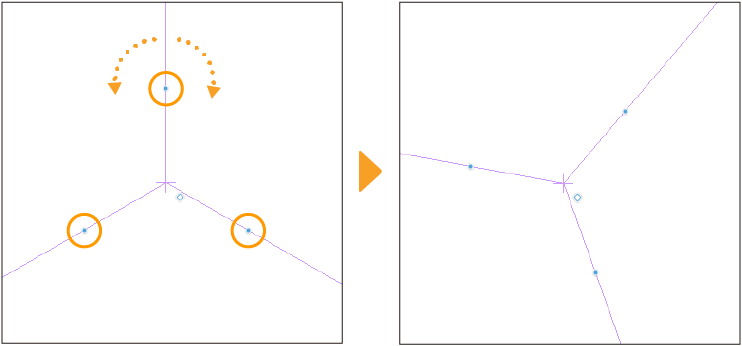
Symmetrical ruler
Drag one of the rotation handles on each line to rotate a symmetrical ruler.
Editing with control points
With Radial curve rulers, Parallel curve rulers, and Multiple curve rulers, you can edit the shape of the ruler using the control points.
You can use the Object tool and the Correction tool to edit control points in the same way as when editing vector layers. In the Control point tool, the functions available for editing rulers are Move control points, Add control point, Delete control point, and Switch corner.
On Windows and macOS, when the Object tool is selected, right-click to display the context menu from the control point or line to access some of the functions of the Control Point tool.
Advanced Tool Settings palette settings
In the Advanced Tool Settings palette of the Object tool, you can set how rulers are edited from the "Operation" and "Special ruler" categories.
Link a ruler to a layer
When using the Move Layer tool, you can choose whether to move the ruler and layer at the same time or separately.
Tapping the checkmark between the layer thumbnail and the ruler icon in the Layer palette unlinks the ruler from the layer, allowing you to move the layer and the ruler separately.
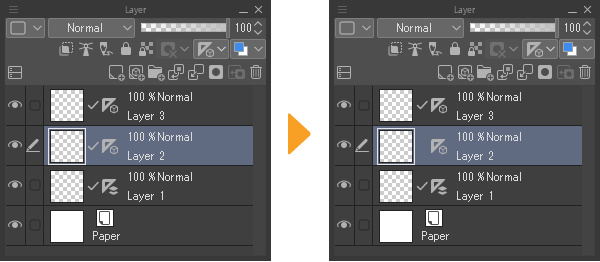
Tap between the layer thumbnail and the ruler again, and a checkmark will appear, linking the ruler and the layer so that they can be moved at the same time.
You can also link a ruler and a layer using the Layer menu > Ruler/Frame > Link Ruler to Layer command.
Link a guide to a ruler
When a ruler is moved, guide lines created on the same layer can be moved along with the ruler.
From the Layer palette, select the layer that has the ruler, tap Toggle special ruler snapping, and turn on Link guide to ruler from the menu that appears. When turned off, the guide lines will not be linked to the ruler and will not move.
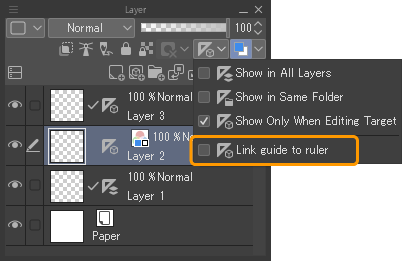
You can also link a ruler and a guide using the Layer menu > Ruler/Frame > Link guide to ruler command.