Drawing while snapping to a ruler
To draw following a ruler, you’ll first need to enable ruler snapping and set its range. Once turned on, you can then draw lines along a ruler on a raster or vector layer with a drawing tool such as the Pen tool by dragging it near the ruler on the canvas.
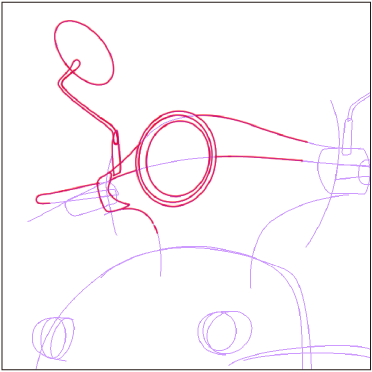
For special and symmetrical rulers, it will snap to the characteristics of each ruler. The Figure tool can also snap to some types of rulers.
For details on how to snap and draw along the perspective ruler, refer to "Drawing along a perspective ruler".
Snap to ruler
You can enable ruler snapping from the View menu > Snap > Snap to rulers, Snap to special rulers, or Snap to grid. Each setting corresponds to a type of ruler.
(1)Snap to Rulers
You can draw along rulers created with the Linear Ruler, Curve Ruler, and Figure Ruler tools. This setting also applied to frame borders on the canvas.
(2) Snap to Special Rulers
You can draw along rulers created by the Special Ruler, Symmetrical Ruler, Guide Line, and Perspective Ruler tools. You can also enable snap settings for perspective rulers created by menu commands here.
(3) Snap to Grid
You can draw along grids shown on the canvas. This also applies to grids attached to a perspective ruler.
Memo | If you can’t snap to rulers when drawing or moving objects, check that Enable snapping is turned on in the Advanced Tool Settings or Tool Settings palette > "Correction" category. When snapping is enabled, you can snap to objects including rulers according to the settings in the View menu. |
Setting a ruler’s range
From the Layer palette, select the layer that has the ruler, and from the Set ruler range, you can set the range of layers in which the ruler will appear. Turning off all items hides the ruler.
On raster and vector layers that display rulers, ruler snapping is enabled, and lines can be drawn along the rulers.
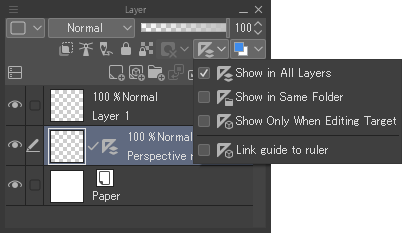
(1) Show in All Layers
Rulers can be displayed on all layers of the canvas.
(2) Show in Same Folder
Rulers can be displayed on layers in the same layer folder as the ruler.
(3) Show Only When Editing Target
Rulers can be displayed only when the layer containing them is selected.
Memo | You can hold down Shift while tapping the ruler icon in the Layer palette to toggle between showing and hiding the ruler. |
Moving a ruler to another layer
You can change the layers on which rulers can be used by moving the rulers to another layer. Select the ruler icon from the Layer palette and drag & drop it onto the destination layer.
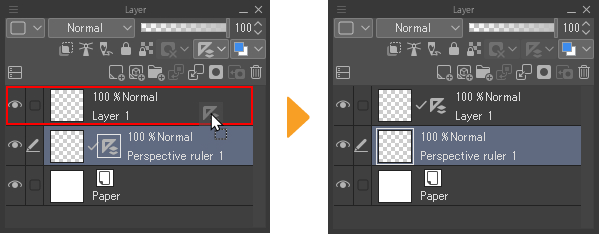
For tablets, drag the ruler icon horizontally and then drag and drop it onto the destination layer.
Draw along ruler
You can use Draw along ruler to draw lines in the same width along the whole ruler all at once. In the Draw along ruler dialog, you can adjust Line width and Anti-aliasing settings.
The lines will be created in the current drawing color. If you have multiple rulers displayed, select the one you want to draw along on with the Object tool and then tap Layer menu > Ruler/Frame > Draw along ruler.
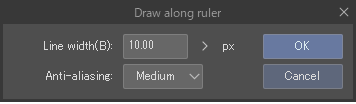
Adjust the settings as needed and tap OK to draw lines along the selected ruler.
Memo | You cannot use Draw along ruler with special, symmetry, or perspective rulers. |
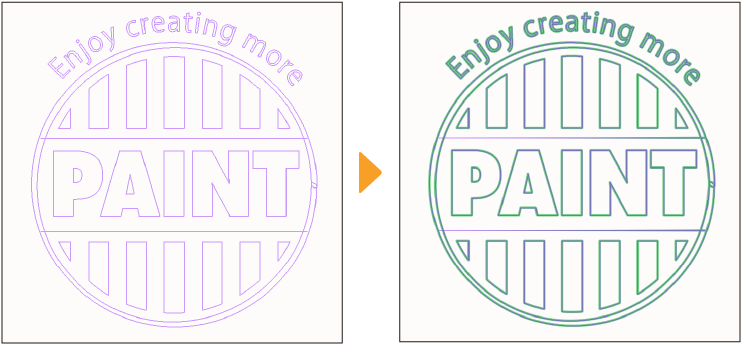
Toggle special ruler snapping
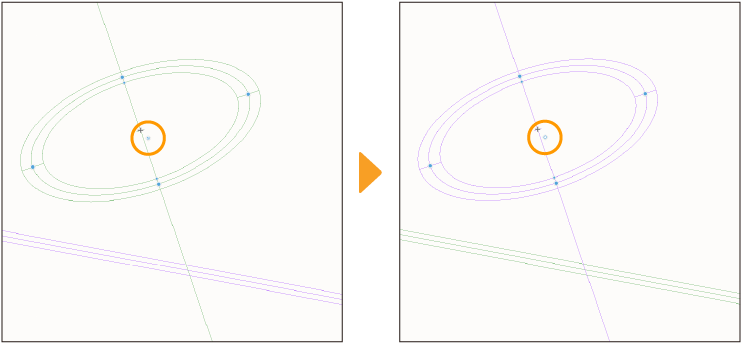
You can enable and disable snapping on a special ruler by tapping the snap toggle icon that appears when a special ruler is selected with the Object tool. You can only snap to one special ruler at a time.
When snapping is enabled, the ruler’s lines turn purple, and the icon shows a blue square. When disabled the line’s turn green and the icon shows a blue circle with a backslash.
You can use the Toggle special ruler snapping menu in the View menu to switch which special ruler has snapping enabled. You can also perform this command with its default shortcut, Ctrl+4 on Windows and Cmd+4 on MacOS.
Memo | You can change the colors of special rulers in the Preferences dialog > Ruler/Unit. If you have already done so, your colors may differ from the instructions here. |
Snap fill tool to symmetry ruler
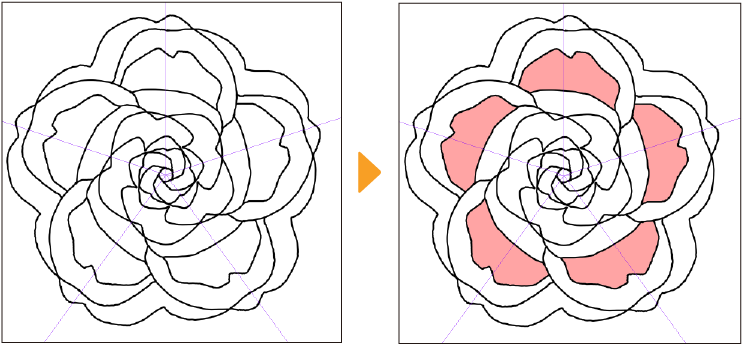
In addition to the Pen and other drawing tools, the Fill and Auto Select tools can also snap to symmetry rulers.
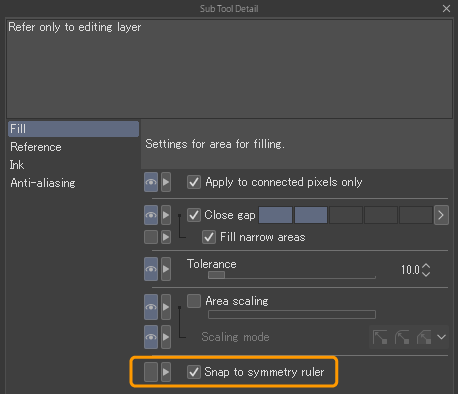
To enable, open to the Advanced Tool Settings palette for the Fill or Auto Select tools, select the Fill category, and turn on Snap to Symmetry Ruler.
Select a layer with symmetry rulers enabled and then tap the canvas with the Fill or Auto Select tool. Just like your lines, fills and selections are then created on each division of the symmetry ruler.
Snap objects to rulers
You can snap objects to rulers when the following settings are all turned on.
·The ruler has snapping enabled in the View menu > Snap
·View menu > Snap > Snap to objects is turned on.
·In the Advanced Tool Settings palette or Tool Settings palette for the selected object, Enable snapping is turned on in the Correction category.
You can snap objects to rulers when moving or transforming them. For more details on snapping objects to rulers, see "Snap to rulers and grids". For details on snapping to a perspective ruler, see "Transforming with the grid".
Memo | For information on the types of objects that can snap to rulers, see "Objects that can snap". |
Snapping to a parallel line ruler
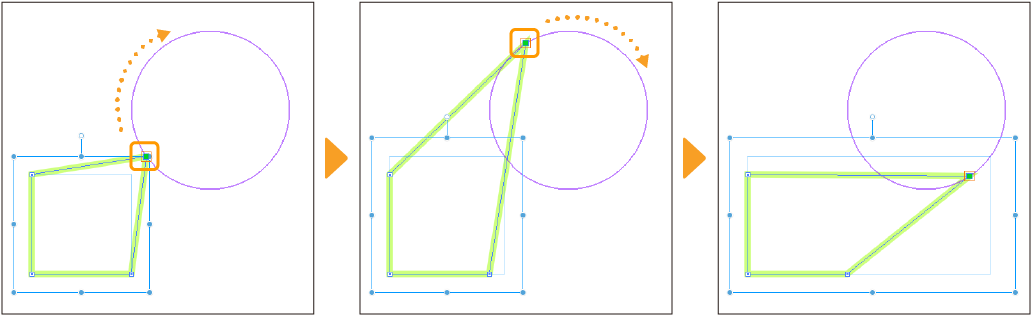
When rotating an object with the Object tool, Text tool, or Light table tool, you can snap it to be parallel or perpendicular to the parallel line ruler.
You can also snap to parallel line rulers when transforming with commands from the Edit menu > Transform, as well as snap mesh handles when using Mesh Transformation.
Snap control points to rulers
You can snap control points to rulers when the following settings are all turned on.
·The ruler has snapping enabled in the View menu > Snap
·View menu > Snap > Snap to control points is turned on.
·In the Advanced Tool Settings palette or Tool Settings palette for the selected object, Enable snapping is turned on in the Correction category.
Snapping to a symmetry ruler
If you have drawn on a vector layer while snapping to a symmetry ruler, transformations and edits to control points will also be reflected across the symmetry ruler when snapping is on. This includes adding new control points or deleting control points.
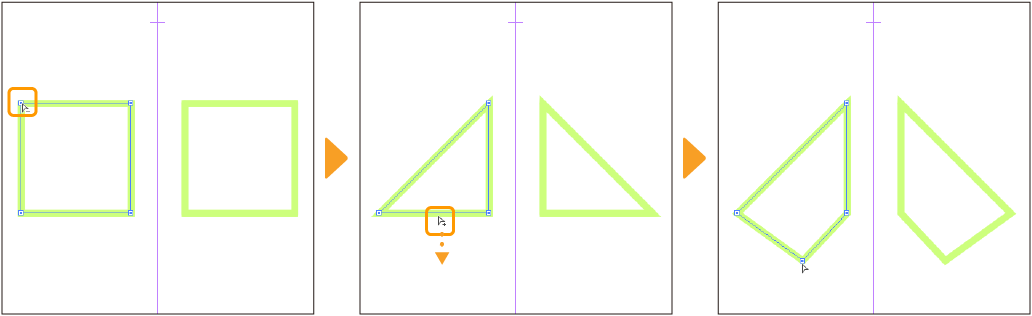
However, if the content on the layer is no longer symmetrical due to edits made while not snapping to the symmetrical ruler, it will no longer be possible to edit control points with symmetry.