Drawing along a perspective ruler
If you turn on Snap to special ruler from the Command Bar or the Layer menu, you can draw lines along the perspective using drawing tools and figure tools.

If you cannot draw a line along the perspective, check that the ruler is active from the ruler range settings in the Layer palette.
Changing line direction when snapping
If you draw in a different direction than you wanted to, return the pen to the start of the drawing without releasing it to cancel the drawn line and redraw it.

You can also disable certain directions for snapping. Use the Object tool to select the perspective ruler and tap the snap buttons to toggle the snapping on and off for each direction.
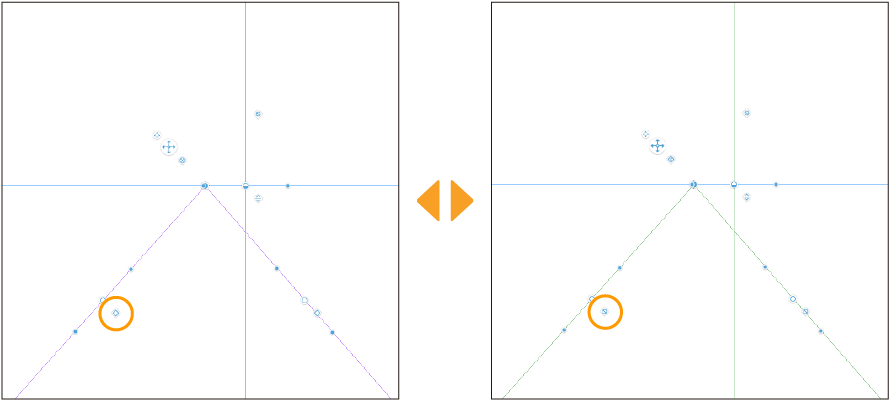
Memo | If dragging to the start position does not redraw the line, you can turn this setting on in the Preferences dialog > Ruler/Unit > When snapping to perspective ruler, reset drawing direction by returning to start point. |
Drawing figures and polylines
You can use the Figure, Frame Border, Balloon, and Selection tools to draw shapes that follow the perspective ruler.
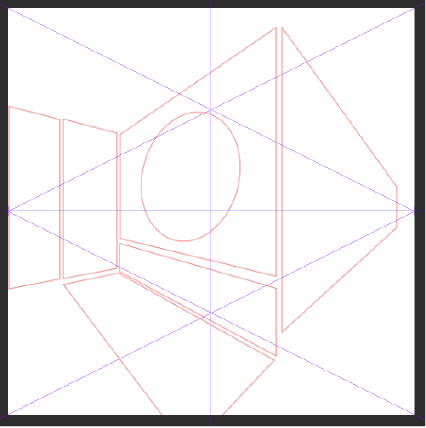
Note that some settings will be disabled when snapping to figures and polylines to a perspective ruler.
Straight lines and Polylines can snap to a grid if the intersecting points are drawn along a perspective ruler. Snap does not work for intersections that are diagonal.
When drawing a rectangle, ellipse, or other shape, the angle cannot be adjusted even if Adjust angle after rotating (check) is turned on in the Tool Property palette.
The Ratio setting will be reflected if it is turned on in the Tool Property palette. However, when snapping to a vanishing point added separately from the perspective, the setting will be disabled.
Toggling the snap settings
Snapping to the entire perspective ruler
You can enable snapping to the entire perspective ruler by tapping the snap toggle icon that appears when a perspective ruler is selected with the Object tool. On the icon, tap the bottom right square.
When enabled, the ruler’s lines turn purple, and the icon shows a blue square grid. When disabled the line’s turn green and the icon shows a blue circle with a backslash.
As with special ruler snapping, you can only snap to one perspective ruler at a time.
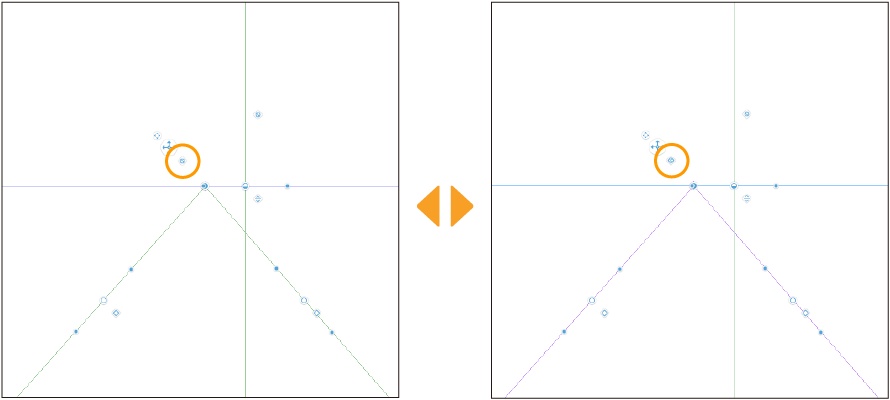
You can also enable snapping to a perspective ruler by tapping Perspective Ruler from the Object sub tool and then turning on Snap in the Tool Property palette.
Snapping to the vanishing point
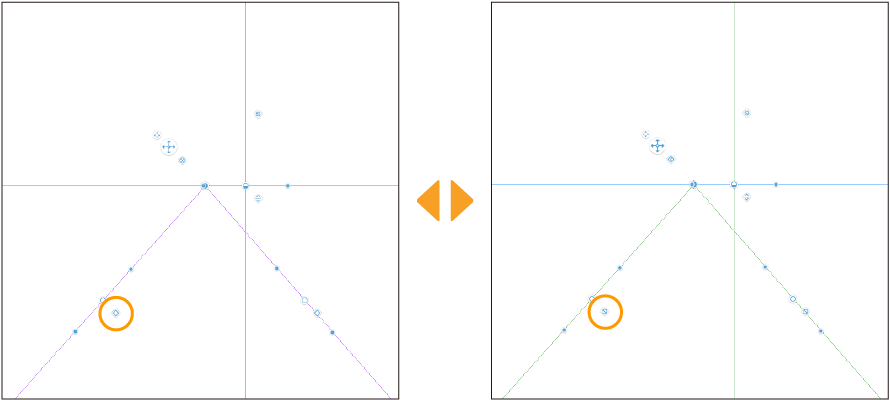
Tap the snap toggle icon near the guide line handles to enable or disable snapping at each vanishing point of the perspective ruler. This is useful when you want to disable snapping only at a specific vanishing point.
Snapping to the eye level
You can draw one and two-point perspective rulers along the eye level. To enable or disable snapping, tap the snap toggle icon near the eye level handle.
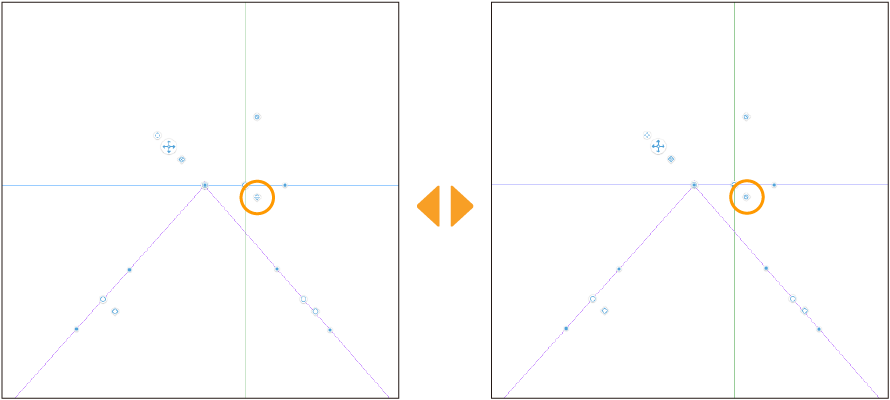
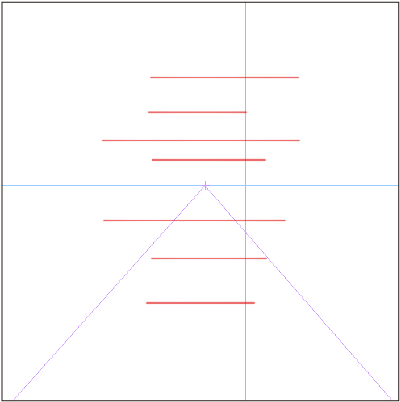
When snapping is enabled, lines can be drawn to follow the orientation of the eye level in addition to the vanishing points.
Snapping to an auxiliary line
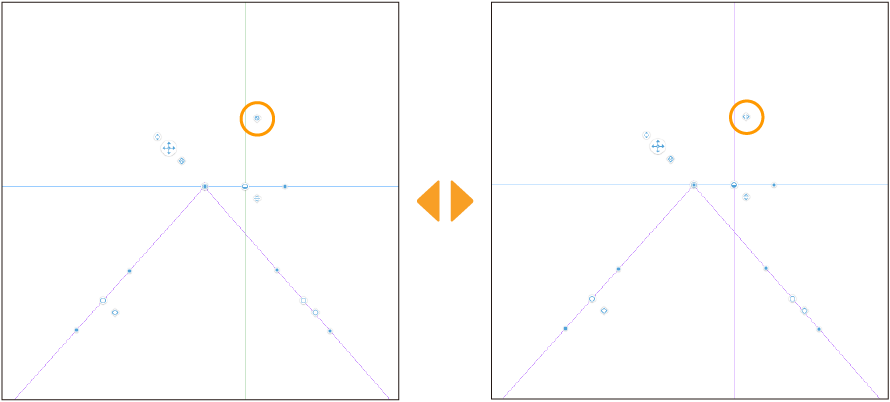
You can draw one and two-point perspective rulers along the direction of auxiliary lines that intersect perpendicular to the eye level. To enable or disable snapping, tap the snap toggle icon near the eye level handle.
Display and snap to perspective ruler grid
The perspective ruler can display an equally spaced grid from the vanishing point. This is useful for drawing evenly spaced lines on floors or windows.
Showing the grid
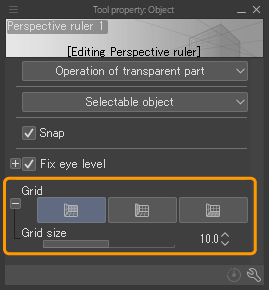
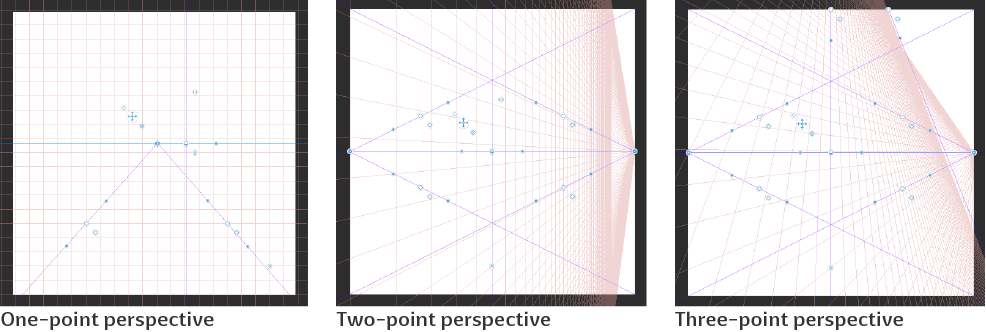
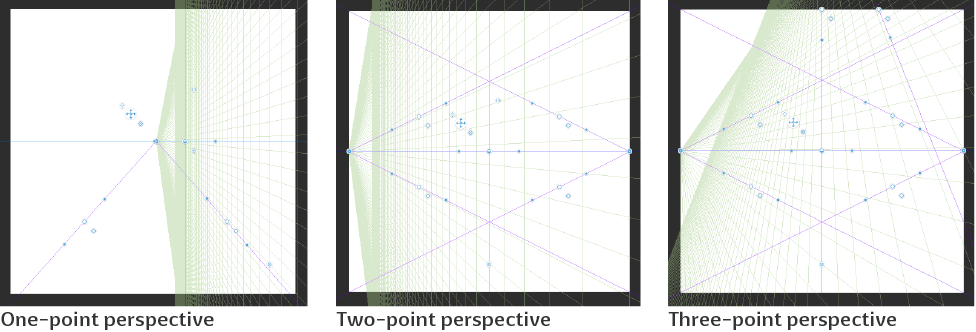
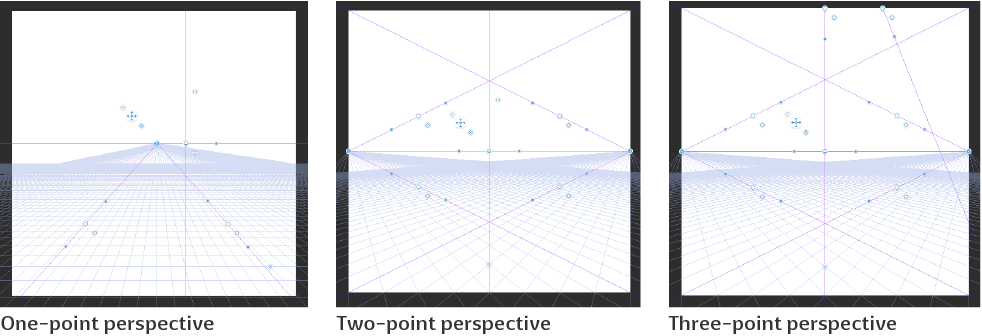
Select the perspective ruler with the Object sub tool. From the Grid palette under the Tool Property palette, tap the button on the plane for which you wish to display the grid. From the left are buttons for the XY plane, YZ plane, and XZ plane.
Tap the + to the left of Grid to display Grid Size and specify the size (spacing) of the grid.
XY plane
YZ plane
XZ plane
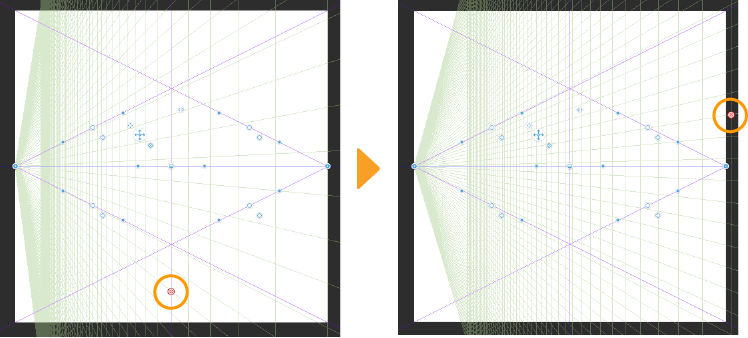
You can adjust the position of the grid by dragging its origin point.
Snapping to the grid
To draw lines along the grid of the perspective ruler, turn on Snap to Grid.
Note that Snap to Special Ruler must also be turned on if you want to enable snapping to planes that do not display a grid.
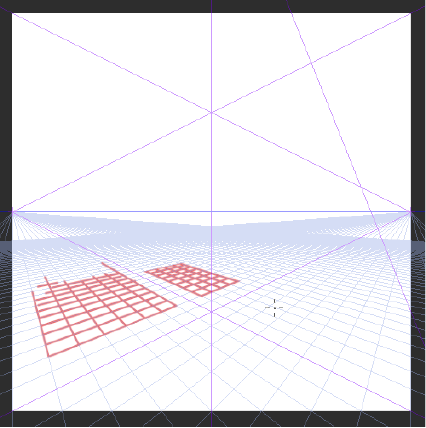
Transforming with the grid
When objects are set up to snap to rulers (see "Snap objects to rulers"), you can snap the object to the handles of the perspective ruler grid when transforming. If Snap to grid is also turned on, you can transform objects to snap to the perspective ruler grid.
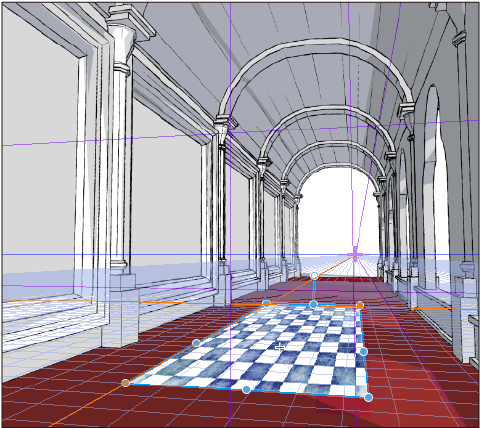
To easily transform images and image materials in alignment with the perspective ruler grid, use the Edit menu > Transform > Free transform to move the handles while snapping to the grid. For information on the types of objects that can snap, see "Objects that can snap".