Using Studio Mode
In Studio Mode, you can access all the tools of Clip Studio Paint to draw and create illustrations, comics, and animations with an interface similar to the desktop version.
Setting up a canvas
To create a new canvas, tap the New icon on the command bar.

In this dialog, you can set the canvas size, resolution, and so on, as well as create canvases for comics, webtoons, or animations.
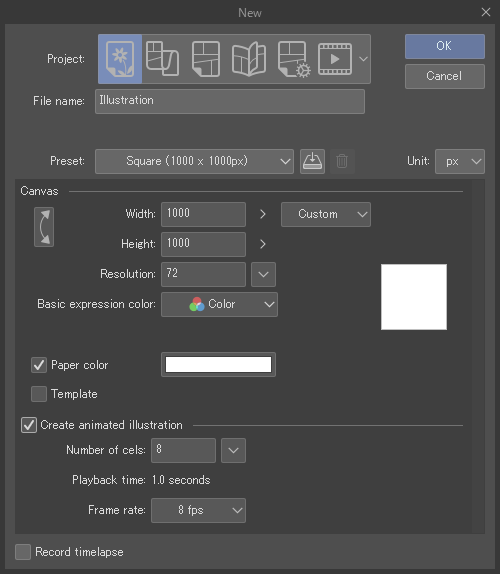
To create a simple illustration canvas, simply set the Project to Illustration and adjust the canvas size and resolution to your requirements. You can also choose preset canvas sizes from the Preset drop-down.
Memo | For more information on creating a new canvas, see "Creating a New Canvas". For more information on basic canvas operations, such as Undo, Redo, and navigating the canvas, see "Basic Canvas Operations". |
Drawing on the canvas
To draw on the canvas, first choose a tool group from the Tool palette, then choose a sub tool from the list and draw on the canvas
There are many types of default brush and pen tools that you can choose from. Use the Pen tool for pens and markers, the Pencil tool for realistic pencils and pastels, the Brush tool for watercolors, thick paint, or ink brushes, the Airbrush tool for airbrushes and spray effects, and the Decoration tool for patterns, background elements, hatching, and effects.
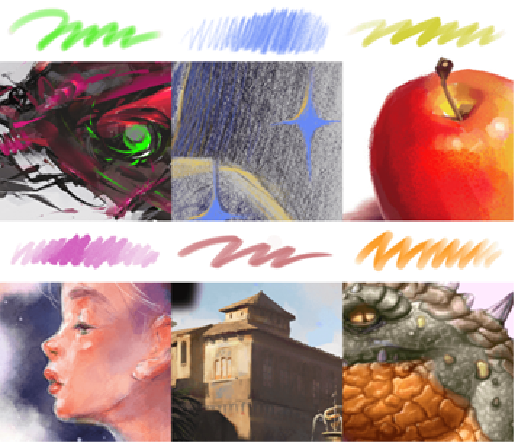
To vary the brush size, try varying the pressure of the stylus like a traditional pen or brush. You can also change the brush size by using the Brush size palette.
To undo or redo the last action, tap two fingers on the canvas. To redo the action, tap with three fingers.
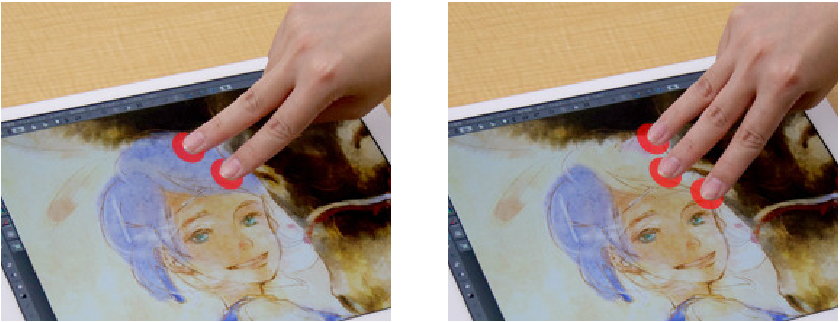
You can also use the undo and redo buttons on the Command Bar, or use keyboard shortcuts Ctrl+Z and Ctrl+Y.
To erase part of your drawing, switch to an Eraser tool, then draw over the area you want to erase. You can also erase by switching your brush color to transparent color using the icon at the bottom of the tool bar. By doing this, you can erase smoothly using any drawing tool.
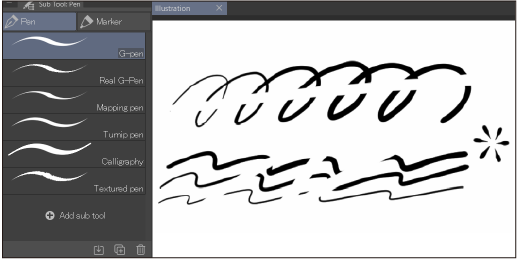
Memo | For more information on drawing tools in Clip Studio Paint, see "Pens and Brushes". |
Using different tools with touch gestures and pen input
If you are drawing on the tablet with a stylus, you can turn on Use different tools with finger and pen in the Command bar so you can perform different operations with touch gestures and the stylus.
If you are drawing with your finger, you do not need to use this setting.
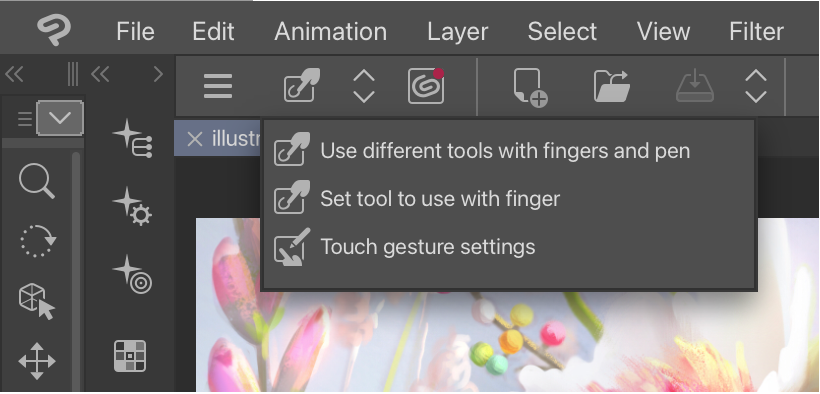
When Use different tools with fingers and pen is turned on, the following are the default settings.
·Move canvas (Hand tool): Single-finger swipe
·Eyedropper tool: Long press
Picking colors
To create a new canvas, tap the New icon on the command bar.
You can draw with three colors in Clip Studio Paint: the main color, the sub color, and transparent color.
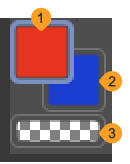
(1)Main color
(2)Sub color
(3)Transparent color
The icon of the selected color is highlighted in blue.
To pick a color, tap the color icon you want to change, then tap inside the Color Wheel palette to change the color. You can use the main and sub colors for easy access to two colors while painting. When transparency is selected, you can paint with transparency to use any drawing tool like an eraser.
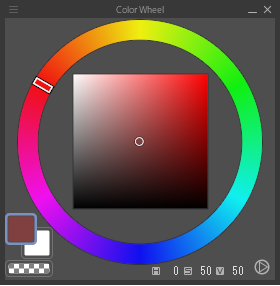
Click the tabs to see other types of color palettes that you can use to pick colors. The default layout has the Color Wheel, Color Set, and Color History palettes available next to the Tool palette, but you can add other color palettes by checking them in the Window menu.
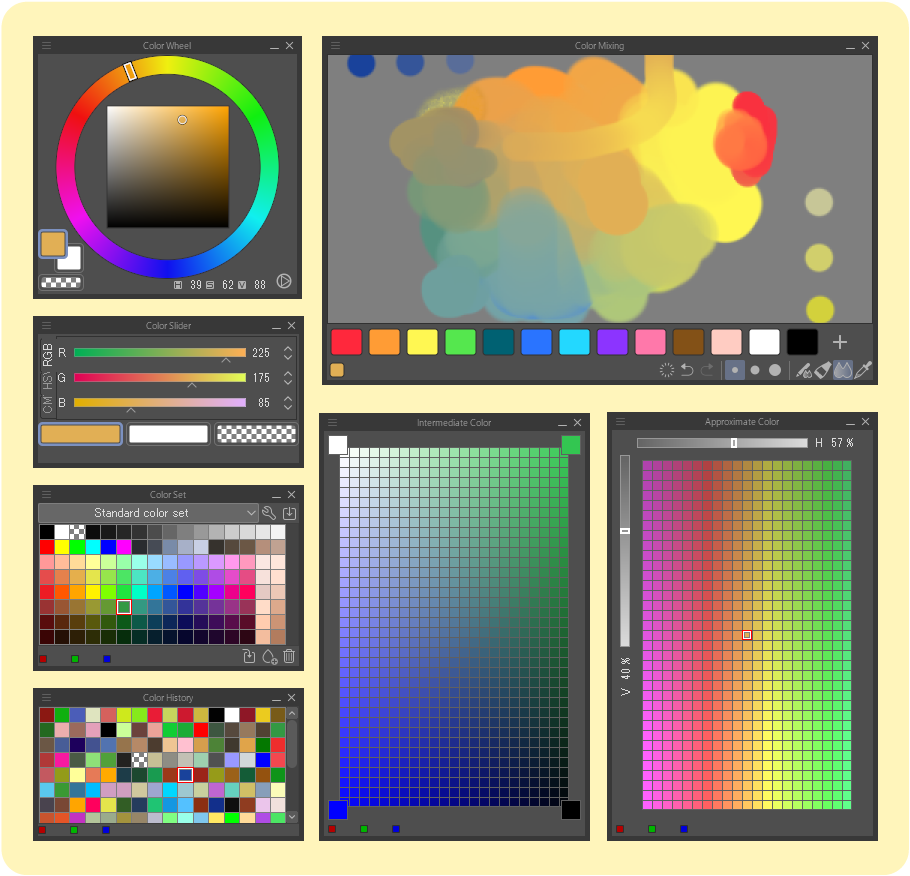
Memo | For more information on the different types of color palettes, see "Colors". |
You can also use the Eyedropper tool to pick colors from the canvas. When the Eyedropper tool is selected, tap on the canvas to pick the selected color, then switch back to a drawing tool to draw.
On tablets, you can long-press with the stylus to temporarily switch to the Eyedropper tool. When you release the stylus, it will switch back to the previous tool.

Using layers
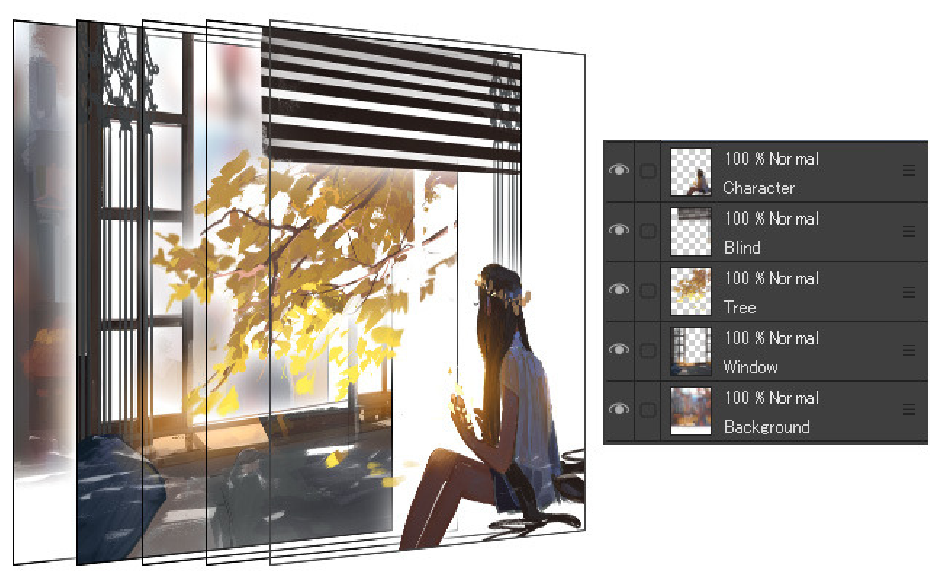
Layers are a helpful tool for digital art. You can think of them like layers of clear film. When you draw on a layer, the drawn areas will appear above any layers below, while the blank areas will remain transparent.
You can manage layers in Clip Studio Paint using the Layer palette. The pen icon to the left of the thumbnail indicates the current editing layer. Use the eye icon to hide or show layers.
You can create a new basic layer using the New Raster Layer icon in the Layer palette, or the Layer menu > New Raster Layer. Other types of layers can be created from the Layer > New layer menu.
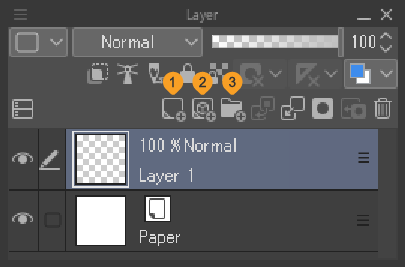
(1)New raster layer
(2)New vector layer
(3)New layer folder
A raster layer is a basic type of layer for painting and drawing.
You can also draw on vector layers. Vector layers save the brush stroke information, so you can easily edit the stroke later. However, you cannot fill or blend paint on vector layers.
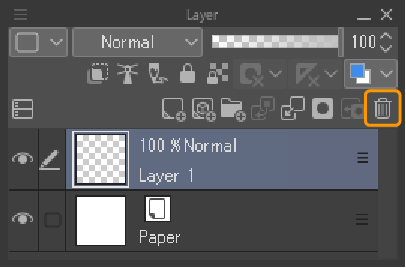
To delete layers, use the Delete icon in the Layer palette, or use the Layer menu > Delete Layer.
Long pressing the layer name shows the commands available for that layer. You can also access these commands from the menu icon at the top left of the layer palette.
Memo | For more information on layers, layer effects, and layer types, see "Layers". |
Saving a file
To save, tap the Save icon from the Command Bar or select Save from the File menu. This will save the file to the Clip Studio Paint app as a .clip file with layers intact.
![]()
When a canvas has unsaved changes, an asterisk will appear next to the file name.

iPad
On the iPad version, the first time you save a file, a dialog will appear prompting you to choose a save location. From the second time, the file will be overwritten.
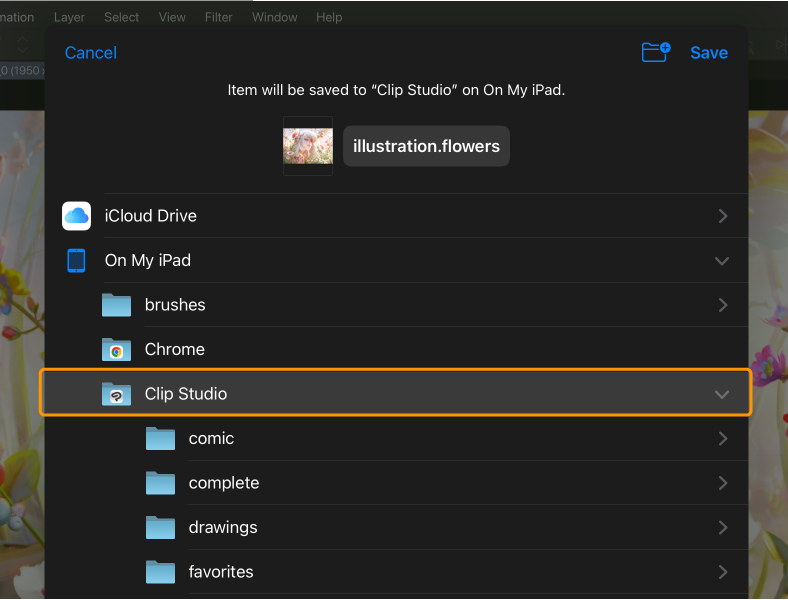
Important | If you save a file to a location other than On this iPad > Clip Studio, you will not be able to manage that file within the app. |
Android
When you tap the Save icon on Android, the "File Picker dialog" will appear. Select the save location and tap Save to save your file.
You can also manage your artworks from the Clip Studio Manage Works screen.
Quick Share
With Quick Share, you can effortlessly export the current file as a flattened image to your device’s file manager app or share to social media.
Tap File menu > Quick Share.
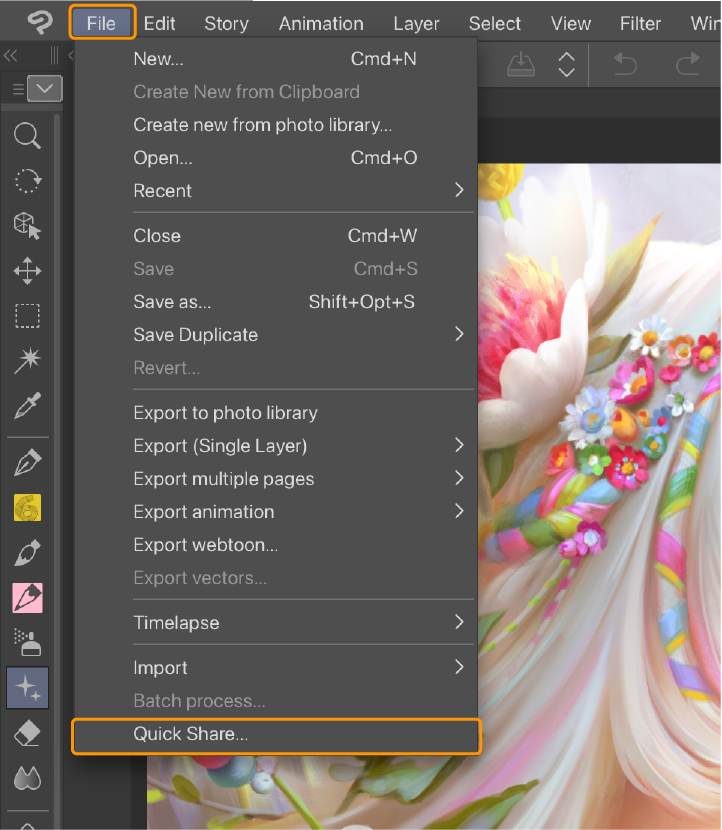
Select the service you want to share to. The image will be exported and opened in that service.
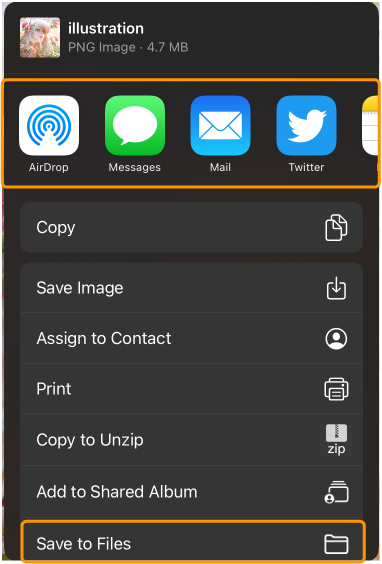
In addition to sharing your files to social media, you can also save files to your Photo Library or your Files Manager app.
·To save to your Photo Library, tap File > Quick Share > Save Image.
·To save to your Files app, tap File > Quick Share > Save to Files.
Important | When exporting with Quick Share, if the image is larger than 4096 pixels, the exported image will be shrunk to fit this size. |
Exporting files
For details on exporting your artwork as a flat file for sharing on social media, see "Exporting files".