Useful features for 3D materials
This section introduces useful functions for 3D materials such as snapping, changing the pivot point, setting up hierarchical relationships, and saving 3D objects.
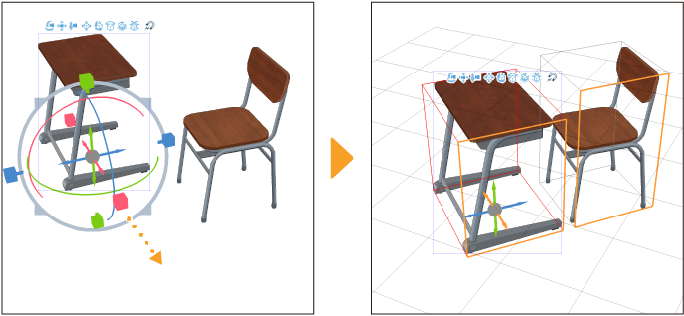
Snap to 3D model
If Snap to 3D Model is turned on when using a manipulator to move, rotate, or change the object scale of a 3D material, a bounding box and snapping effects will appear, allowing you to snap to other 3D materials.
Memo | Snap to 3D Model is not available when using the Tool Property or Sub tool Detail palette to move, rotate, or change an object's scale. Also, it cannot be used when moving a 3D material with the Movement manipulator's Snap and move feature. |
You can toggle Snap to 3D Model in the Operation category of the Sub Tool Detail palette. In addition, you can select the target to snap to from Move, Rotate, and Scale under Snapping. You can select multiple items.
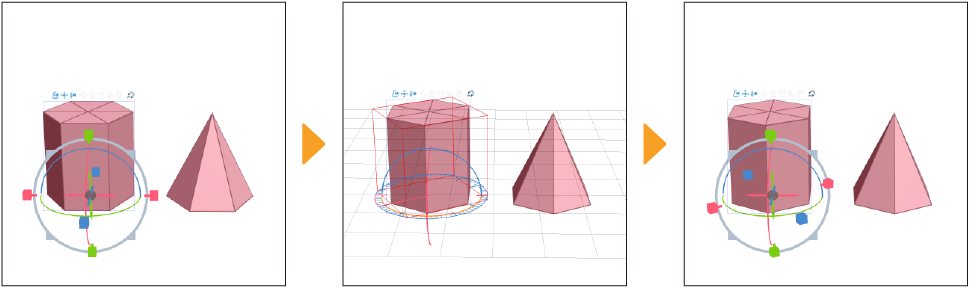
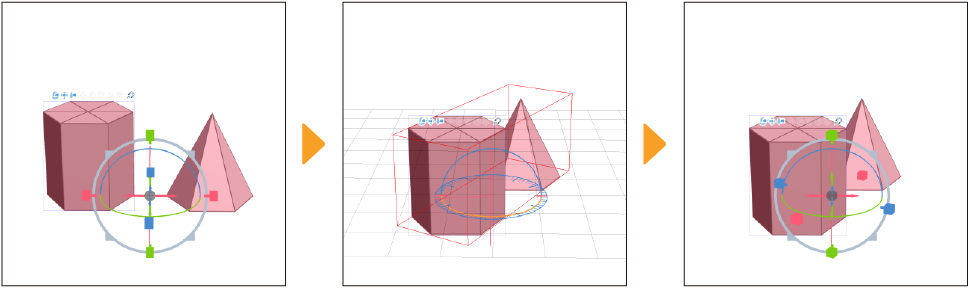
Move
When moving a 3D material, you can snap to the position of another 3D material. When snapping, bounding boxes and snapping effects will show.
Rotate
When rotating a 3D material, a snap effect is displayed centering on the rotation reference position, and can be rotated in 5-degree increments. The snapping angle can be changed from the Sub Tool Detail palette > Operation > Rotation Step Angle.

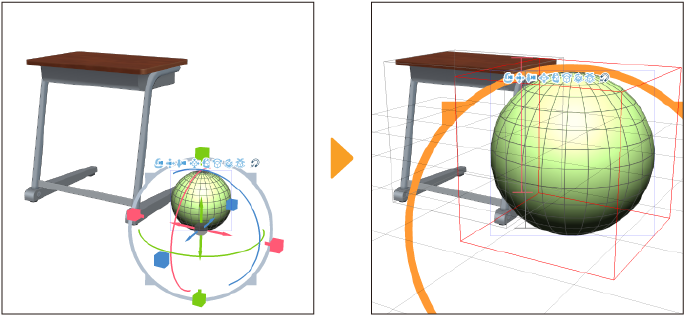
Scale
The gray rings of the Root, Part, and axis-independent scaling manipulators can be used to snap to the size and position of other 3D materials when changing the scale of a 3D material or part. When snapping, bounding boxes and other snapping effects appear.
Duplicating a 3D material
You can duplicate and use 3D materials on the same 3D layer.
·Panorama materials cannot be duplicated.
·If you duplicate while selecting a part of a 3D object material, the entire 3D object material will be duplicated.
·If you duplicate a material that is part of a hierarchy, only the selected material will be duplicated. To duplicate both the parent and child materials with the hierarchy intact, select all the materials in the hierarchy and duplicate.
Using the Object List
Select the 3D material you wish to duplicate from the Object List and tap Duplicate.

The duplicated 3D material is placed so that it overlaps the original. To see both, select the 3D material on top with the Object sub tool and move it using the Movement or Root manipulators.
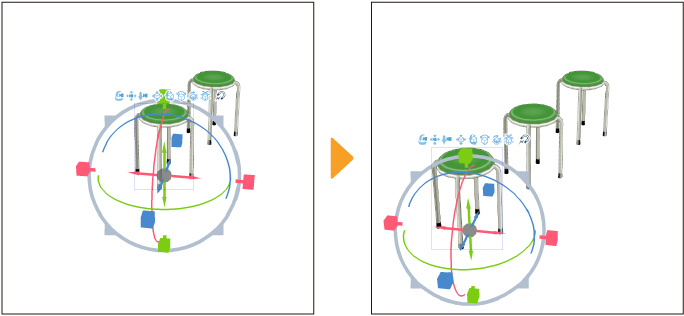
Creating equally spaced copies
You can create duplicates spaced equally apart by following these steps:
1Select the 3D material you wish to duplicate and tap Edit menu > Copy.
2Tap the Edit menu > Paste. The duplicated 3D material will sit on top of the original.
3Select the 3D material on top with the Object sub tool and move it to the desired location using the Movement or Root manipulator
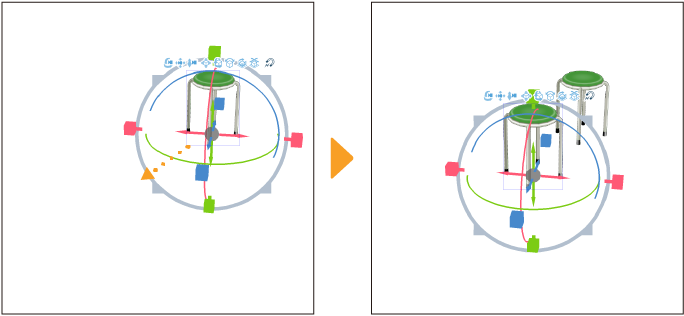
4Tapping Edit menu > Paste again will duplicate the 3D material again according to the spacing arranged in step 3.
Setting a pivot point for multiple objects
When multiple 3D materials are selected, you can change the reference point for rotating or scaling. You can select it from the Sub Tool Detail palette > Operation category > Pivot point for multiple objects setting.

First selected object
The Root or Part manipulator appears around the first selected 3D material. You can rotate and scale the materials relative to the pivot point of the displayed Root or Part manipulator.

Local pivot points
The Root or Part manipulator appears around the first selected 3D material. You can rotate and scale the materials relative to their individual pivot points.
Midpoint of multiple objects
The Root or Part manipulator appears in the center of the selected 3D materials. You can rotate and scale the materials relative to the pivot point of the displayed Root or Part manipulator, without affecting the relative positions of the 3D materials.
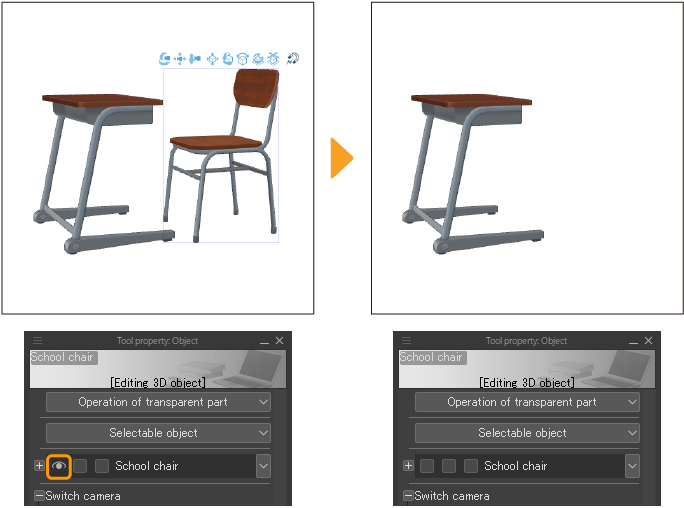
Showing/Hiding 3D materials and parts
You can show or hide 3D materials from the Object List in the Tool Property palette of the Object sub tool by toggling the eye icon to the left of the material name. For 3D object materials with multiple parts, you can also toggle the display of specific parts.
Use the Object sub tool to select the 3D material you wish to show or hide. The selected 3D material will appear in the Object List of the Tool Property palette. Tap Show/Hide to toggle the display.
When a part of a 3D object material is selected, tap the rightmost icon next to the name on the Object List to see that part.
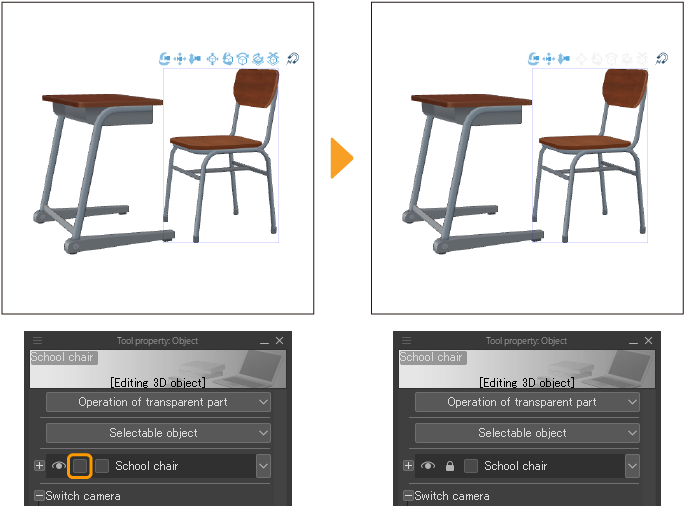
Locking a 3D material
You can lock a 3D material with the Object List to prevent it from being moved, rotated, or edited. This is useful when you want to save your settings.
To lock a material, select it with the Object sub tool. In the Object list of the Tool Property palette, tap the second icon from the left to lock it. Tap the icon again to unlock it.
In addition to 3D materials, you can also lock panorama materials, cameras, ambient light, and directional light. If these are locked, you will not be able to change the settings in the Tool Property or Sub Tool Details palettes.
Linking 3D models in a hierarchy
You can set up hierarchical relationships (parent-child relationships) between 3D models. For example, you can now attach accessories like hats and glasses to your 3D drawing figure, or put an object in the 3D model’s hand and pose them together. When grouped in a hierarchical relationship, you can move the models together and change the visibility at once.
You can set hierarchical relationships for the following types of 3D materials:
·3D drawing figures
·3D characters
·3D objects
·3D head models
·3D primitives
You can set a hierarchical relationship in the Sub Tool Detail palette > "Object List".
Select the child object in the list and drag and drop it onto the parent 3D material. To select and drag an object in the list on a tablet device, long press on the 3D material name.
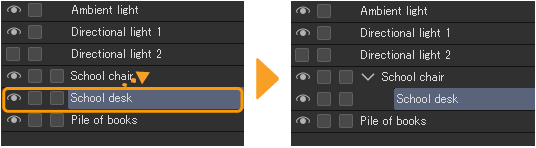
You can have multiple child materials under one parent.
Hold down the Ctrl key and tap to select multiple 3D materials. Then, drag and drop them onto the parent 3D material to add them as child materials at the same time.
You can also attach child materials to other child materials in a grandchild position.

When you select a 3D material set as the parent on the canvas and move or rotate it, the 3D material set as the child will also be linked to it.
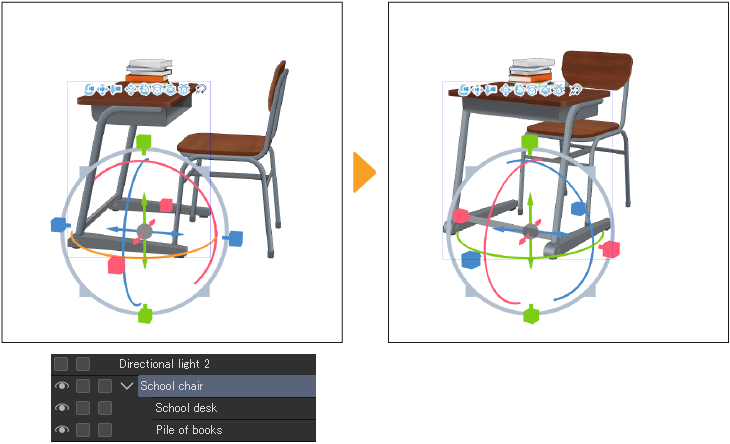
However, if you move or rotate a material set as a child, the parent will not move with it.
Ungrouping materials in a hierarchy
If you want to ungroup materials from the parent-child hierarchy, drag the material outside of the object list until you see a red line appear around the edges of the entire palette and then drop it.

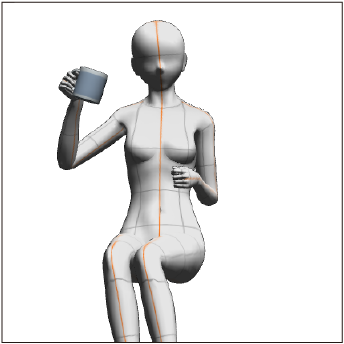
Attaching materials to a 3D drawing figure
Poseable models that have joints, like 3D drawing figures or 3D characters, can have child materials attached to specific body parts such as their hands or heads. You can also attach 3D objects to imported VRM files in the same way.
Link the child material to the 3D drawing figure, then select it in the Object list and select where you want the Attachment point to be.
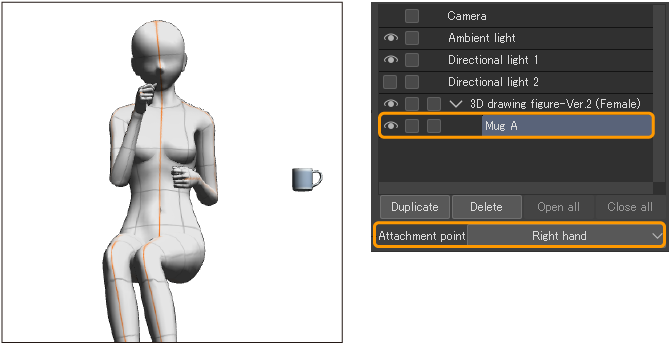
This will reposition the child material to the attachment point. You can manually adjust where you want the prop to be placed on the attachment point.
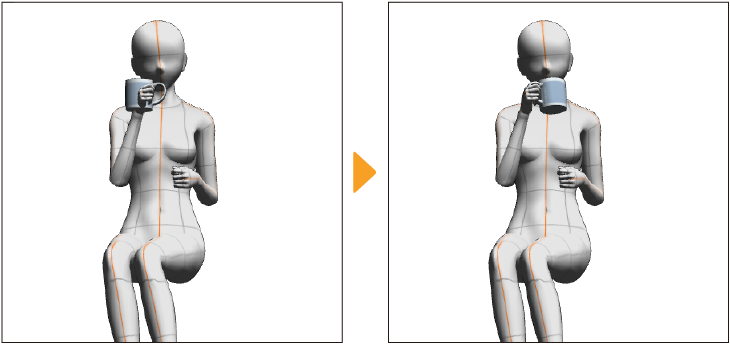
Now, when you pose the drawing figure, the prop will move along with it.
Registering a 3D object as a material
You can register 3D files and 3D objects that have been imported as described in "Importing 3D Files" to the Material palette as 3D object materials. You reuse them for other canvases or projects and publish them to Clip Studio Assets.
Memo | You cannot register 3D object materials that are compatible with Ver. 1.5. |
Before registering a 3D object, adjust the angle and scale to the appearance you want. This will be the default appearance and scale for the registered material.
You can register a 3D object in one of the following ways.
Registering from the Object Launcher
Tap the Save 3D object to Material palette icon and the Material property dialog will appear. Specify the material name and save location, then tap OK to register the 3D object material to the Material palette.

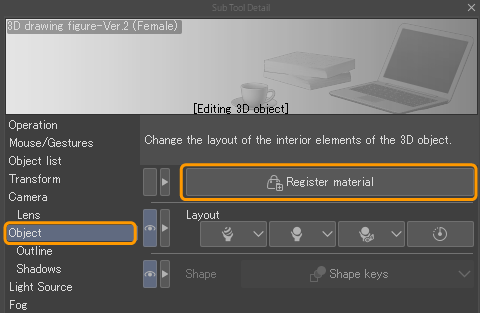
Registering from the Sub Tool Detail palette
You can register a pose from the Sub Tool Detail palette > Object category. Tap Register material, and the Material property dialog will appear. Specify the material name and save location, then tap OK to add the 3D object material to the Material palette.
Using 3D object materials registered in Clip Studio Paint
3D object materials that have been registered as materials in Clip Studio Paint cannot be opened in Clip Studio Modeler. They also cannot be used on Clip Studio Paint Ver. 2.2 or earlier.
You can register the following types of the material to the Material palette, but you cannot publish them to Clip Studio Assets.
·Default 3D object materials
·3D object materials or 3D files that were imported to a canvas in Clip Studio Paint Ver. 2.2 or earlier.
·User-made materials downloaded from Clip Studio Assets
·Licensed materials