Screentones
Here we will show you how to apply and edit screentones in Clip Studio Paint.
Creating a screentone layer
First, create a selection area where you want to paste a tone.
You can read more about creating selections from the "Selection" chapter.
Next, select Layer menu > New layer > Tone. Alternatively, you can tap New Tone from the selection launcher. This opens the Simple Tone Settings dialog.
![]()
Memo | Screentones are not available in Clip Studio Paint DEBUT. |
In the Simple Tone Settings dialog, you can set the tone pattern type, dot frequency, and density. Confirm your settings, and tap OK. The tone is then pasted into the selected area, and a fill layer is created in the Layer palette.
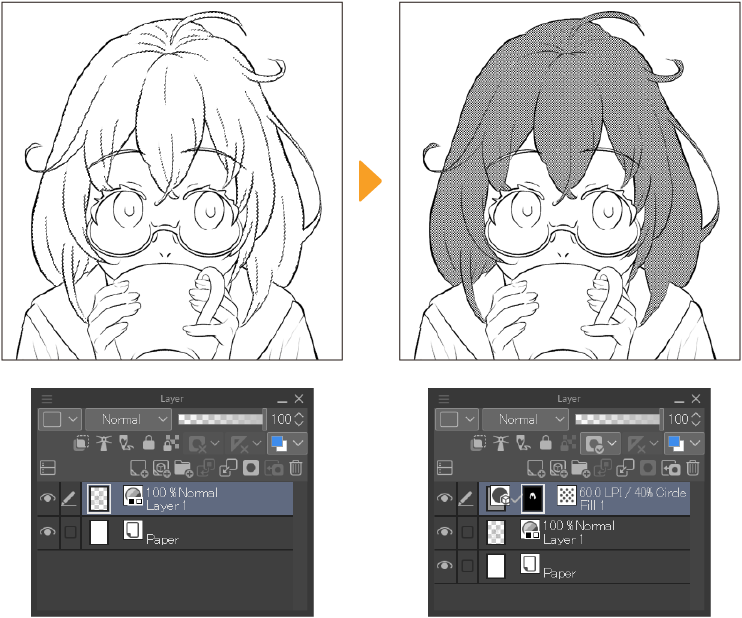
You can also paste a tone to the canvas by selecting materials from the Material palette > Monochromatic pattern > Basic.
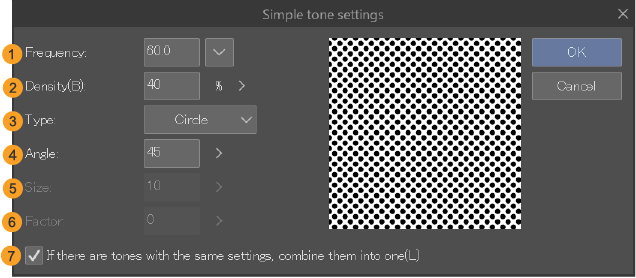
When you create a Tone layer, the following dialog will appear.
 p
p
(1)Frequency
Specifies the number of screentone lines per inch. Larger values result in smaller dots.
(2)Density
Specifies the density of the tones (halftone dots).
(3)Type
Selects the pattern for the screentone. You can choose from: Circle, Square, Lozenge, Line, Cross, Ellipse, Noise, Sugar plum, Asterisk, Star, Carrot, Cherry (round), Cherry (mid), Cherry (thin), Flower (round), Flower (mid), Flower (thin), Clover (round), Clover (thin), Ninja star, Diamond, Heart, Clubs, and Spades.
(4)Angle
Sets the angle of the tone pattern (halftone dots).
(5)Size
You can adjust the noise size when Noise is selected under Type.
(6)Factor
You can adjust the noise factor when Noise is selected under Type.
(7)If there are tones with the same settings, combine them into one
When turned on, if there is a Fill layer set to Tone with the same settings, the layer will be merged into that layer. This option does not appear if there is no selection area on the canvas.
Moving a tone pattern
To move the pattern of a tone, select the Operation tool > Move tone pattern sub tool.
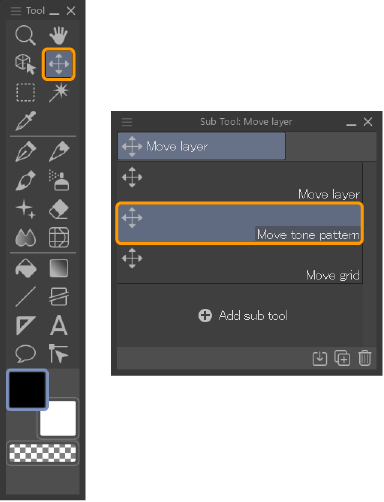
Then select a tone layer from the Layer palette and drag on the canvas to move the tone pattern.
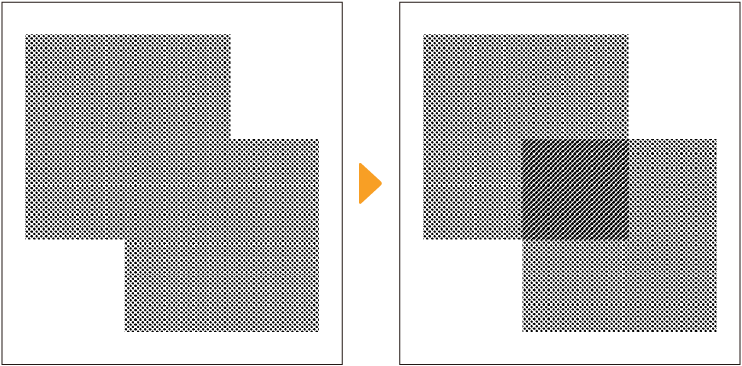
If an image material layer is toned and used as a pattern tone, the Move Tone Pattern sub tool will move only the dots and not the pattern of the image material layer. If you want to move the pattern of an image material layer, use the Object sub tool.
Changing the tone settings
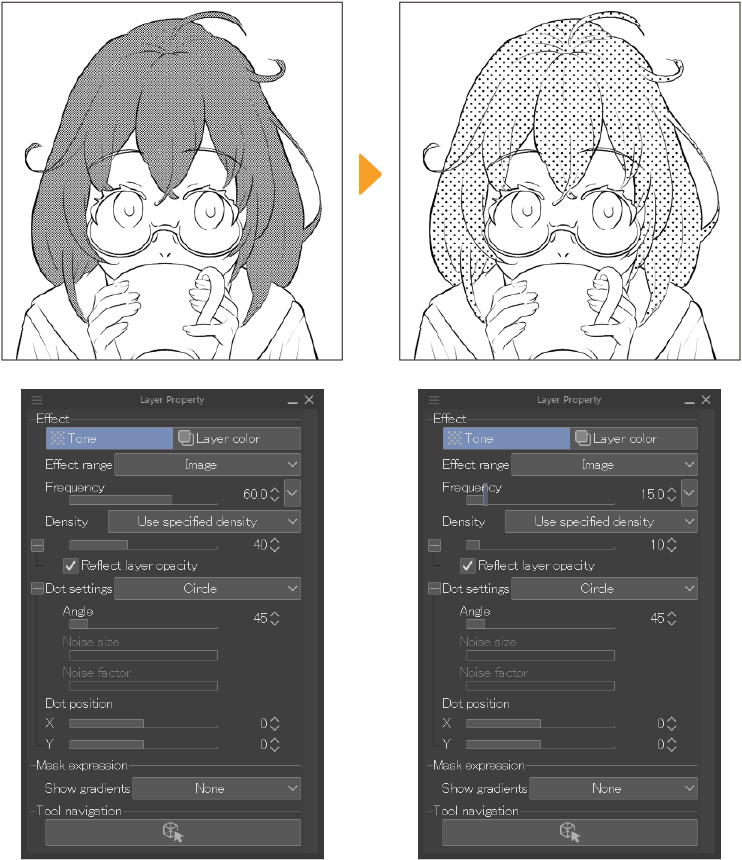
You can edit settings such as the tone frequency, angle, and pattern after the layer has been created. Select the tone layer and go to the Layer Property palette to view these settings.
For details on adjusting Layer Property palette settings, see "Layer properties".
Cutting or adding to a tone
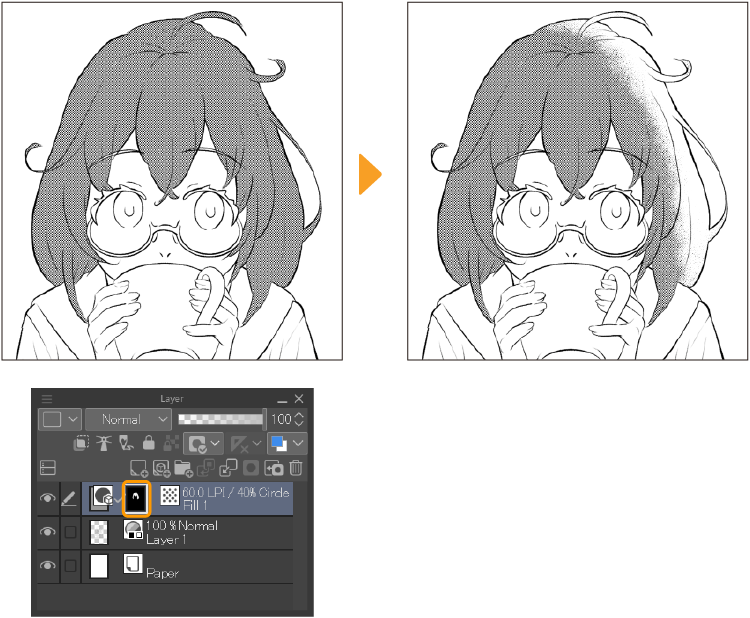
On the Layer palette, select the layer mask of the tone layer. You can adjust where the tone appears by erasing or drawing on the layer mask.
For information on how to edit layer masks, see "Layer masks".
Highlight the tone area
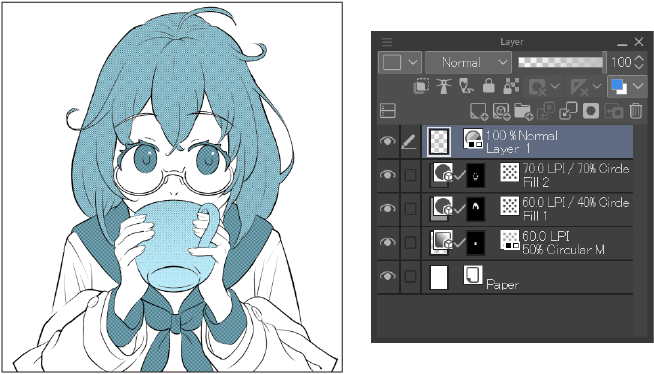
Select the options in the View menu > Show Tone Area to highlight areas with screentones in color. This is useful when you want to check for leftover parts of tone.
The color for displaying tones can be set from Area Color in the Layer Property palette. For details, see "Tone".
Show Selected Tone Area
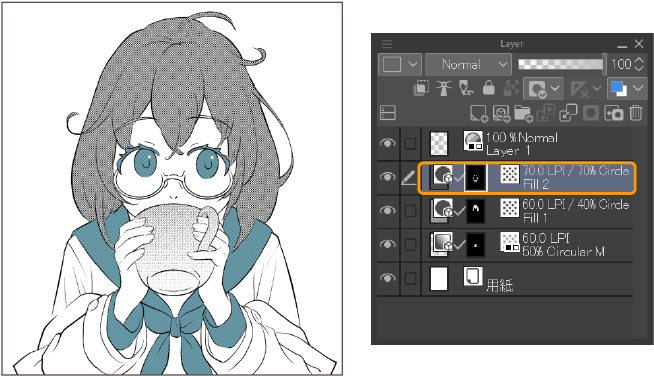
When Show Selected Tone Area is turned on, selecting a layer with tones on the Layer palette will show the areas with tone in color.
Areas of tone will not display correctly in the following cases.
·When Tone is set in the Layer Property palette of a layer folder, selecting a layer in a folder will not recognize tone areas on the layer.
·When Edge is set in the Layer Property palette of a layer folder, selecting a layer in a folder will not recognize transparent areas of tone.
Show All Tone Areas
When Show All Tone Areas is checked, all tone areas in the canvas will be shown in color.
Include Image Material Area
When Include Image Material Area is checked, image material layers that do not have tone will also display in color. This occurs regardless of whether Show Selected Tone Area or Show All Tone Areas is set. However, image materials set to Overlay texture in the Layer Property palette will not display with color.
