Layer masks
Layer masks are used to hide parts of a layer. You can use this to hide unnecessary parts without erasing them, or to limit the area of fill layers and gradient layers.
Creating a layer mask
You can mask selections or entire layers, in order to hide parts of layers without deleting them entirely.
First, select the layer in the Layer palette and create a selection area of the part you want to keep or hide.
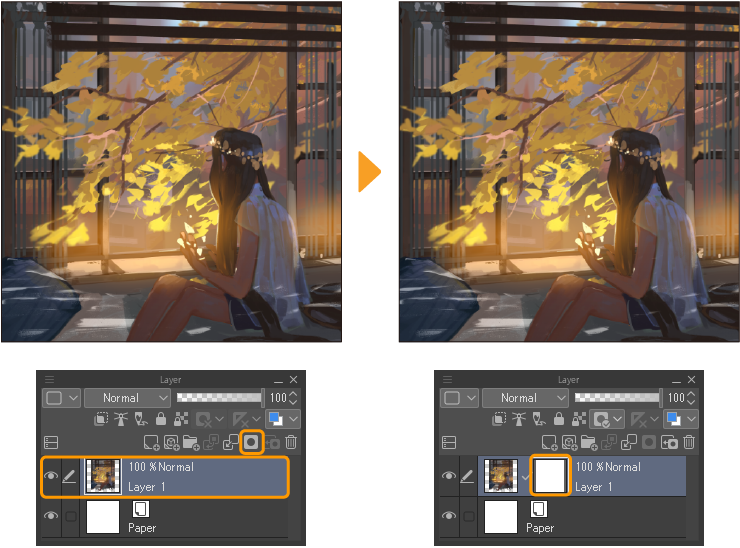
Next, use the Layer menu > Layer Mask > Mask Selection or Mask Outside Selection. A layer mask thumbnail will appear next to the layer with the visible area shown in white and the masked area shown in black.

You can also use the Mask Outside Selection icon on the Layer palette to create a layer mask.

If you create a layer mask without any selection area, a mask will be created for the entire layer.Mask outside selection masks the entire layer, and Mask Selection creates a layer mask with no areas masked.
To delete a layer mask, select the Layer menu > Layer Mask > Delete Mask while selecting the layer mask thumbnail.
You can also right-click the layer mask icon and use Delete Mask from the context menu.
Tapping the Delete key or Edit > Delete command will clear the mask layer so that no areas are masked.
Editing layer masks
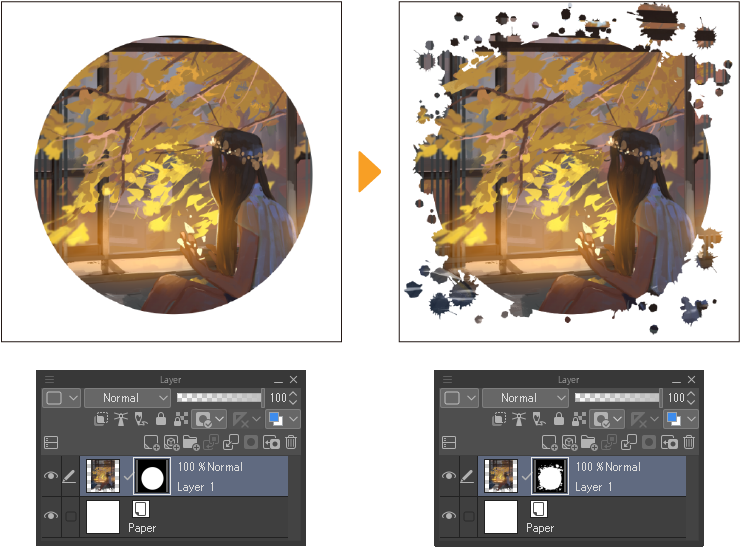
After creating the layer mask, you can change the masked area with drawing tools. Tap on the layer mask icon to edit it.
To mask more of the layer, draw on the mask layer with an Eraser tool or any drawing tool set to transparency. To uncover more of the layer, draw on the mask layer with any color.

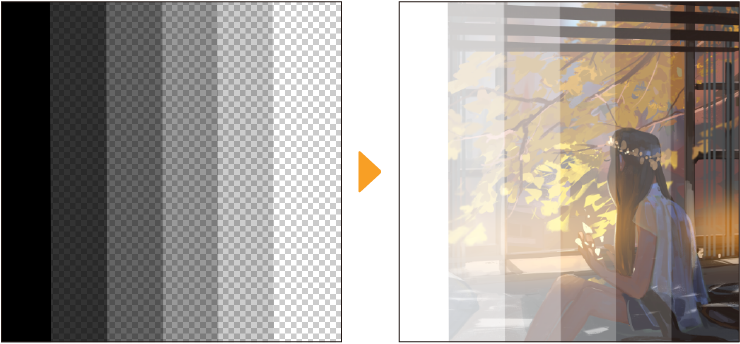
Memo | Unlike other software which may use a black-white scale for erasing and adding to the mask, Clip Studio Paint uses an alpha scale. |
You can use the Delete key or Edit > Delete command to clear the mask layer so that no areas are masked.
You can partially mask areas using gradients by going to the Layer Property palette for the layer mask and checking that Mask Expression > Show gradients is set to Yes.

When masking with gradients is turned off, using a color above a specified opacity will fully mask the area. You can adjust the threshold in the Layer Property palette > Mask Expression > Threshold.
Merging a layer mask
You can use the Layer menu > Apply mask to layer to combine the layer and the layer mask, deleting any parts that were covered by the mask. This also removes the layer mask from the Layer palette.
When you apply a layer mask, the resulting layer will be a raster-type layer, regardless of the original layer type.

You can apply layer masks to layers with keyframes by turning on Edit layers with active keyframes in the Animation menu.
Layer mask settings
Disabling a mask
You can temporarily hide a layer mask without deleting it by disabling it in the Layer menu.
Uncheck Enable Mask to disable it. A red cross will appear over the mask thumbnail to indicate it is disabled.

To enable the mask, simply check Enable Mask in the Layer menu again.
Show mask area
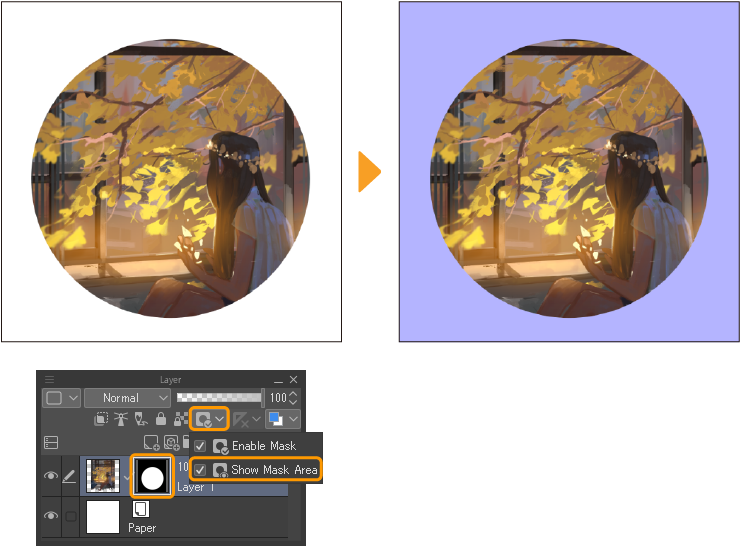
Select the Layer menu > Layer Mask > Show Mask Area to display the masked area in purple.

Link/unlink mask to layer
When the mask and layer are linked, the mask moves with the layer when using the Move layer tool or other layer transformations. When the layer is not linked to the layer mask, you can move them independently.
By default, newly created masks are linked to their respective layer, as indicated by a check mark between the thumbnails on the Layer palette.

You can toggle the layer linking on and off by tapping the check mark on the Layer palette, or from the Layer menu > Layer Mask > Link Mask to Layer.