Layer properties
You can add layer effects and change layer properties such as the layer color in the Layer Property palette. The available options and settings depend on the type of layer selected.
Memo | The Layer Property palette is not available in Clip Studio Paint DEBUT. |
The following properties are available for each layer type.
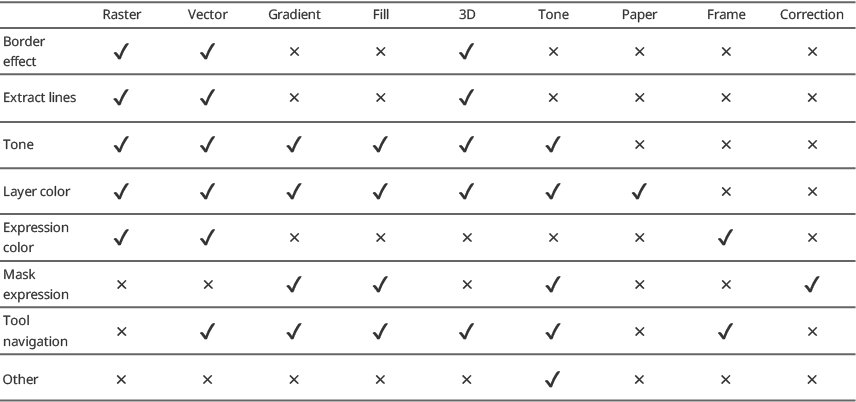
You can save layer properties as default for newly created layers of that type using the Layer Property palette menu > Save as default.
Border effect
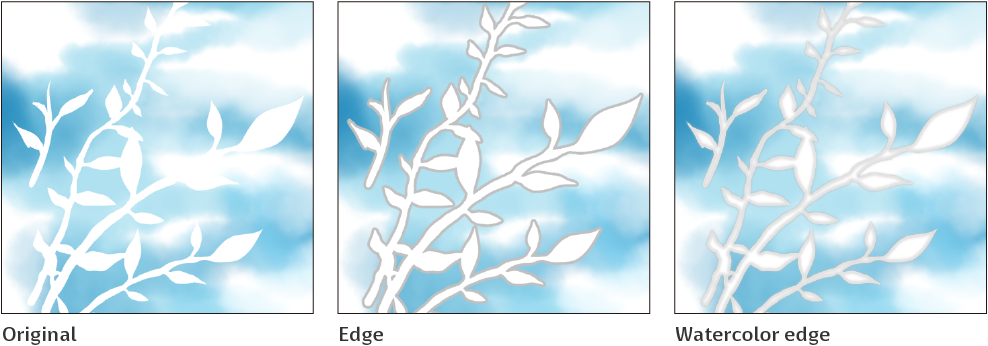
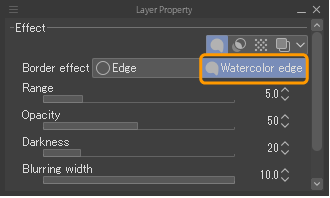
Border effect adds a border around the drawn parts of the layer. Two types of effects are available: Edge and Watercolor edge. Edge creates a solid color line around the layer content, while Watercolor edge creates a subtle pale edge like a watercolor stain.
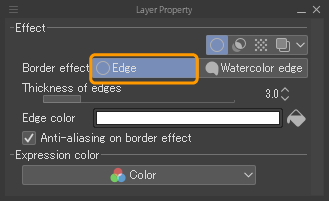
When Border color is turned on and set to Edge, you can adjust the thickness, color and anti-aliasing effect.
When Border effect is turned on and set to Watercolor edge, you can adjust the range, opacity, darkness, and blurring width. The color of the watercolor edge depends on the original color of the layer.
Extract lines (EX only)
The Extract lines button allows you to extract lines and black fill areas from the selected layer.
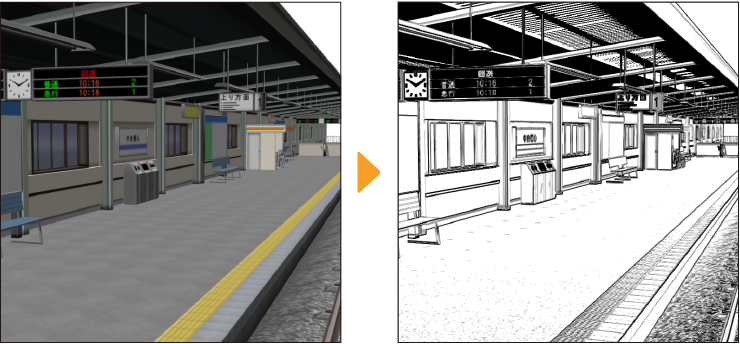
The settings are the same as the Extract lines section of the Layer menu > Convert to lines and tones dialog.
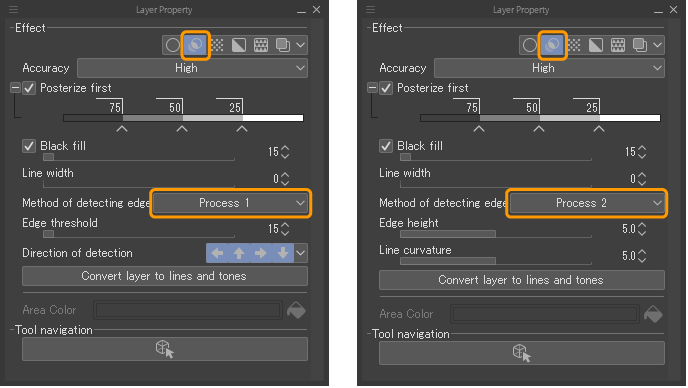
This layer effect can be toggled on and off.
To convert the layer permanently, tap the Convert layer to lines and tones button. This will open the line conversion dialog where you can adjust the settings and see the preview before confirming.
Memo | For more information on the Extract line settings and the settings in the Convert to lines and tones dialog, see "Convert to lines and tones (EX only)". |
Tone
The Tone effect allows you to view the layer as screentone dots. This effect can be toggled on and off.
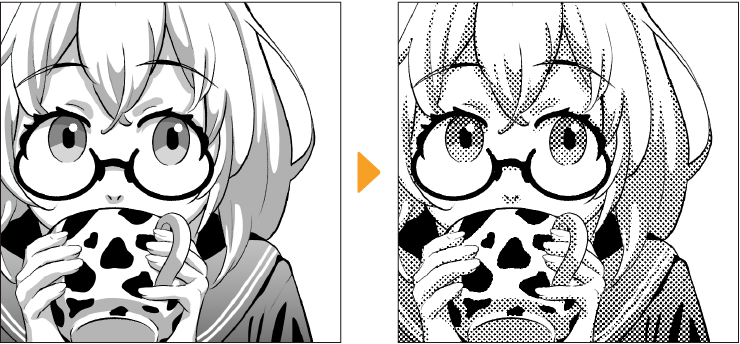
Turning this effect on will display the following settings. You can use these to adjust the tone density, frequency, angle, dot shape, and so on.
(1)Frequency
Specifies the number of screentone lines per inch. Larger values result in smaller dots.Grid/Ruler bar: Moves the grid and ruler bar.
(2)Density
Specifies the density of the tones (halftone dots). When set to Use color of image, the density is based on the original colors. Darker colors will result in denser screentones. When set to Use brightness of image, the density is based on the brightness. Parts drawn on lower layers will be seen under the screentones.
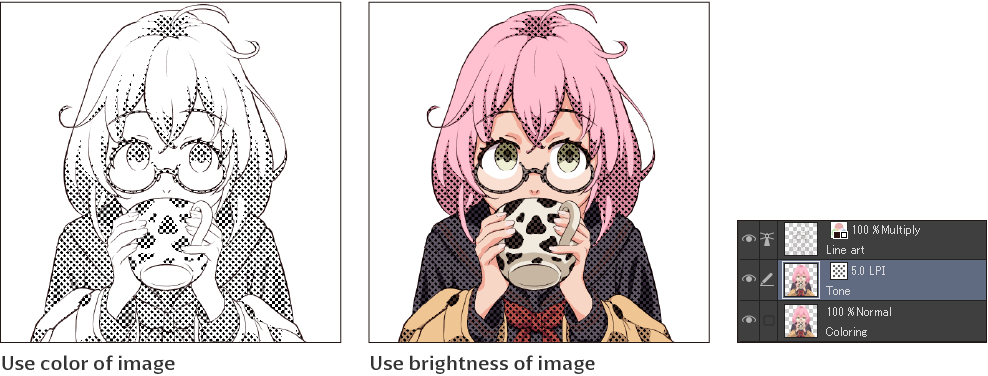
On Fill layers, Use specified density is also available. You can use the slider to adjust the density.
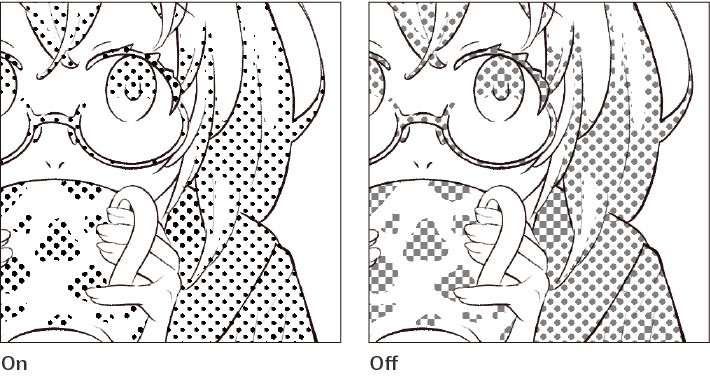
(3)Reflect layer opacity
When turned on, the opacity of the layer affects the size of the screentone dots. Even if the opacity of the layer is changed, the dots themselves do not change color, but the size changes to create a similar effect of opacity in black-and-white, like in the following image.
(4)Posterization
When turned on, you can adjust the density of the tone using the slider. This setting does not appear for Fill layers.
(5)Dot settings
Selects the pattern for the screentone. You can choose from: Circle, Square, Lozenge, Line, Cross, Ellipse, Noise, Sugar plum, Asterisk, Star, Carrot, Cherry (round), Cherry (mid), Cherry (thin), Flower (round), Flower (mid), Flower (thin), Clover (round), Clover (thin), Ninja star, Diamond, Heart, Clubs, and Spades.
(6)Angle
Sets the angle of the tone pattern (halftone dots).
(7)Size
You can adjust the noise size when Noise is selected under Type.
(8)Factor
You can adjust the noise factor when Noise is selected under Type.
(9)Dot position
You can move the dot pattern in the horizontal (X) and vertical (Y) directions.
(10)Area color
When Show Tone Area is turned on, you can set the color of the tone areas and areas with image materials. Tap the color indicator to open the Color settings dialog box where you can set the color.
Layer color
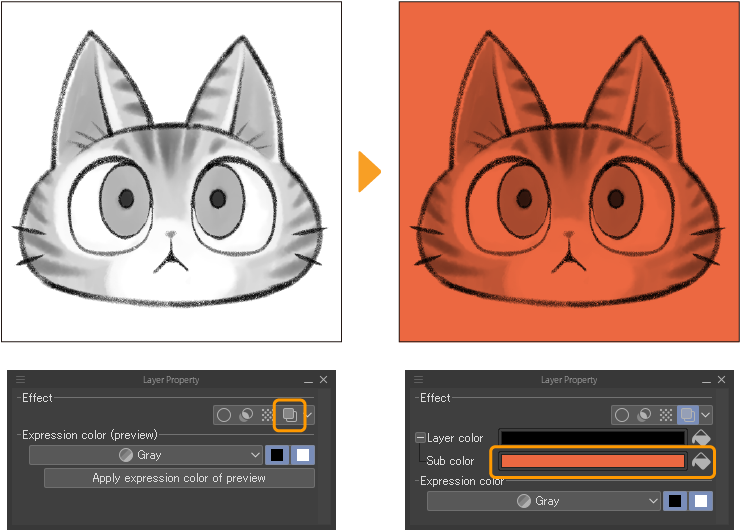
The Layer color effect allows you to view the layer in a specified color. You can also toggle this effect from the icon on the Layer palette.
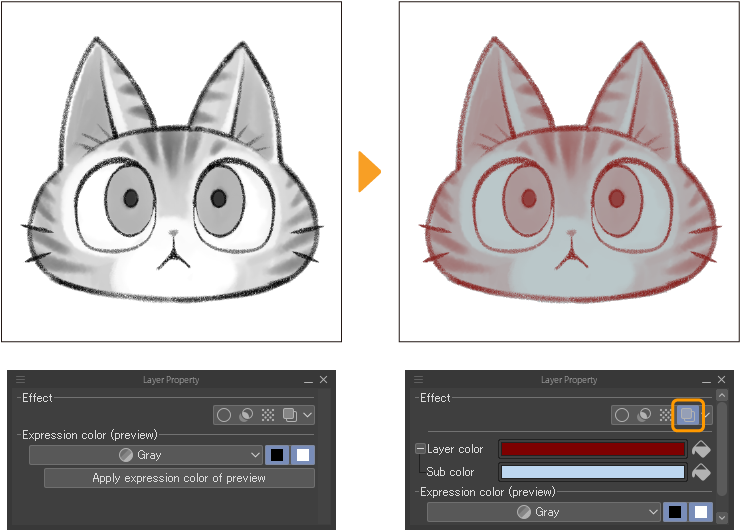
Tapping the layer color bar will open the Color settings dialog box where you can set the color. You can also tap the Fill icon to the right to use the current drawing color. The chosen layer color replaces black.
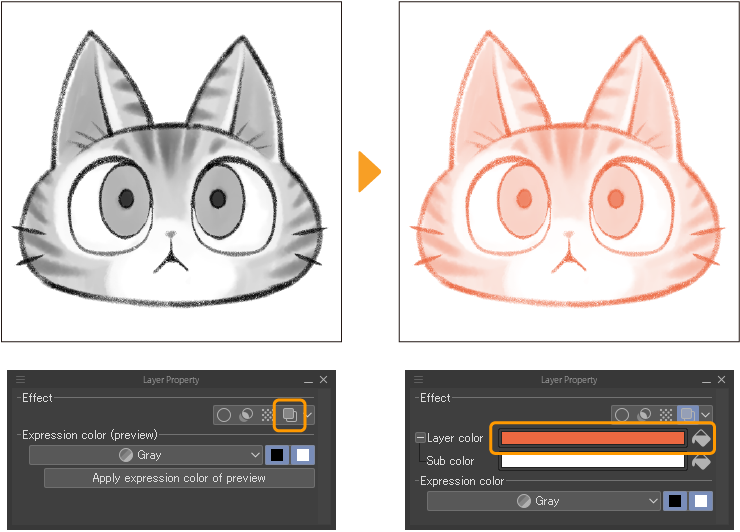
You can also specify a sub color to replace white. Tap the indicator to set the color or tap the Fill icon to set the current drawing color. When a sub color is set, white areas in the original layer will change to the specified color.
Expression color
This setting changes the expression color of the selected layer. You can change the expression mode to Color, Gray or Monochrome.
Memo | For more details on expression colors, please see "Expression Colors and Drawing Colors". |
When changing to an expression color with less information, such as changing a Color layer to Grey or Monochrome, the change first appears as a preview. You can adjust the preview using the sliders before confirming the change.
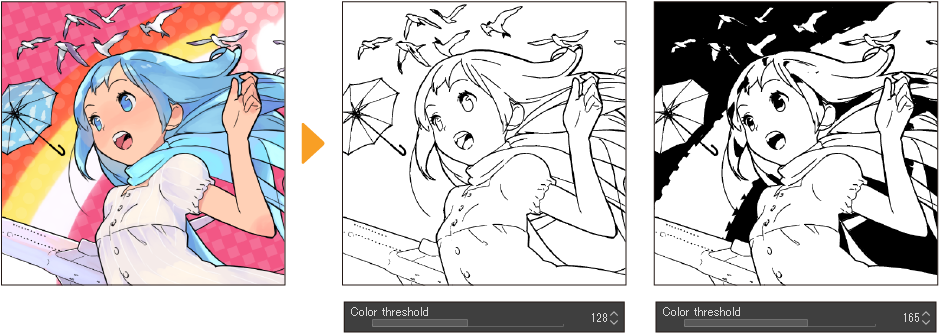
When converting to a Monochrome layer, you can adjust the threshold at which the original colors are displayed in black or white.
Color threshold: The color threshold set with the slider determines the border between black and white.
Alpha threshold: The alpha threshold for opacity set with the slider determines the border between black and white and transparent.
Reflect layer opacity: This setting determines whether the original layer’s opacity is referred to. When turned on, the drawing color is divided into black, white, and transparent, based on the original colors and layer opacity. When turned off, it applies opacity to the layer after converting the expression color to monochrome.
Once you apply the previewed expression color, you cannot revert the effect by changing back to the original expression color.
Display decrease color
The Display decrease color setting allows you to display an image material or 3D material in limited colors such as greyscale or monochrome without changing the expression color mode. This effect can be toggled on and off.

When displaying the image as Monochrome, you can adjust the threshold at which the original colors are displayed in black or white.
Color threshold: The color threshold set with the slider determines the border between black and white.
Alpha threshold: The alpha threshold for opacity set with the slider determines the border between black and white and transparent.
Reflect layer opacity: This setting determines whether the original layer’s opacity is referred to. When turned on, the drawing color is divided into black, white, and transparent, based on the original colors and layer opacity. When turned off, it applies opacity to the layer after converting the expression color to monochrome.
Mask Expression
This setting appears when a layer mask is selected. It allows you to set whether to allow partial masking of areas using gradients. When Mask Expression > Show gradients is set to Yes, you can partially mask areas by drawing with semi-transparency.
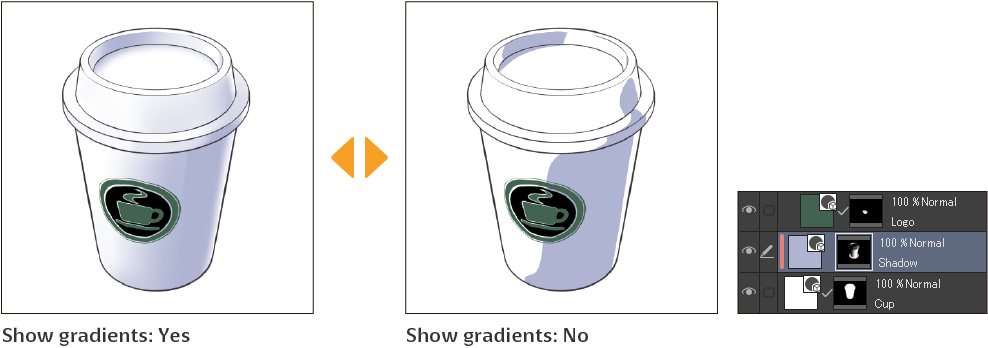
When masking with gradients is turned off, using a color above a specified opacity will fully mask the area. You can adjust the threshold in the Layer Property palette > Mask Expression > Threshold.
Tool navigation
Tool navigation displays tools and sub tools that can be used for editing the selected layer.
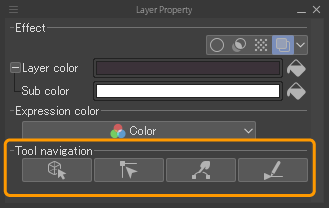
Hover over a tool icon on the Tool navigation bar displays the tool name. Tap a tool icon to switch the tool/sub tool.
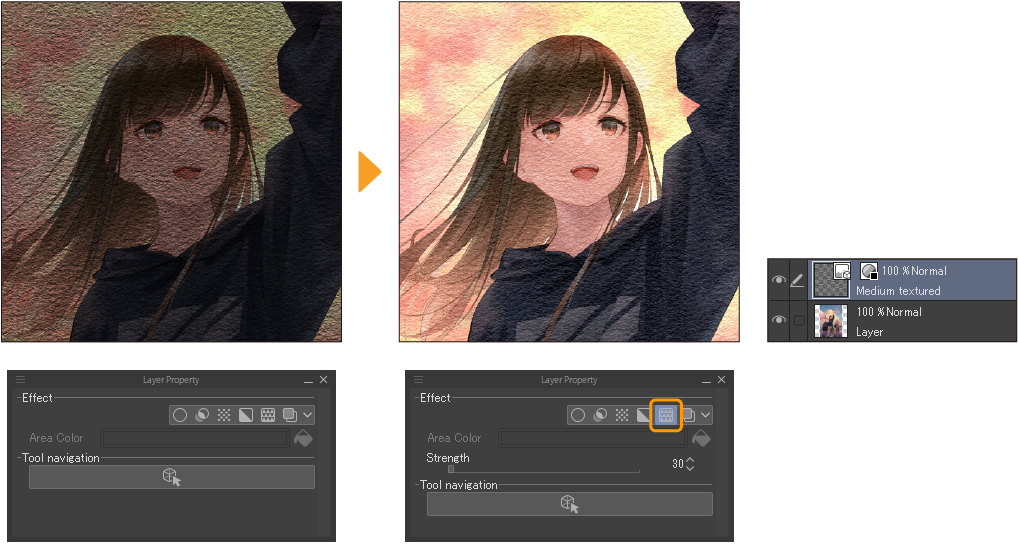
Overlay texture
The Overlay texture setting is available for image material layers only. It is designed for use with texture images.
When turned on, you can set the strength of the texture effect using the slider.
Color mode
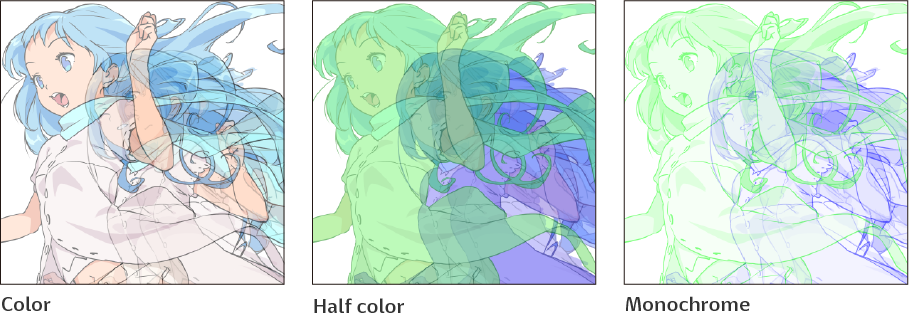
The Color mode setting is only available for light table layers. This setting determines how layers are shown on the light table.
Color: The original colors are used.
Half color: The original colors are combined with the layer color.
Monochrome: The layer color and sub color are used as a gradient to replace the original colors.
