Moving tools
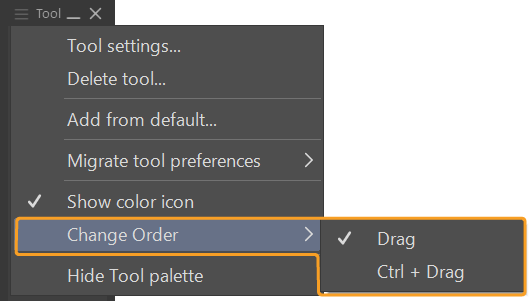
You can drag tools and tools to move them around. First check the Change Order setting from the Tool or Tool Group palette menu to confirm how to move tools.
·Drag means that you will be able to move a tool by simply dragging it around. This is the default setting.
·Ctrl + Drag means that you will have to hold down Ctrl while dragging a tool. This prevents accidentally moving the tools.
Customize tool palette
Change tool name
Select the name of the tool you want to rename and open the context menu or the Tool palette menu, then tap Tool settings.
In the Tool settings dialog, enter the new name and tap OK. The new tool name will be reflected in the Tool palette.
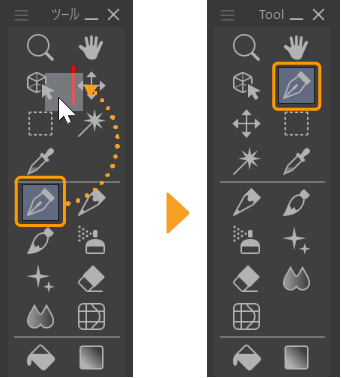
Change tool position
In the Tool palette, you can drag and drop tool icons to move them.
Add separator
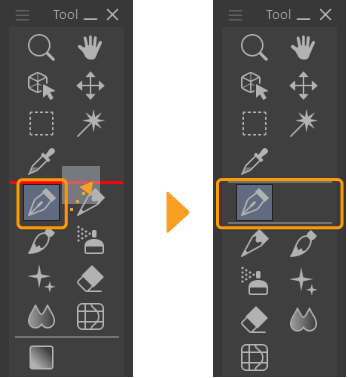
In the Tool palette, drag a tool on top of a separator. This will create a new separator above or below the dropped tool icon.
Add tool
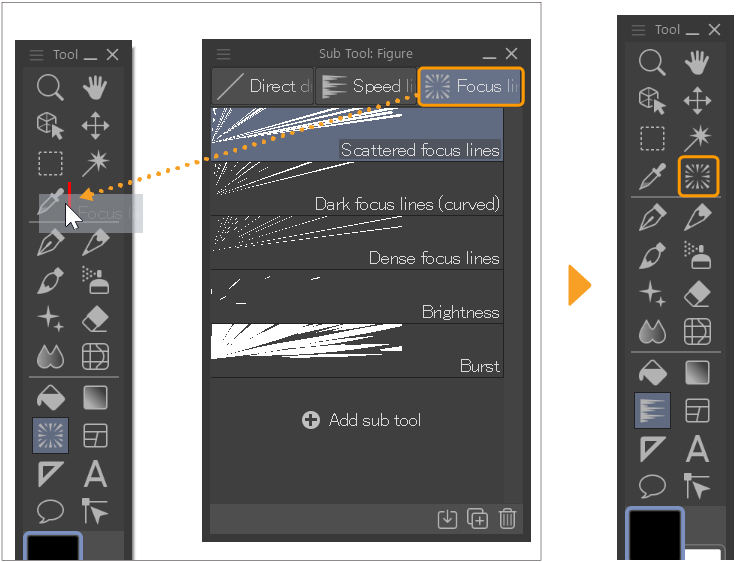
From the Tool Group palette, drag a tool or tool group and drop it on the Tool palette. This will add the tool as a new Tool category.
Delete tool
Select the tool you want to delete from the Tool palette and open the context menu or the Tool palette menu, then select Delete tool.
Important | Deleting a tool will also delete its tool groups. |
Turn dynamic icons on or off
You can change whether the Tool icon changes depending on the currently selected tool, or if is it locked to always show a specific tool icon. From the Tool palette menu > Icon to choose from Selected tool or First tool.
When set to Selected tool, the Tool icon will change to match the icon of the selected tool. When set to First tool, the Tool icon will always be the icon of the topmost tool in the first tool group for that tool.
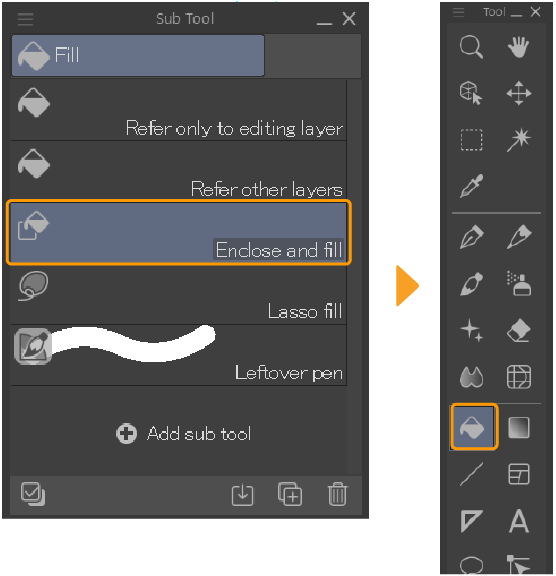
Customize tool palettes
Change the display of the tool group
Select the Tool Group palette menu > Show tool group name to either show or hide the tool group name.
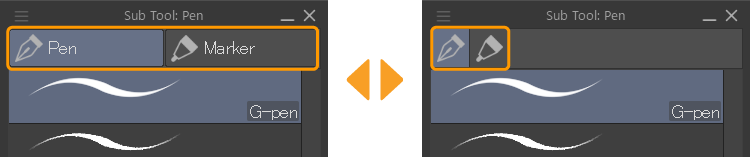
Change tool group name
Select the name of the tool group that you want to rename and open the context menu or the Tool Group palette menu, then select Rename tool group.
In the Rename tool group dialog, enter the new tool group name and then tap OK. The new tool group name will be reflected in the Tool Group palette.
Memo | The icon for the tool group is determined by the tool that is located at the top of the tool group list. |
Move a tool group
In the Tool Group palette, drag and drop the tool group to move it to a new position.
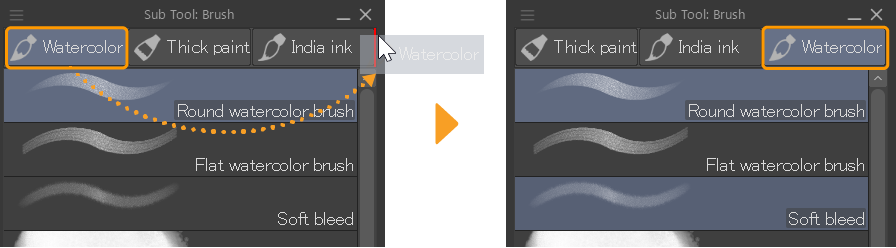
Add a tool group
To create a new tool group, drag a tool that you want to put into the new tool group and drop it to the edge of the tool group tabs.
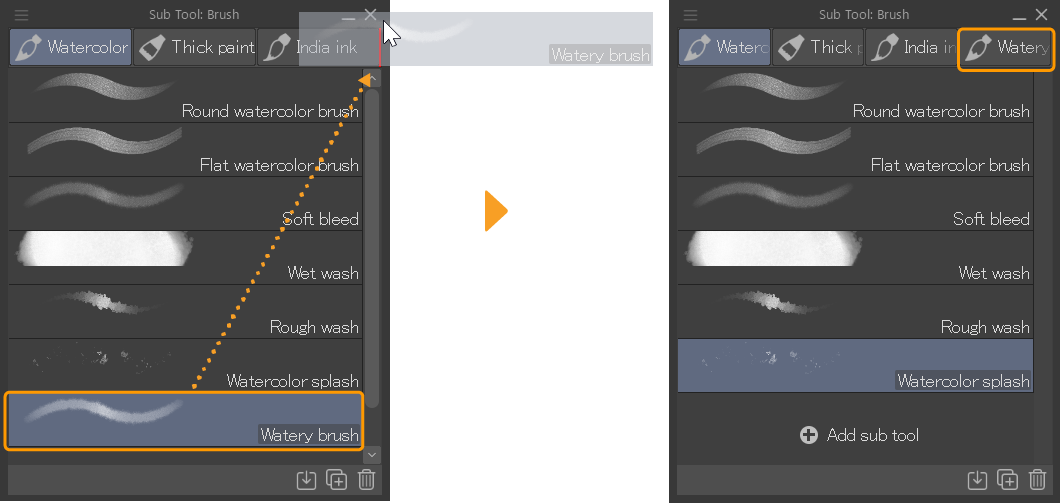
Change tool group layout
Go to the Tool Group palette menu > View to change how tools are displayed in the list.
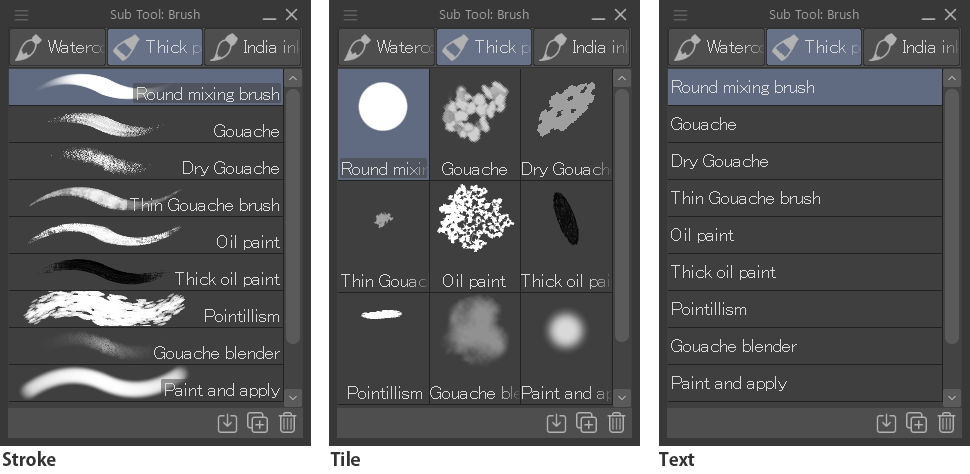
Stroke
For tools for drawing, you will see the stroke and the tool name. With other tools, the tool icon will be shown instead of the stroke.
Tile
Shows the tool as a tile. You can select from Tile or Tile small. With drawing-type tools, you will see the brush tip shape and the tool name. With other tools, the tool icon will be shown instead of the brush tip.
Text
The tool name will be displayed as text. Neither the stroke or tool icon will be shown.
Show checkboxes
You can make checkboxes appear beside each tool with the following methods.
·Tool Group palette menu > Select with checkbox
·Tap the Select with checkbox icon at the bottom of the Tool Group palette
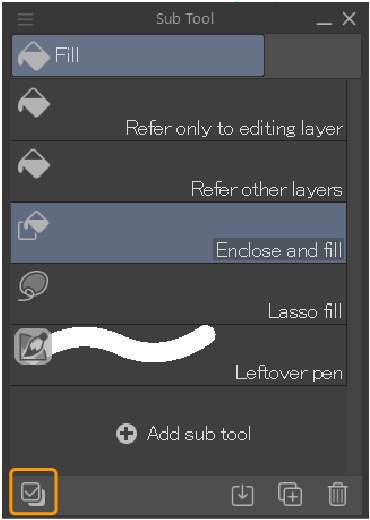
You can use the checkboxes to select multiple tools at once, in order to perform joint actions like moving them together or exporting them.
Memo | ·You can also hold down the Ctrl key to select multiple tools at once. ·For information on moving tools, see "Move a tool". ·For information on exporting tools, see "Exporting tools". |
Change tool name or icon
To change the name or icon for a tool, select it and open the context menu or the Tool Group palette menu, then select Tool Properties.
Once the Tool Properties dialog appears, set the new name and tool icon and then tap OK to reflect your changes onto the Tool Group palette.
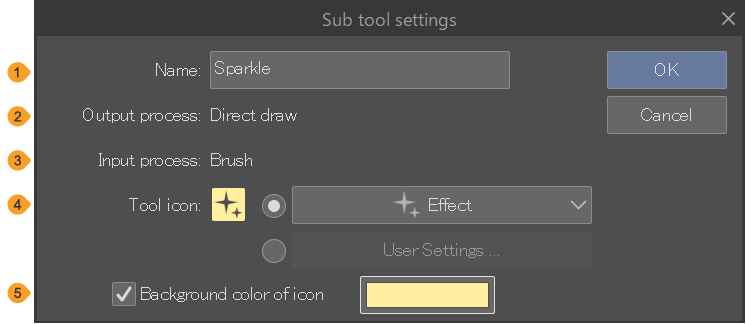
(1)Name
(2)Output process
(3)Input process
(4)Tool icon
You can set an icon for the tool. Select User preset to bring up a dialog that lets you select an image file to use. You can use BMP, JPEG, PNG, TIFF, and Targa files. To change a custom icon you’ve already added, tap User preset again.
(5)Background color
Turn this on to change the background color of an icon. Tap the color displayed to bring up the Color settings dialog where you can pick a color.
Duplicate a tool
Select the tool to copy and open the context menu or the Tool Group palette menu, then select Duplicate tool.
Once the Duplicate tool dialog appears, set the new name and tool icon and then tap OK to reflect your changes onto the Tool Group palette.
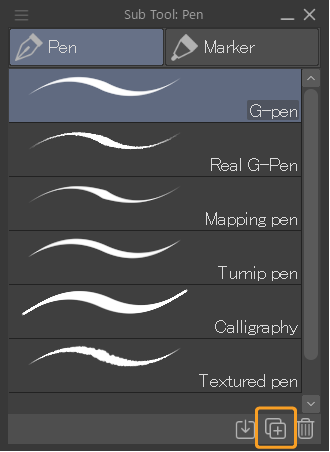
The settings in the Duplicate tool dialog are the same as the Tool Properties dialog.
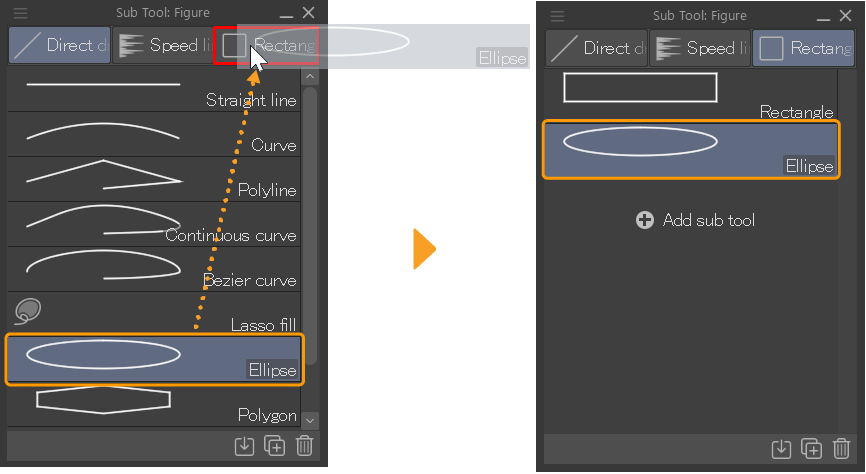
Move a tool
In the Tool Group palette, drag and drop the tool to move it to a new position.
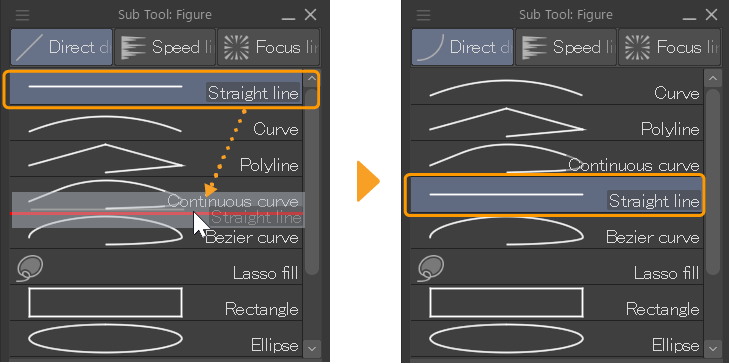
You can also drag tools to different tool groups or tools by dropping onto the new tool group tab or the tool icon. You can drag and drop the entire tool group to move it.
Delete a tool
To delete a tool, highlight the tool and tap the Delete tool at the bottom of the Tool Group palette. You can also drag the tool onto the Delete tool icon, or use the Delete tool command from the context menu or the Tool group palette menu.
Memo | If you delete all tools in a tool group, then the group will also be deleted. |