Adjusting 3D space
You can add a 3D fog effect to create a sense of depth, as well as correct warping by straightening materials.
Important | 3D layers with Fog or Straighten effects cannot be edited in Clip Studio Paint Ver. 1 and earlier. You can set these effects to be visible even when opened in Ver. 1 or earlier from Preferences > "File" > Save in compatibility mode. |
Fog
You can add depth to a 3D space with the Fog settings when a 3D object or layer is selected. When Fog is applied, objects further from the camera appear more obscured, creating a sense of depth.
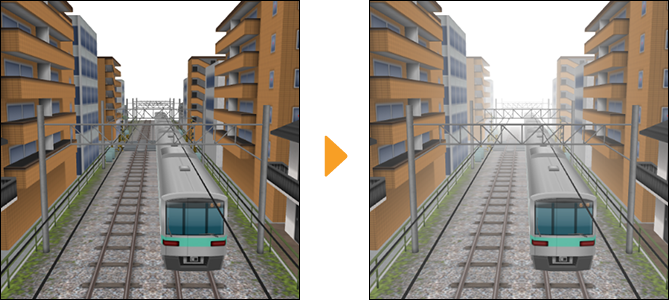
To add fog to a 3D layer, tap Enable fog in the Advanced Tool Settings palette > Fog category.
You can change the fog appearance with the Fog type. The default setting is Distance fog.
Distance fog is a spherical fog that becomes thicker relative to the distance from the camera.
Depth fog is a flat fog that becomes thicker relative to the distance from the screen.
Fog height is a flat fog that changes thickness based on height.
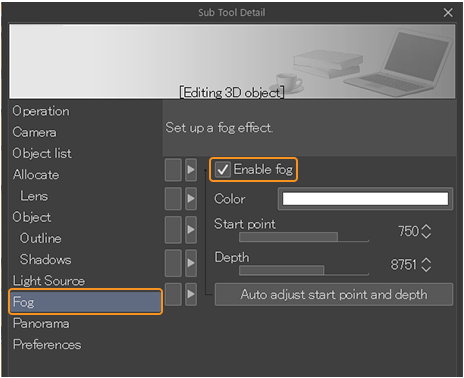
You can adjust the fog’s appearance with the Start position and Depth settings.Start position applies fog at a specified distance from the camera.Depth specifies the thickest part of the fog in terms of distance from Start position.
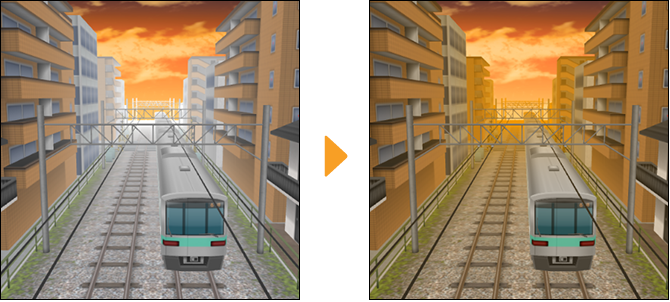
You can also change the color of the fog using the Color setting, and change the opacity with the Opacity setting. This is useful when you want to blend 3D materials with the color of the background.
For example, the image below shows an image with a sunset in the background. Changing the fog color to orange helps the 3D material blend in.
When the fog is set to Fog height, you can use the direction setting to make it come from below or from above.
Straighten
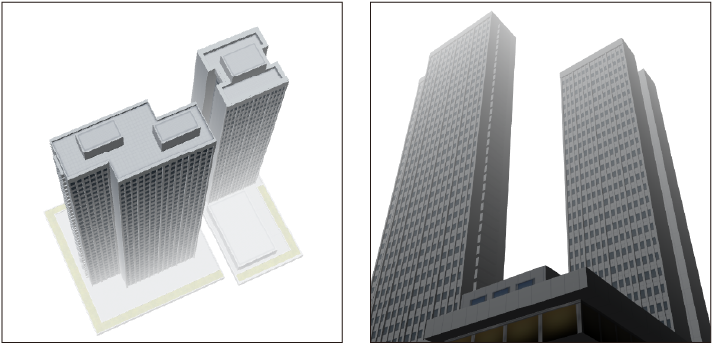
You can correct distorted 3D objects with the Advanced Tool Settings palette > Lens category > Straighten setting. While a 3D object is selected, tap Straighten to make the vertical lines perpendicular to the ground and make the 3D layer appear like two-point perspective.
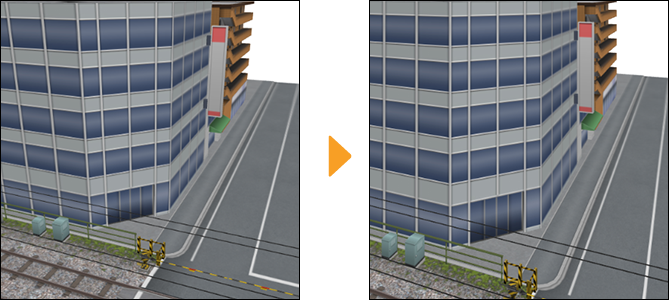
You can revert the effect by tapping Reset adjustment.