3D Head Models
Clip Studio Paint includes 3D head models to help you with character illustration. You can adjust the face blend and individual facial features as well as save customized 3D head models as new materials.
Important | 3D layers with 3D head models cannot be edited in Clip Studio Paint Ver. 1 and earlier. You can set the model to be visible even when opened in Ver. 1 or earlier from Preferences > "File" > Save in compatibility mode. |
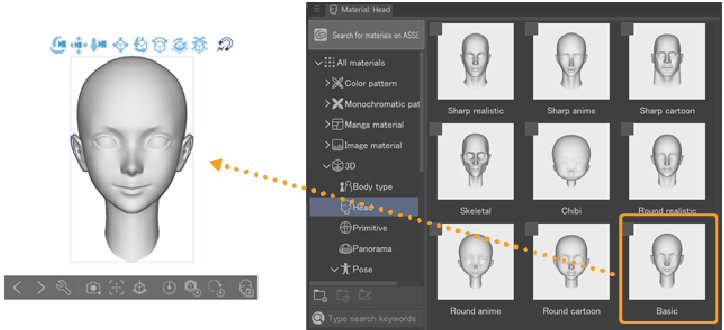
You can find the 3D head models in the Material palette > 3D > Head. There are 9 preset head model shapes with different appearances. Drag a material to the canvas to use and edit it.
Face Mixer
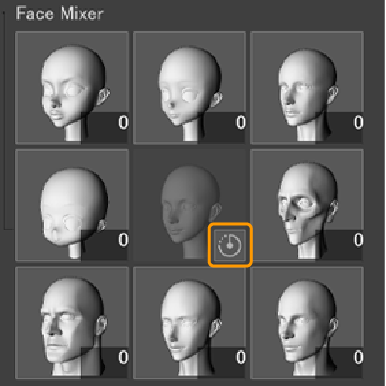
You can edit the face mix from the Tool Property palette or Sub Tool Detail palette > Head model category > Face Mixer setting. The nine dimensions of the face mixer are shown here. The center tile is the default base face.
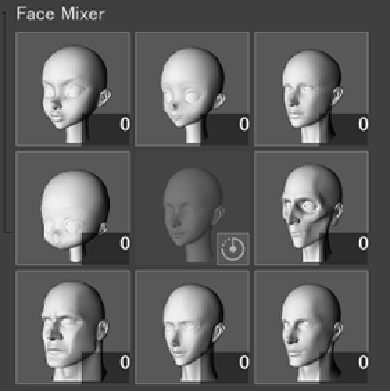
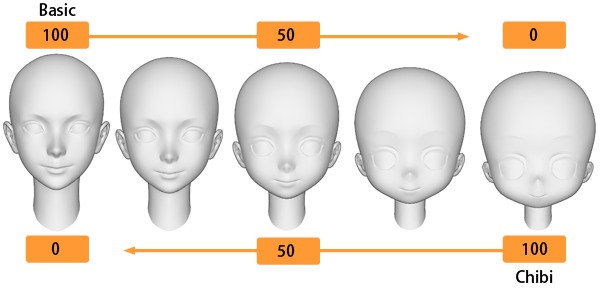
The numbers displayed at the lower right side of the thumbnail of each face in the Face Mixer indicate the level of that dimension. You can increase or reduce the level of each dimension by dragging the sliders or entering a number.
If a single dimension is set to 100, the head model will appear exactly as it does in the tile.
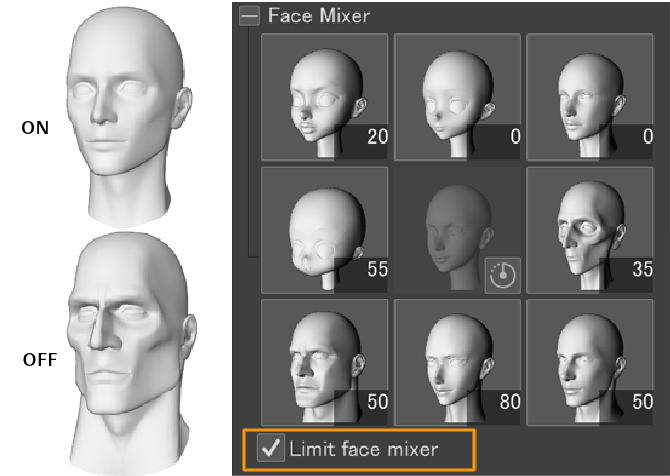
If each dimension is set to a high level, the head model may distort. If you want to avoid this, turn on Limit face mixer. However, if you want to create a face with more unrealistic aspects, you might want to keep it off.
Resetting the head model
You can reset the head model to the default base face by tapping the reset icon on the at the bottom right of the center tile.
You can also reset the head model entirely, including adjusted facial features, by importing a head model from the Material palette to the canvas again.
Adjusting facial features
You can adjust individual facial features from the Sub Tool Detail palette > Facial features category. Adjustable features are the head, brows, eyes, ears, nose, mouth, neck, and head tilt. For details on adjusting the head tilt, see "Adjusting the head tilt".
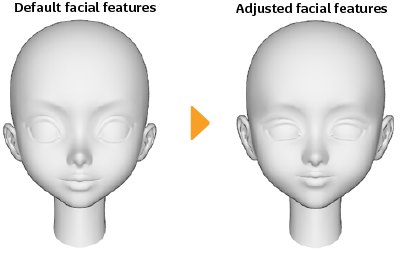
In the Tool Property palette > Facial features, select the part you want to edit and adjust the sliders that appear on the right side.
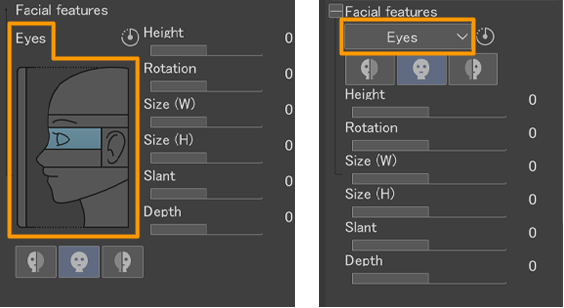
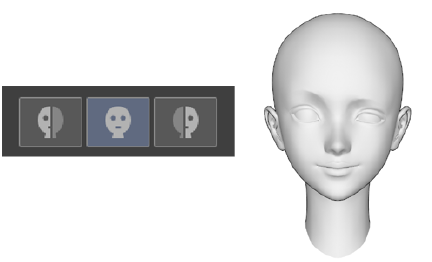
For eyes, eyebrows, and ears, you can switch to editing only the left or right side independently using the icons beneath the profile image. By default, the setting affects both sides.
Adjusting the head tilt
You can adjust the head tilt by tapping the vertical bar (Direction) to the left of the head profile.
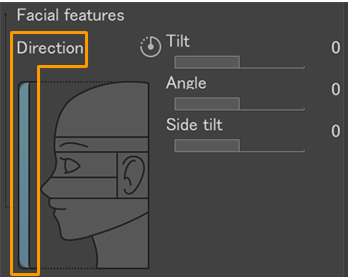
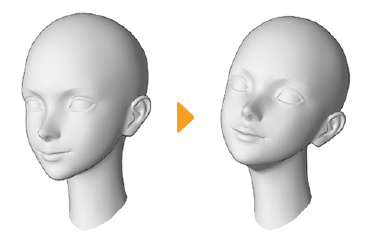
By default the head model faces forward, but you can change the face direction to show movement and emotion. You can adjust the Tilt (tilting the chin up or down), Angle (side-to-side rotation), and Side tilt.
Resetting the facial features
You can restore each part to the default appearance by tapping the reset icon on the top part of the palette while the part is selected.
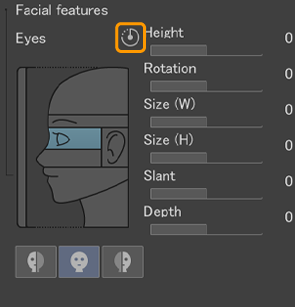
To reset the entire head model, see "Resetting the head model".
Saving a head model material
You can save a customized head model as a new material by tapping it with the Object sub tool and using the Sub Tool Property palette > Head model > Register material button, or by tapping the icon on the Object Launcher when the head model is selected.

Loading a saved head model material
You can import a head model material to the canvas by selecting it the Material palette and tapping the Load to canvas icon at the bottom of the palette. If a head model is already selected on the canvas, the new model will replace it.