Page Manager
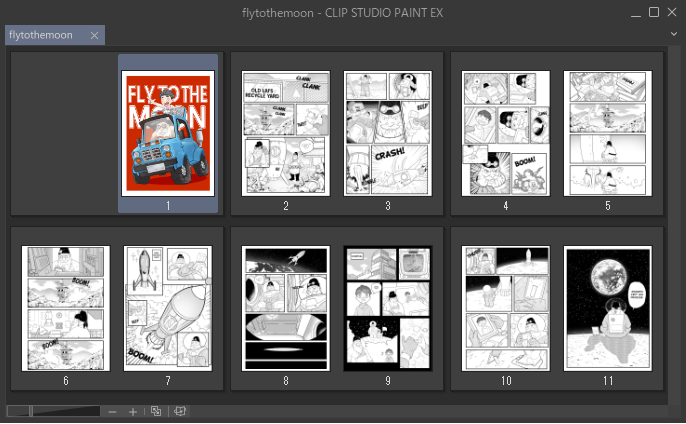
The Page Manager shows all the pages in the current project.
To display the Page Manager, open the management file (extension: cmc) from the File menu > Open, or select the Story menu > Page Manager while any page in the project is open.
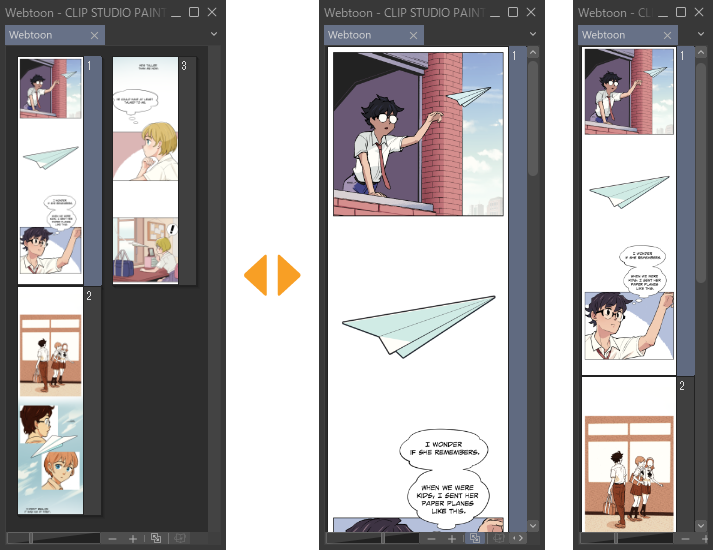
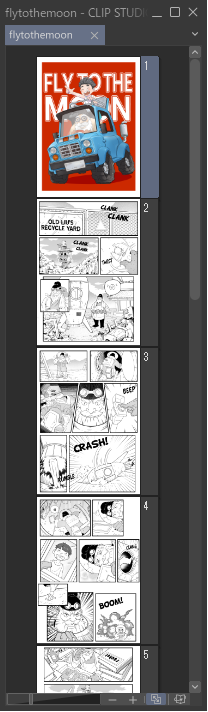
The appearance of the Page Manager depends on the current project settings. Projects that will be bound like a book will be lined up horizontally, while webtoon projects will be lined up vertically. Pages are represented by page thumbnails.
Select the page you want to edit from the Page Manager by tapping the page thumbnail. To select multiple pages, hold Ctrl while selecting each item. To select multiple consecutive pages, hold down the Shift key and tap the first and last pages.
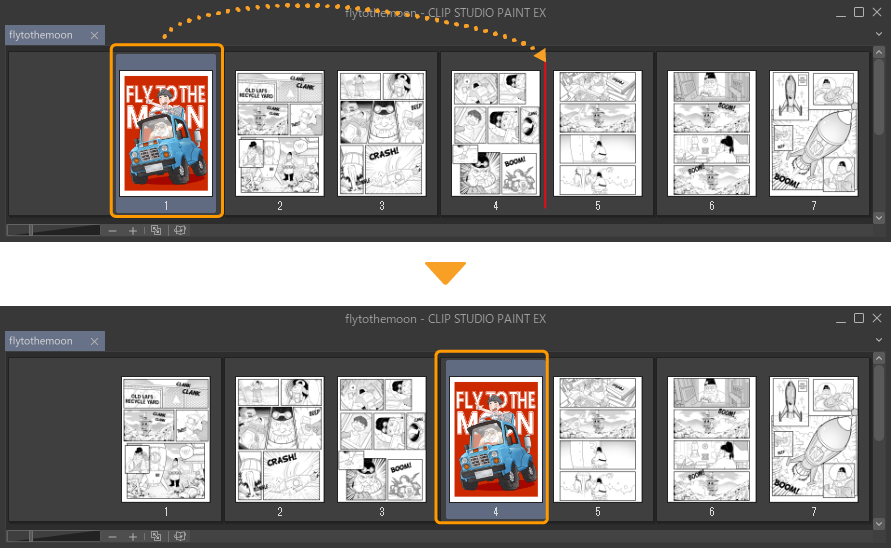
Moving pages
Select a page in the Page Manager and drag and drop it to where you want to move it. You can move multiple pages at once.
Memo | If you cannot reorder pages by dragging and dropping, check your settings in the Story menu > Page Reordering. If Ctrl + Drag is selected that means you will need to hold the Ctrl key while dragging. You can change to just drag and drop by switching the setting to Drag. Ctrl + Drag is helpful to avoid accidentally changing the page order. However, you cannot use Ctrl to perform operations that combine other modifier keys, such as duplicating a page. |
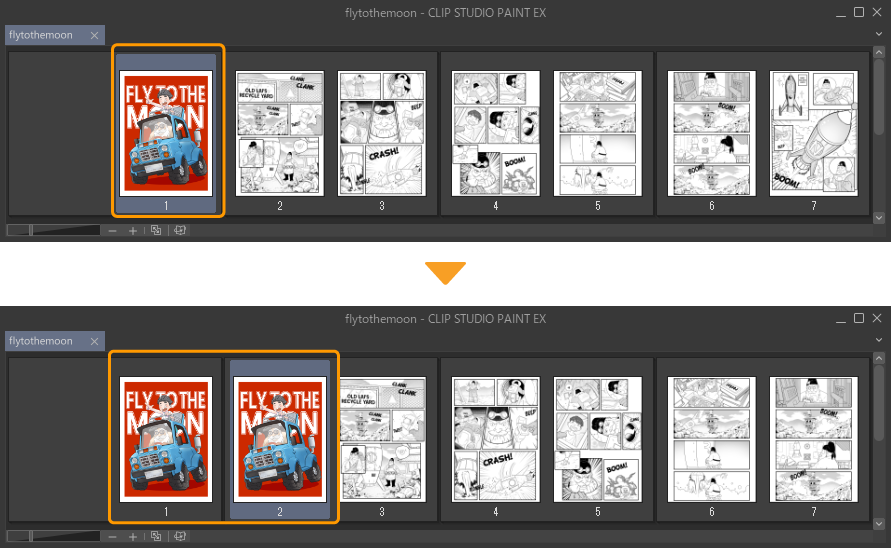
Duplicating pages
To make a copy of the page you have selected from the Page Manager, select Story menu > Duplicate Page. You can also select a page and press Alt while dragging and dropping to duplicate the page. You can duplicate multiple pages at once.
If the Story menu > Page Reordering setting (see "Moving pages") is set to Ctrl + Drag, you can hold Ctrl and Alt while dragging to duplicate a page.
When there is a two-page spread after the selected page, or when there is a cover page set, a blank page file will be added to maintain an even number page count.
Adding pages
Select the Story menu > Add Page to add a new page after the selected page. The resolution and basic expression color of the new page will be the same as specified in the New dialog or Change project settings dialog.
When a two-page spread is after the selected page, or when there is a cover page set, two new pages will be added.
Go to the Story menu > Add Page (Advanced) to open a dialog box where you can add pages and dictate settings for the new pages.
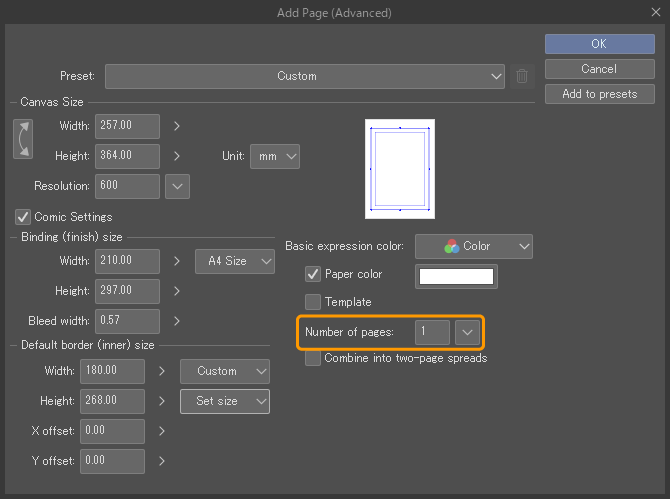
The Add Page (Advanced) dialog shows the most recent project settings. Change the settings as needed, specify the number of pages you want to add in Number of pages, and tap OK. The pages that you have added from the dialog box will appear in the Page Manager.
If a two-page spread is after the selected page, or when there is a cover page set, a blank page file will be added to maintain an even number page count even if Number of pages has the total set to an odd number page count.
Memo | For details on the settings in the Add page (Advanced) dialog, see "New dialog box (Show all comic settings)". |
Import a different file as a page
You can add pages from other files by selecting the Story menu > Import Page(s). In the dialog that appears, select the files you want to import and tap Open. The selected pages will appear in the Page Manager. If you have selected multiple pages, multiple pages will be added at once.
When a page is added to the Page Manager, the file will be duplicated and stored in the page management folder. The selected file data will remain wherever it was originally stored.
If there is a double-page spread behind the added page, or if the project has a cover, white pages may be added so that the number is even.
Load pages from multi-page projects
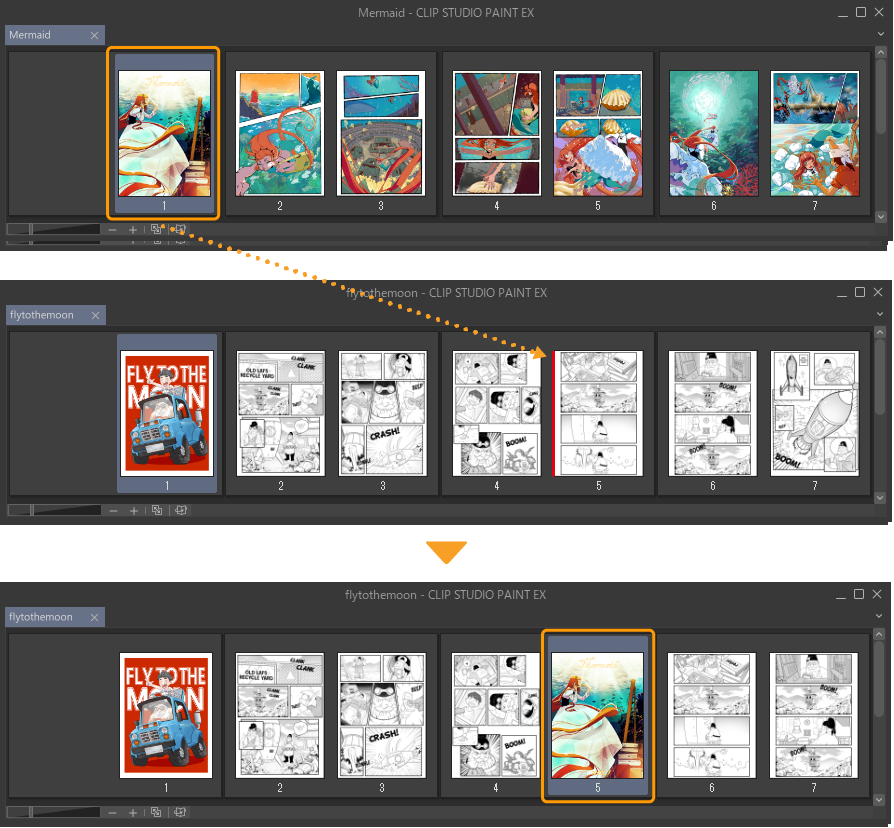
Select the management file (extension: cmc) to import pages from. The Import pages dialog box will pop up and you can enter which pages you want to import. You can also open the Page Manager that contains the pages you want to import, and drag them to the Page Manager of the project you want to add them to.
You can also import PDF files. On Windows devices and macOS devices with an Intel chip, you can import Comic Studio (Manga Studio 4) files (ext: .cst).
When a ComicStudio file or a PDF file is selected, a dialog box will appear with settings to convert them to a Clip Studio Paint management file (extension: cmc). Follow the instructions on the screen to convert it and you will be able to load the pages.
Replace page with another file
You can replace a page by selecting it in the Page Manager, then using the Story menu > Replace page. Choose a file to replace the selected page with. Once it has been replaced, the original page data will also be erased.
You cannot replace multiple pages, but you can replace merged two-page spread pages with another two-page spread. You cannot replace a single page with a two-page spread, or vice versa.
You cannot replace any management files that control multiple pages with this function.
Memo | When multiple people are collaborating on a project and a page assigned to someone is replaced with the Replace page function, the assignment setting will also be lost. |
Making your page a two-page spread or a single page
You can combine pages to make a two-page spread or divide pages to make single pages. You will not have this option if you selected Webtoon as your project type.
Combine Pages
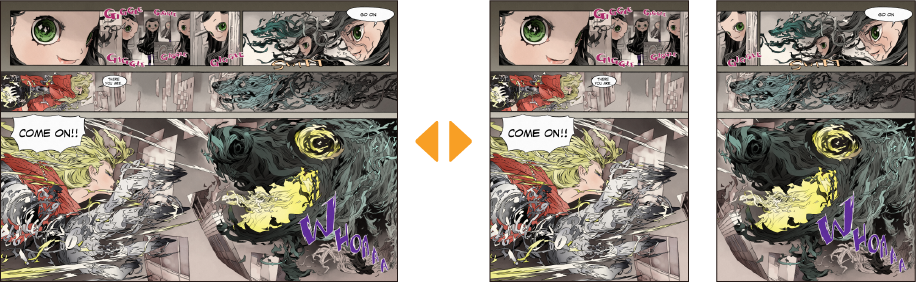
You can combine two consecutive pages to become one. When you combine pages for a two-page spread, you get rid of the need to draw on the two pages separately.
From the Page Manager, select the pages you want to convert to a spread. Go to the Story menu > Combine pages. The Combine Pages dialog box will appear along with the settings for the crop marks.
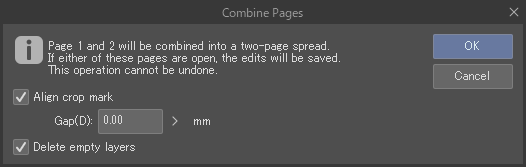
Turn Align crop marks off to combine the pages at the edges. Turn it on to have the pages aligned at the cropped border. The position of the cropped border on the left and right pages can be adjusted with the Gap setting. Turn Delete layer with no drawing on to delete empty layers.
Tap OK in the Combine Pages dialog to combine the pages.
Change to Split Pages
You can split combined pages made into two-page spreads back into two single pages. From the Page Manager, select the two-page spread you want to split and select the Story menu > Split pages.
A dialog box will pop up similar to when you combine pages, with an option to delete empty layers.
Delete pages
From the Page Manager, select the pages you want to delete, then go to the Story menu > Delete Page.
If you have selected an odd number of pages on a project with two-page spreads or a cover, then you may not be able to delete the selected pages. In this case, please select an even number of pages to delete. You cannot delete pages in a way that would misalign the two-page spread.
Rename page files
When you add and rearrange pages, the page file names will not change. This can cause the page names in the Page Manager to be out of order.
Go to the Story menu > Sort page file names to rename the file of each page according to their order in the Page Manager. If you have a two-page spread that is combined, then the name for each page will be reflected in the new name, for example: “page0006-page0007.clip.”
Memo | You cannot use Sort page file names if you are using the file for group work. |
Page Manager display
Change the thumbnail display size
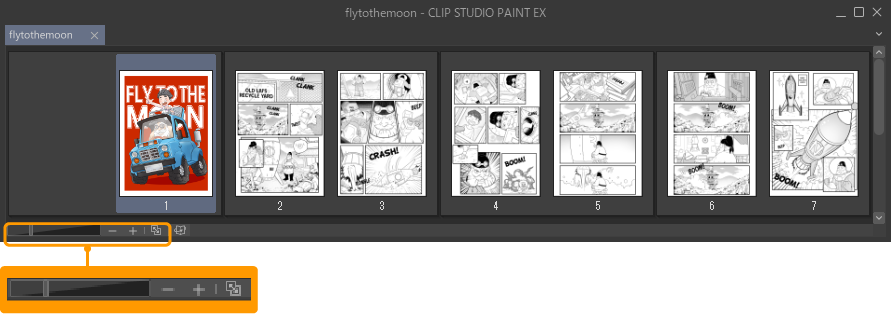
You can adjust the size of the thumbnails from the buttons at the bottom-left of the Page Manager.
Tap + or - to change the size of the thumbnails. You can also change the size of the thumbnails with the slider. Alternately, you can use the View menu > Zoom In/Zoom Out.
Tap Fit to Navigator to adjust the size of the thumbnails to fit the width of the Page Manager. When you change the size of the Page Manager window, the size of the thumbnails will adjust accordingly. This is useful when checking webtoons to line them up vertically. Alternately, you can use the View menu > Fit to Navigator.
Tap Fit to Navigator again to undo the setting.
Change Page Manager display position
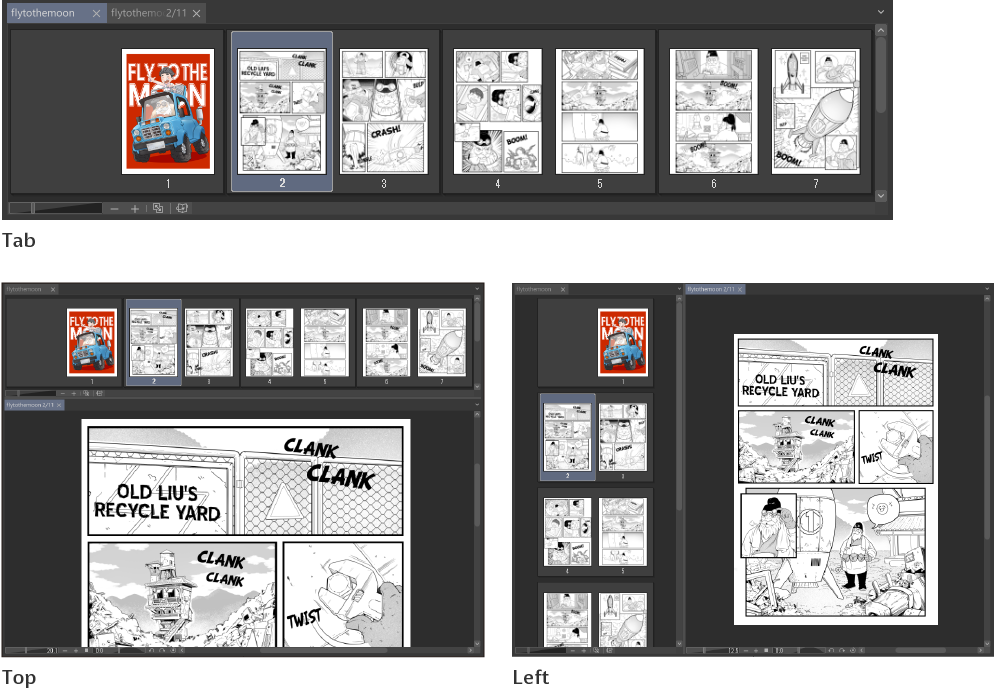
You can change where the Page Manager appears on-screen when you have a page open. From the Story menu > Page Manager Layout you can select Tab, Left, Right, Top, or Bottom.
Tab will display the Page Manager as a tab when a page is open.Left, Right, Top, or Bottom will display the Page Manager in the designated position when a page is open.
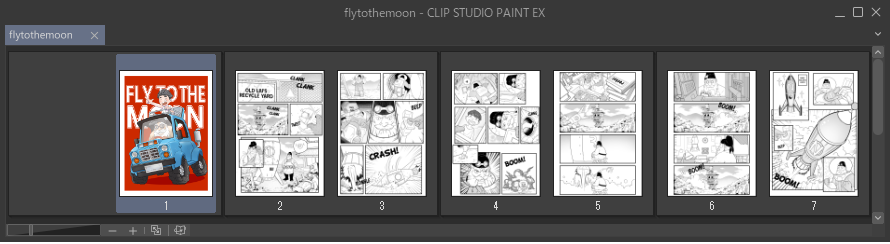
Page-by-page view
Go to the Story menu > View > Page-by-page and select it to line up the pages in the Page Manager horizontally.
If you have a webtoon project selected and you try to select Page-by-page, the Settings for multi-page works dialog box may pop up. Set Binding point and Start page and then tap OK to view your project in Page-by-page mode.
Webtoon view
Go to the Story menu > View > Webtoon to line up the pages in the Page Manager vertically.
If you set your project to have binding settings when you started the project or in page settings, then it will be displayed in the following way:
·Two-page spreads will display divided into left and right pages.
·For projects that include two-page spreads or a cover, adding or deleting a page will affect the page count by two.
When you have the view set to Webtoon you can set the direction you want the comic read in. You can choose from the Story menu > Webtoon reading direction which offers either Right-to-left or Left-to-right.
Auto-scroll
Go to the Story menu > Page Manager Layout > Auto-scroll and turn it on to have the Page Manager display the page you are currently working on automatically when you change the page you are editing. To stop scrolling the Page Manager, turn off Auto-scroll.