Advanced Selection Functions
You can use the Select menu to access additional methods such as expanding and shrinking, or selecting a color range.
Expand Selected Area
The Select menu > Expand selected area expands the selection by the width specified in the dialog.
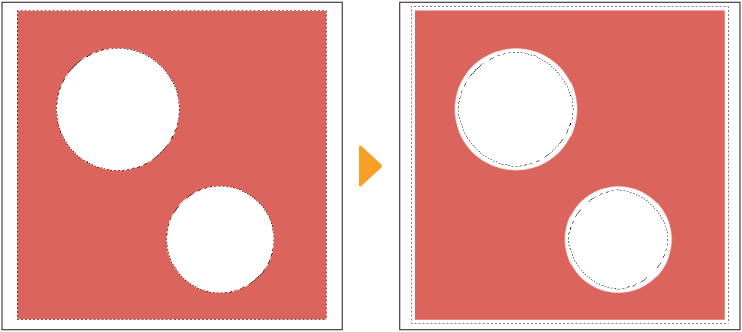
The same operation can be performed from the Selection Launcher.
![]()
In the dialog that appears, you can adjust the following settings:
Expansion width: Set the width to expand the selection.(The unit used is the same as set in Preferences.)
Expansion type: Set the corner shape of the selection to sharp or rounded corners.
Shrink Selected Area
Select menu > Shrink Selection shrinks the selection by the width specified in the Expand selected area dialog.
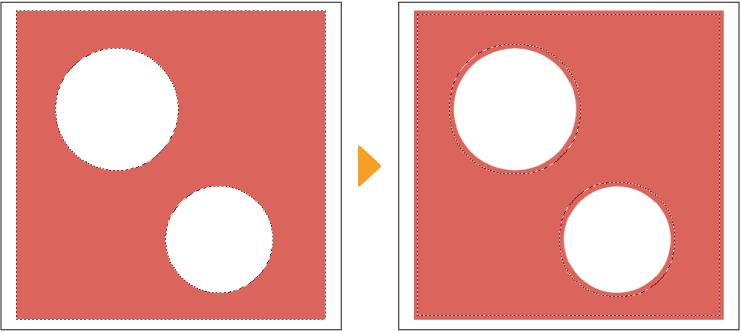
The same operation can be performed from the Selection Launcher.
![]()
In the dialog that appears, you can adjust the following settings:
Shrinking width: Set the width to shrink the selection.(The unit used is the same as set in Preferences.)
Shrinking type: Set the corner shape of the selection to sharp or rounded corners.
Blur border
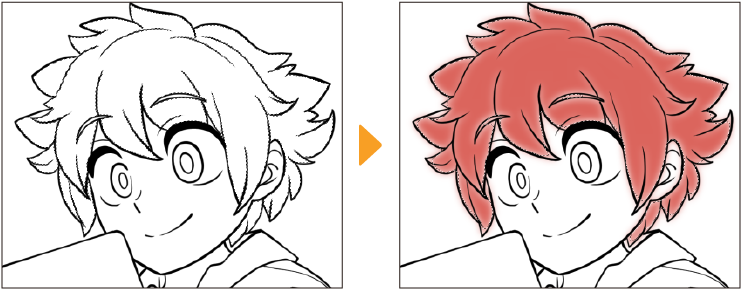
Use Select menu > Blur Border to soften the border of the selected area by the amount specified in the Blur Border dialog. Using a soft selection border can be useful when transforming parts of an image, as the adjustment will be less obvious.
Memo | You cannot use Blur border in Clip Studio Paint DEBUT. |
Blur Border can only be seen when the selected area is color, as in the image below.
Select Color Gamut
Use the Select menu > Select Color Gamut to select colors within a specified range.
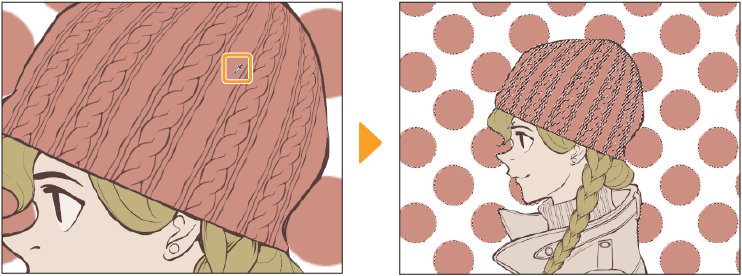
Memo | You cannot use Select Color Gamut in Clip Studio Paint DEBUT. |
In the Select Color Gamut dialog, you can set detailed criteria that will create a selection when you tap on a color on the canvas.
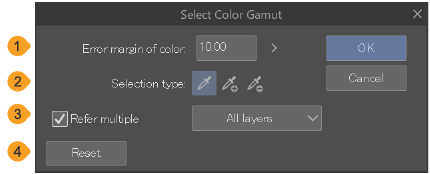
(1)Error margin of color
Sets the error margin of color for the target color. The larger the value, the larger the tolerance to include areas in colors other than the target.
(2)Selection type
Sets how to create a selection when there is already a selection area on the canvas.
New selection: Creates a new selection.
Add to selection: Adds the color gamut from Select Color Gamut to an existing selection.
Delete from selection: Removes the color gamut from Select Color Gamut from an existing selection.
(3)Refer multiple
Turn this on to set the layer to be referred to when creating a selection. When turned off, only the selected layer is referred to.
All layers: Refers all layers. However, hidden layers cannot be referred to.
Reference layer: Refers to layers set as a reference layer.
Selected layer: Refers to layers that are selected on the Layer palette.
Layer in folder: Refers to layers within the layer folder. Layers not included in the same folder as the edited layer cannot be referred to.
(4)Reset
Quick Mask
Masks are useful for creating selections of complex shapes. Tap the Select menu > Quick Mask to create a Quick Mask in the Layer palette.
Memo | You cannot use Quick Masks in Clip Studio Paint DEBUT. |
While the Quick Mask layer is selected, use a drawing tool where you want the selection area to be, then tap Select menu > Quick Mask again to convert the contents into a selection.
Once converted to a selection, the Quick Mask layer will be removed. You can also turn a current selection into a Quick Mask from the Select menu > Quick Mask to edit it.
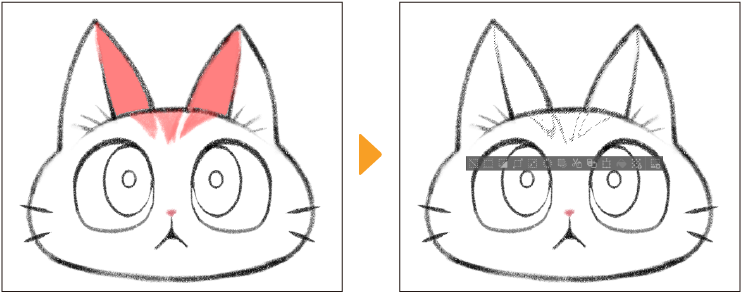
The color of the Quick Mask can be changed by tapping the colored square icon in the upper left corner of the Layer palette or from the Preferences > Layer/Frame.
Quick Masks cannot be saved and are converted to selections if the file is saved. When you want to save selection areas, use a selection layer. For details, see "Selection Layers".