Adding new brushes
You can create and customize your own brush settings in Clip Studio Paint.
Creating a new brush (duplicating)
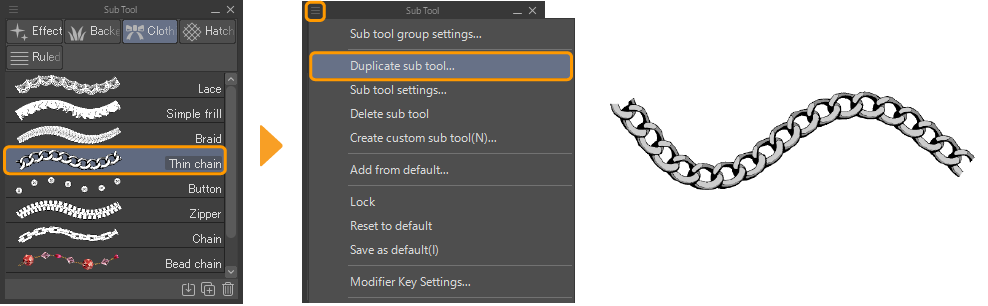
To create a new brush, start by picking a brush that is similar to the brush you want to make.
Go to the Tool Group menu > Duplicate tool.
In the dialog that appears, give your new tool a name.
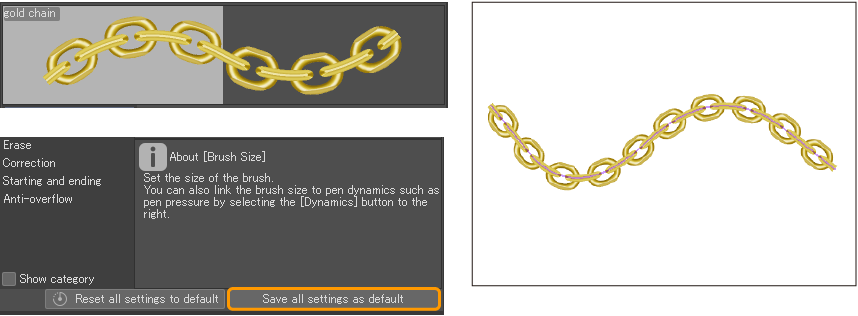
Next, open the Advanced Tool Settings palette and customize your new brush. You can change the brush tip in the Brush tip group, adjust the spacing in Brush stroke, add color randomizing in Color Jitter, and more.
Memo | For more information about customizing brush settings, see "Customizing brush tools". For details on tool settings, see the "Settings Glossary". |
You can draw on the canvas while the Advanced Tool Settings palette is open, so you can test your brush as you adjust the settings. When you’ve finished customizing your brush, select Save all settings as default to save your new brush.
Memo | You can also create a new custom brush from the Tool Group palette menu > Create custom tool. This will create a basic round brush that you can edit freely. However, in most cases it is easier to create custom brushes by starting from an existing brush that you like. |
Adding brushes from Clip Studio ASSETS
You can download free and paid brushes and materials from Clip Studio ASSETS, a material library linked to your Clip Studio account.
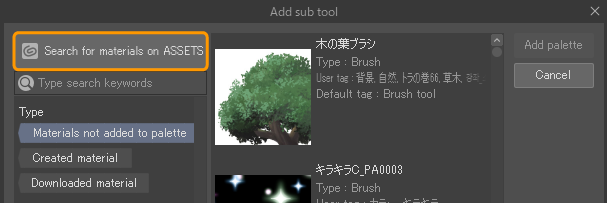
To access Clip Studio ASSETS from Clip Studio Paint, go to the bottom of the Tool Group palette list > Add from downloads and select Search for Materials on ASSETS in the dialog that appears.
You can also access Clip Studio Assets from the home page of Clip Studio Start.
On the desktop version, Clip Studio Assets will open within the Clip Studio app. On tablet versions, the Clip Studio Assets site will open in your default web browser.
Before searching, make sure you are logged into your Clip Studio account to download materials. After selecting a brush to download, simply select the Download button to download the brush to Clip Studio Paint.
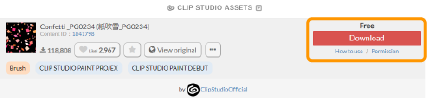
Memo | This guide shows how to download free materials. Please see here for details on how to purchase paid materials with GOLD or Clippy tokens. |
Brush materials downloaded from Clip Studio ASSETS are stored in the Downloads tool group in the Tool palette.
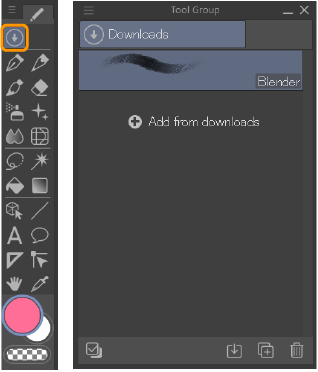
If a downloaded brush material is not in the Downloads tool group, please check your material download settings. For instructions on how to set this up, please refer to "Auto install materials".
Alternatively, you can add a downloaded tool to a Tool Group palette using the method described in "Adding downloaded tools to a palette" below.
Adding downloaded tools to a palette
You can also add downloaded tools to a tool group using the Add Tool dialog. Access the dialog from the Tool Group palette menu > Add tool, or the Add from downloads button at the bottom of the tool list.
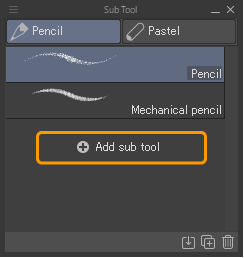
In the Add tool dialog, you can filter the type of material to downloaded materials by selecting Downloaded material in the left menu.
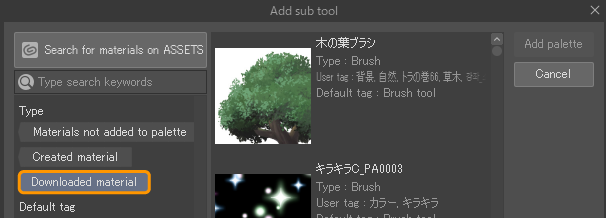
Select your brush and click Add to palette to add it to the current tool group. Now you can use the new brush.
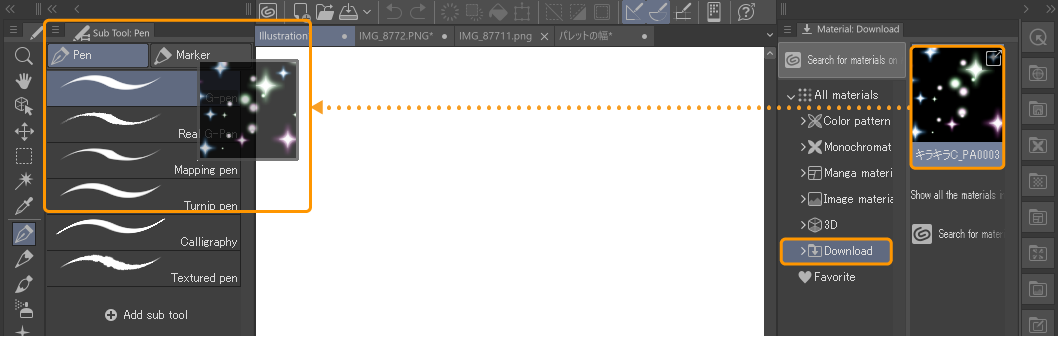
Alternately, you can drag the brush material from the Material: Download palette to the Tool Group you want to store it.
Importing brush files
You can import tool files (.sut), tool group files (.sutg), and Photoshop brush files (.abr) to Clip Studio Paint.
On Windows and macOS, you can also import tool sets from Comic Studio, Manga Studio, or Illust Studio (.tos).
The fastest way to import multiple brush files is to drag and drop them directly into the Tool Group palette. Open the folder or file manager alongside Clip Studio Paint, select the desired brush files, and drag them to the open Tool Group palette.
Memo | ·For the iPad version, you can drag and drop brush files from the Files app. ·You cannot import brush files in Clip Studio Paint DEBUT. ·You cannot import .tos files on macOS devices with silicon chips. |
You can also import tools from the Tool Group palette menu > Import tool. This will open your file manager, where you can select a brush file to import.
If you import a single tool from the Tool Group palette menu, it will be added to the current tool group. If you import a tool file (.sutg) or Photoshop brush file (.abr) with multiple tools, it will be created as a new tool group.