Customizing brush tools
Check this section for details on customizing existing brush tools in Clip Studio Paint.
Sub Tool Detail palette
You can customize the brush tools in Clip Studio Paint using the Tool Property palette and the Sub Tool Detail palette.
Memo | You cannot customize brush settings from the Sub Tool Detail palette in Clip Studio Paint DEBUT. |
Each tool has relevant settings that show in the Tool Property palette by default.
Open the Sub Tool Detail palette at the bottom of the Tool Property palette to display all settings for the selected tool.
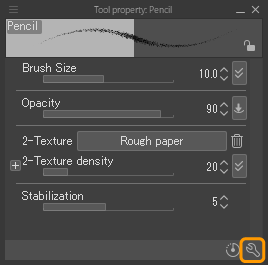
You can change which settings appear in the Tool Property palette by toggling the checkbox to the far left of the setting name. Settings with an eye icon will appear in the Tool Property palette.
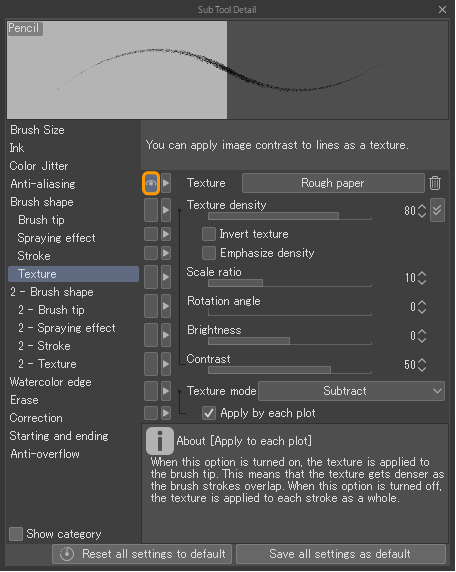
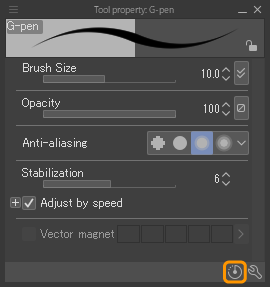
After editing a brush, select Save all settings as default in the Sub Tool Detail palette to save the settings as new defaults.
You can also revert any changes to the most recently saved default by selecting the Reset all settings to default button in the Tool Property palette or the Sub Tool Detail palette.
Sub tool settings
Brush tools have the following setting groups in the Sub Tool Detail palette. Depending on the brush tool type, some settings in each group may be unavailable.
For details on specific settings, see the "Settings Glossary".
Brush size
Settings for the brush size, including minimum size and pen pressure sensitivity.
Ink
Settings for the brush opacity, blending mode, and color mixing.
Color Jitter
Settings for adding randomness to the brush color.
Anti-Aliasing
Settings for the level of anti-aliasing on the brush.
Brush shape
Settings for the overall brush shape.
Brush tip
Settings for the brush tip shape, including the angle, hardness, and density of the brush tip.
Spraying effect
Settings to add and adjust the spraying effect of the brush.
Stroke
Settings for how the brush tips are spaced and repeat in a single stroke.
Texture
Settings to add and adjust the texture of the brush.
Dual brush (2- Brush shape)
Settings to create dual brushes linked to the main brush shape.
Watercolor edge
Settings to add a watercolor-style edge and adjust the opacity and size of the effect.
Erase
Settings exclusive to Eraser-type brushes. You can turn on Vector eraser settings and erase on all layers.
Correction
Settings such as stabilization, tapering, and snapping to rulers or other objects.
Starting and ending
Settings to add automatic effects to the start or end of lines.
Anti-overflow
Settings to keep the brush from crossing reference lines.
Brush dynamics
Some settings such as Brush size, Opacity, and Brush density have a button to the far right. This button controls how the brush responds to input dynamics such as pen pressure and tilt.
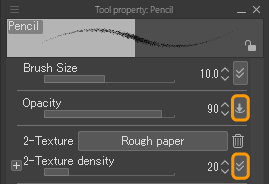
Select this button to open the brush dynamics for the desired setting.
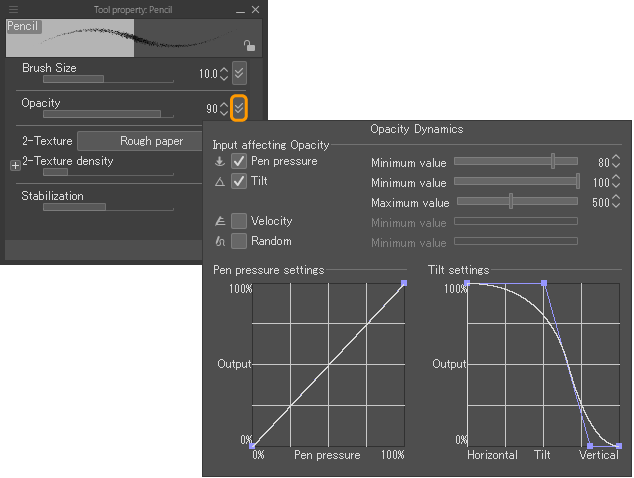
In the Dynamics dialog, you can link a brush setting to Pen pressure, Tilt, Velocity, or randomize the setting. Use the slider to set minimum or maximum values as needed. You can also make detailed adjustments to pen pressure input using the Pen pressure settings graph.
When brush dynamics are active for a setting, the icon in the button will change accordingly. If dynamics are not on, the icon will appear as a box with a diagonal slash.