Auto Actions
You can use Auto Actions in Clip Studio Paint to record and automate repetitive processes consisting of multiple steps, such as creating embossing effects, duplicating and clipping folders, and so on.
You can view the Auto Action palette from the Window menu > Auto Action.
Memo | Auto Actions are not available in Clip Studio Paint DEBUT. |
The Auto Action palette shows a list of recorded Auto Actions, and commands related to recording and managing Auto Actions.
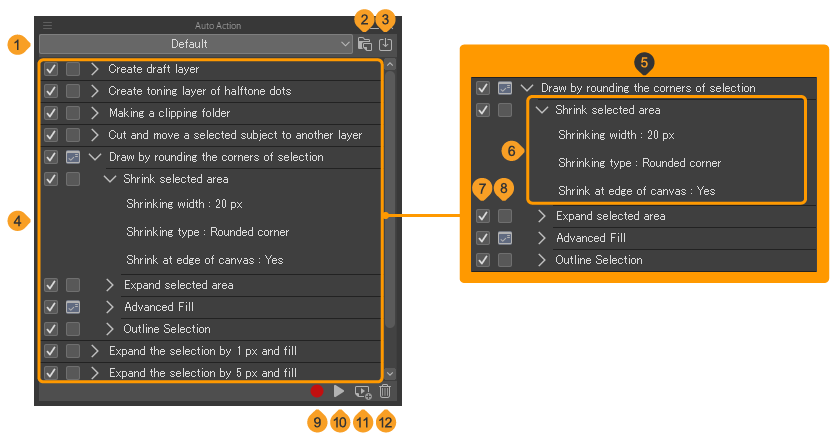
(1)Switch auto action set
(2)Create new auto action set
(3)Add auto action set
Loads an Auto Action Set material downloaded from Clip Studio Assets.
(4)Auto action list
A list of auto actions registered in an auto action set.
You can right-click or long-press on the Auto action list to display the context menu where you can edit the auto action or its commands.
(5)Auto action
A setting to record multiple operations and run the recorded operations. Operations can be run by auto action. Tap the auto action name or the icon to its left to show or hide the operations recorded to the auto action.
(6)Command
An operation recorded in the auto action. To show any recorded settings from a dialog box when recording the operation to the auto action, click the icon to the left.
(7)Run switch
When turned off (not checked), the relevant command within the auto action is not run.
(8)Change settings switch
When turned on (checked), the dialog for configuring settings displays when the relevant command is run. Once the settings are configured, execution of the auto action resumes. When turned off, the settings at the time the auto action was recorded are executed.
(9)Start or stop recording an auto action
(10)Playing an auto action
(11)Adding a new auto action
(12)Deleting an auto action
Operating an auto action set
An auto action set is a group of multiple auto actions. The Auto Action palette can be toggled for each Auto Action Set, making it convenient to create multiple Auto Action sets according to usage, frequency of use, etc.
Create an auto action set
Click Create new set on the Auto Action palette. Alternatively, it can also be created by selecting Create new set from the Auto Action palette menu.
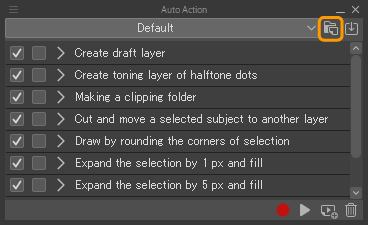
In the Create new set dialog, enter a name for the set and click OK.

An Auto action is created in the Auto Action palette as soon as a new set is created.
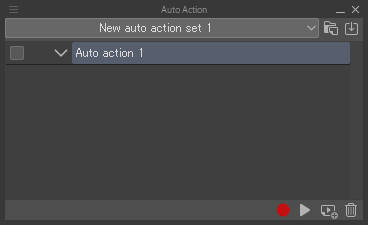
Switching auto action sets
You can switch between auto action sets by selecting Auto action sets from the pull-down menu.

Deleting an auto action set
Select the auto action set you wish to delete from the pull-down menu.
You can also delete an Auto Action set by selecting Delete Set from the Auto Action palette menu.
Duplicating an auto action set
Select the auto action set you wish to duplicate from the pull-down menu.
You can also duplicate an Auto Action set by selecting Duplicate Set from the Auto Action palette menu.
Renaming an auto action set
Select the auto action set you wish to rename from the pull-down menu.
You can also rename an Auto Action set by selecting Settings of set from the Auto Action palette menu.
Exporting an auto action set
You can export and save the currently displayed auto action set to an auto action set file (extension: laf) by selecting Export Set from the Auto Action palette menu.
Importing an auto action set
Select Import set from the Auto Action palette menu to load an auto action set file (extension: laf) into the Auto Action palette. On Windows/macOS/iPad, you can also import an auto action by dragging and dropping the file into the Auto Action palette.
Using Auto Actions
An auto action consists of settings for recording and running operations. Once you have recorded operations in an auto action, you can automatically run the recorded operations.
Adding an auto action
Select the auto action set you wish to add from the pull-down menu.
You can add an auto-action by tapping Add auto action on the Auto Action palette or selecting Add auto action from the Auto Action palette menu.
Enter a name once an auto action has been added to the Auto Action palette. You can also confirm by pressing enter via the keyboard. You can confirm the name on tablets with the on-screen keyboard.

Recording operations in an auto action
Select the auto action for which you want to record an operation. Even if you select an auto action for which an operation has already been recorded, you can still record new operations to it.
Tap Start to record auto action from the Auto Action palette.
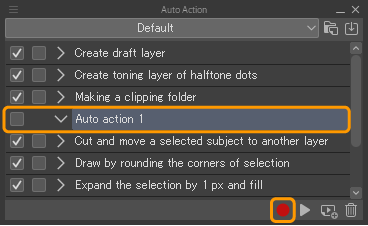
Perform the operations you want recorded in the auto action. These will display as a list of commands in the auto action. Once all operations are complete, tap Stop to record auto action. An operation will now be recorded in the auto action.
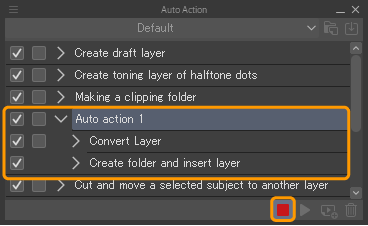
For tool and sub tool operations, only the movement of layers and selections can be recorded. No other operations can be recorded. Furthermore, there may be palette and menu operations that cannot be recorded.
Running an auto action
From the Auto Action palette, select the auto action you wish to play and tap Start to play auto action or double-tap it. The auto action is replayed, and the recorded operation will now run.
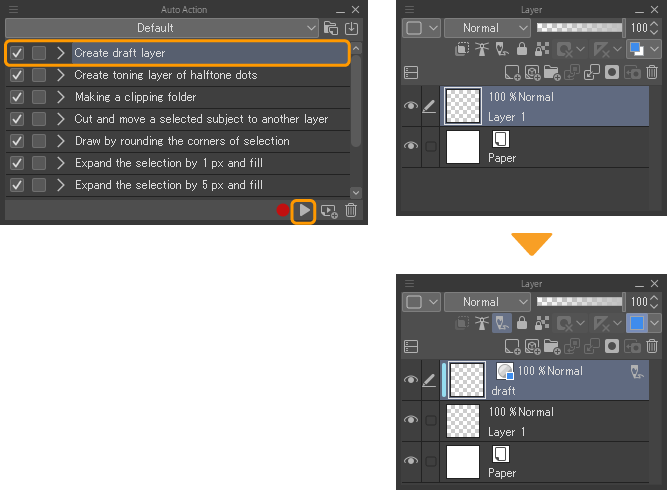
Auto actions can also be replayed using the Quick Access palette or with shortcuts.
Playing only specific commands
When a certain command within the auto action is selected, operations will run from the selected command onwards. If you uncheck the checkbox for a command in the Auto Action palette, you can playback the commands except for the ones turned off.
Changing the order of auto actions and commands
Select the auto action you want to change and drag and drop the auto action to the desired position on the Auto Action palette. Selected commands can also be moved to other auto actions.
Selecting auto actions and commands while holding down Ctrl or Shift allows you to select multiple auto actions and commands. However, if multiple commands are selected, they are limited to commands within the same auto action.

Deleting an auto action
From the Auto Action palette, select the auto action or command you wish to delete and tap Delete auto action. Click OK to confirm.

Renaming an auto action
You can rename an auto action from the Auto Action palette. Select the auto action you wish to rename, then select Rename auto action from the Auto Action palette menu to enter the new name.
Duplicating an auto action
You can duplicate an auto action by selecting the auto action you wish to duplicate from the Auto Action palette and choosing Duplicate auto action from the Auto Action palette menu.
To duplicate a command in an auto action, select the command and choose Duplicate command from the Auto Action palette menu.
Moving or duplicating an auto action to another auto action set
Select the auto action you wish to move from the Auto Action palette. Select the auto action set destination from the Move Auto Action to a different set menu in the Auto Action palette. You can move an auto action to a selected auto action set.
If you want to keep the auto action in the original auto action set, choose Copy auto action to different set from Auto Action palette menu and select the auto action set you want to duplicate.
Changing the display of the Auto Action palette
Button mode
Selecting Button Mode from the Auto Action palette menu switches auto actions and commands into buttons allowing you to run an auto action simply by tapping it.
However, when in button mode, auto actions and commands cannot be set. You can select Button Mode again to return to the original display.
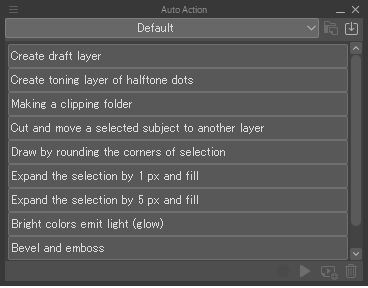
Show the action setting bar
From the Auto Action palette menu, select Show the action setting bar to show or hide the buttons and pull-down menu above the list of auto actions.
Show command bar
From the Auto Action palette menu, select Show command bar to show or hide the buttons below the auto actions list.