Quick Access Palette
The Quick Access palette allows you to register your favorite tools, commands, Auto Actions, or drawing colors for easy access. Go to the Window menu > Quick Access to display the Quick Access palette.
If you use Companion mode, you can also use the Quick Access palette from your smartphone.
Memo | You cannot use the Quick Access palette in Clip Studio Paint DEBUT. |
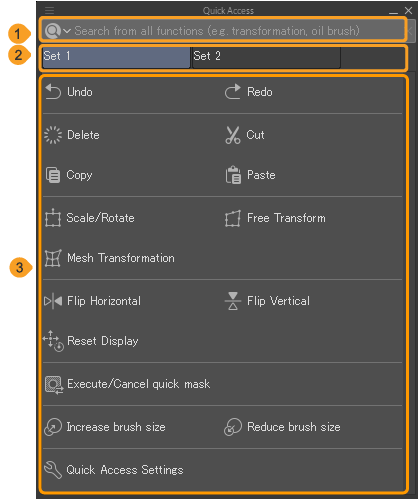
(1)Search bar
You can search for tools and features in Clip Studio Paint. See "Searching the Quick Access palette" for details.
(2)Set list
You can change the Quick Access set list that appears on the Quick Access palette. A Quick Access set list is a group of tools and commands that you often use together.
Using it in Companion mode will add another Quick Access set just for Companion mode.
(2)Button list
A list of the functions registered to the Quick Access set. You can register any tool, command, Auto Action, or drawing color to a button. Tap the button to use the registered command.
Searching the Quick Access palette
You can search keywords in the Quick Access search bar to find tools and features.
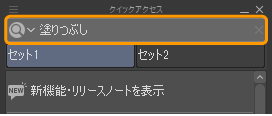
Memo | Your searched keywords will remain in history. Tap the magnifying glass on the left side of the search bar to see your search history and select a previous search term. You can use Delete History at the bottom of the list to clear your search history. |
The search results will appear in a drop-down list. Tap the tool or feature you want to use from the search results.(Results displayed in faded text cannot be selected.)
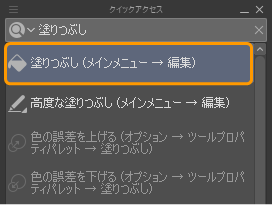
The search results include any tools or features that can be set in the Quick Access Settings dialog. After the feature or tool name, a guide to locate the tool or feature in the Quick Access Settings dialog is displayed in parentheses.
To hide the search results, tap the X symbol to the right of the search bar.
Adding a search result to a Quick Access set
You can add a search result directly to an existing Quick Access set. Long-press or right-click a search result to open the context menu.
Tap Add to Quick Access from the context menu and choose the set that you want to add the feature to.

The new tool will be added to the end of the selected Quick Access set. To change the order, see "Change Quick Access set position".
Hiding the search bar
You can hide the search bar from the Quick Access palette by opening the Quick Access palette menu at the top left and unchecking Show search bar.
Customizing the Quick Access palette
Set lists
You can view the set lists as button tabs or as a drop-down list. Change the setting from the Quick Access palette menu > How to display set lists and choose Button or Pop-up.

Button list
Go to the Quick Access palette menu > View to choose how to show the button list.
Tiles
Choose Tile to have the buttons displayed as tiles. If you choose an option where the Tile has a button size included, then changing the Quick Access palette will not change the button size.
The button size options are very small, small, medium, and large. When set to very small tiles, the button names will not be displayed.
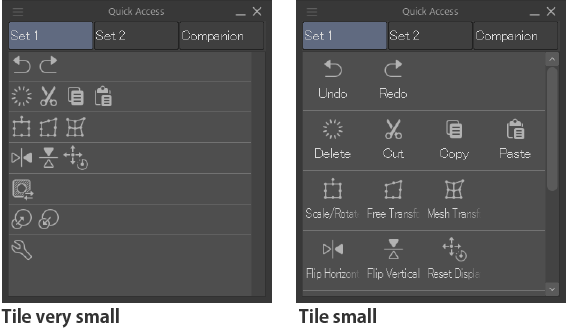
When set to a fixed number of tiles, the setting determines how many buttons can be placed on one line. The options are 4 Columns, 8 Columns, and 16 Columns. If you change the size of the Quick Access palette, the tile size will adjust accordingly.
List
Choose List and the buttons will be displayed as a list. With this setting, changing the Quick Access palette width will also change how many columns will appear. The list size options are small, medium, and large.
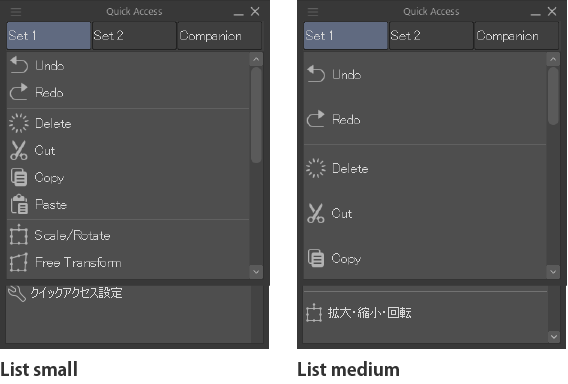
When set to a fixed number of columns, the setting determines how many buttons can be placed on one line. The options are 1 Column, 2 Columns, and 3 Columns. If you change the size of the Quick Access palette, the number of columns will not change.
Quick Access Settings
To add or delete functions in the Quick Access palette, open the Quick Access Settings dialog from the Quick Access Settings icon or from the Quick Access palette menu.
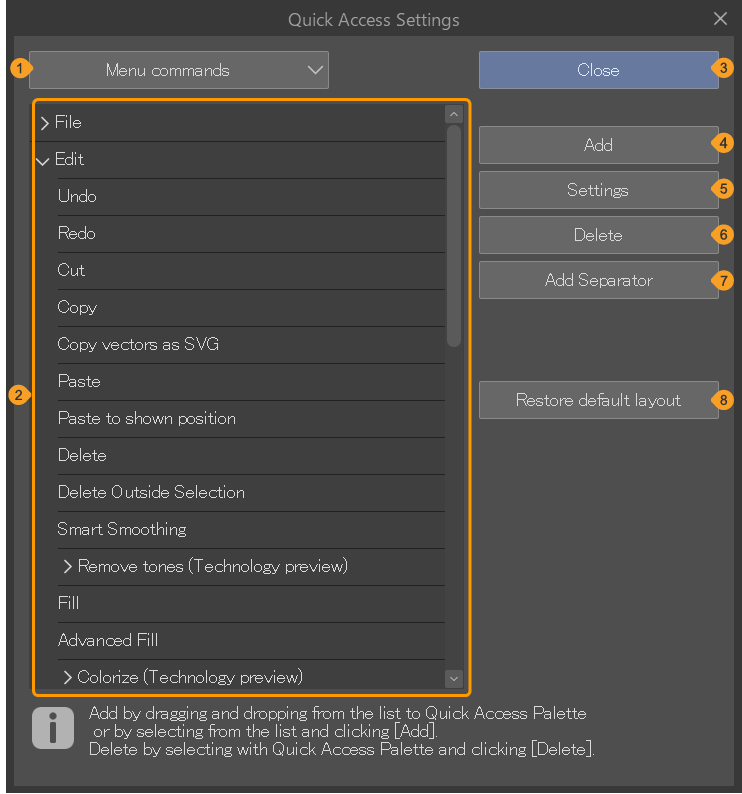
(1)Category
Select a category to change the list displayed below. These categories work the same way as in the Command Bar Settings dialog.
(2)List
A list of functions for the selected category is shown here. Select the functions you want to add to the Quick Access palette.
(3)Close
(4)Add
(5)Settings
(6)Delete
(7)Add Separator
This adds a separator under an icon in the Quick Access palette. Buttons added under the selected button will be added under the separator.
(8)Restore default layout
The Quick Access palette display will be restored to its default state. When you restore it to the default state, any added buttons will be deleted, and the position of buttons will be reverted to the original state. Custom icons and background colors will be kept the same.
Use the Quick Access set
Create new Quick Access set
To create a new Quick Access set, open the context menu for a Quick Access set or the Quick Access palette menu and tap Create set. When the Create set dialog appears, enter a name and tap OK. A new Quick Access set will be added to the Quick Access palette.

You can also drag and drop a button from the button list to the edge of the set list tab to create a new Quick Access set list.
Delete Quick Access set
To delete a Quick Access set, open the context menu for a Quick Access set or the Quick Access palette menu and tap Delete set. The Quick Access set will be deleted from the Quick Access palette.
Rename a Quick Access set
To rename a Quick Access set, open the context menu for a Quick Access set or the Quick Access palette menu and tap Manage set. In the Manage set dialog, enter the new name and tap OK. The new name will be reflected in the Quick Access palette.
Change Quick Access set position
To move a Quick Access set tab, drag the set list name while holding down the Ctrl key and drop it to a new position.
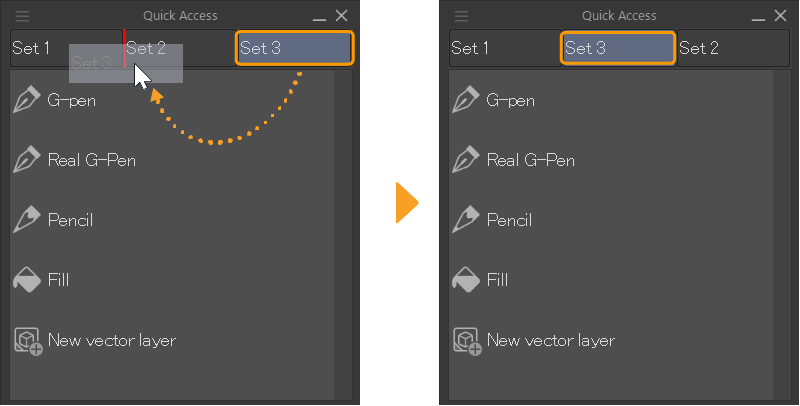
Memo | When the Quick Access Settings dialog is displayed, you can drag and drop Quick Access sets without holding the Ctrl key. |
Customizing buttons
Adding and deleting buttons
Open the Quick Access Settings dialog to add and delete buttons from the Quick Access palette.
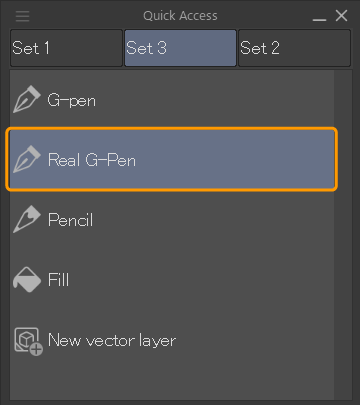
Adding buttons
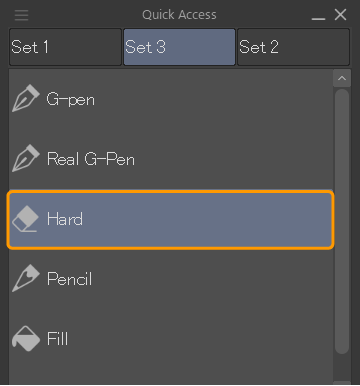
To add a button, open the Quick Access Settings dialog, then select a category from the pull-down menu and select a function to add. Add the function by tapping the Add button or by dragging it onto the Quick Access palette.
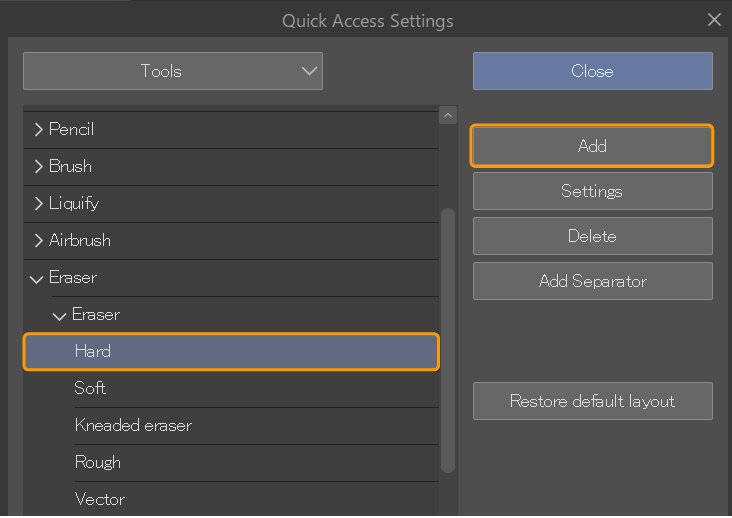
The selected function will be added to the Quick Access palette.
Memo | You can drag and drop the following to the Quick Access dialog to add them without opening the Quick Access Settings dialog. ·Auto Actions ·Tools ·Sub tools or sub tool groups The following can be dragged and dropped to the Quick Access palette while pressing Ctrl. ·Selection Launcher icons ·Command Bar icons |
Deleting buttons
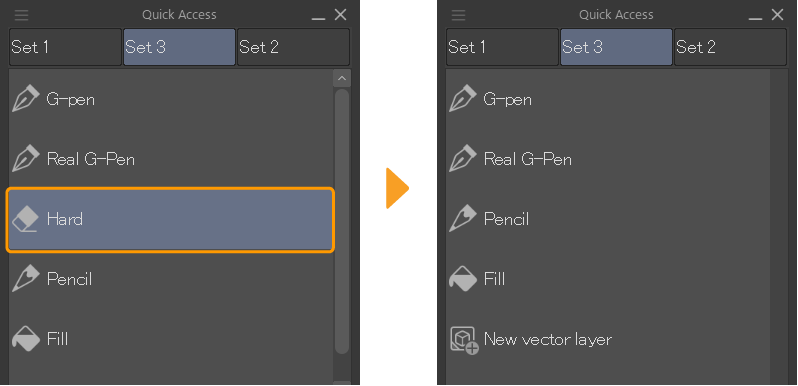
Tap the button in the Quick Access set, then tap the Delete button in the Quick Access Settings dialog.
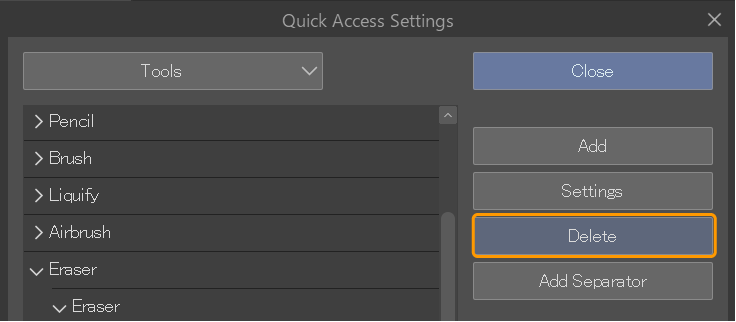
The button will be deleted from the Quick Access palette.
Memo | ·You can delete separators in the same way by using the Delete button. ·You can also delete buttons by displaying the context menu for the button you want to delete and tapping Delete. |
Moving buttons
Open the Quick Access Settings dialog, then drag and drop the buttons in the Quick Access palette to change their positions.
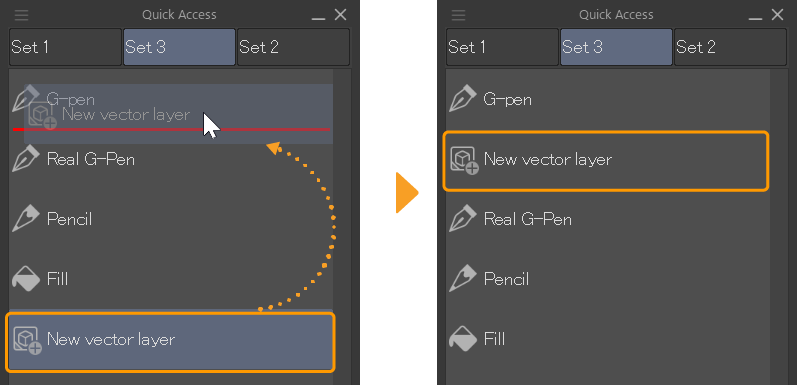
Memo | Dragging and dropping a button from the Quick Access palette onto a separator will create a new separator as well as change the button position. |
You can also move buttons without opening the Quick Access Settings dialog by dragging and dropping while holding the Ctrl key.
Moving buttons to another Quick Access set
Open the Quick Access Settings dialog, then in the Quick Access palette, drag and drop the button to the new Quick Access set.
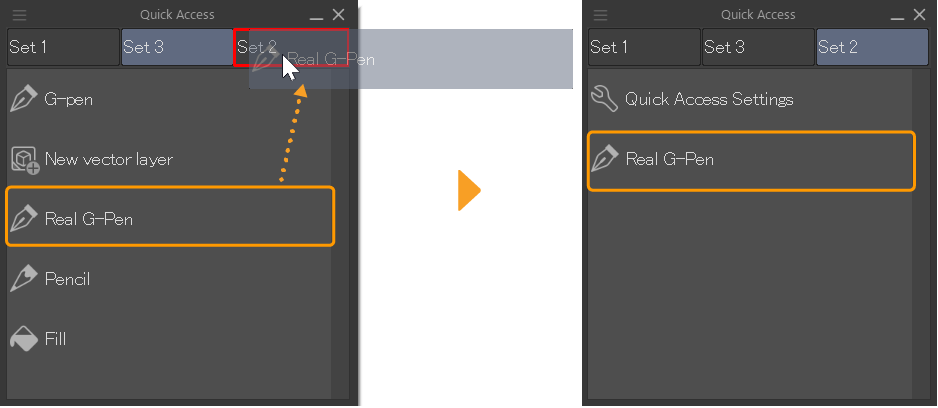
You can also move buttons without opening the Quick Access Settings dialog by dragging and dropping while holding the Ctrl key.