Using the Graph Editor
When using keyframes, you can edit each track with the Graph Editor.
When the Timeline palette is switched to Graph Editor, a graph that connects keyframes will appear. The vertical axis of the graph will change according to the track chosen. The horizontal axis is the time.
You can edit the animation curve to add image transformations, change the image opacity, or to make detailed adjustments to interpolation methods between keyframes. For audio tracks, you can adjust the volume.
Switch to Graph Editor
Switch to Graph Editor to edit keyframes. To edit a track in the Graph Editor, select it from the Timeline palette, and either tap the Graph Editor icon on the Timeline palette or tap the Animation menu > Animation curve > Graph Editor.
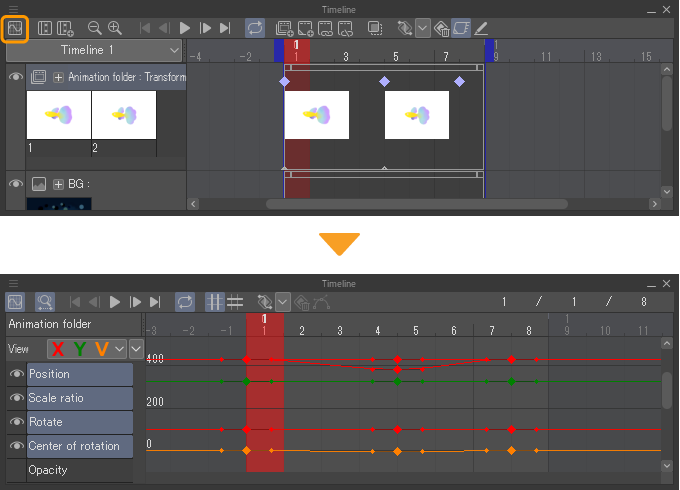
Exit the Graph Editor
The same operation used to switch to the Graph Editor can be used to return the Timeline palette to its normal display.
Timeline Palette
The following are the functions on the Timeline palette when using the Graph Editor.

(1)Command Bar
(2)Current frame/Start frame/End frame
Shows the positions of the current frame, the start frame and the end frame.
(3)Track name
(4)View
Shows or hides the animation curves, X graph, Y graph, and Other, by tapping their corresponding buttons. When Other is turned on, graphs that are not affected by the X and Y curves, such as Opacity and Volume, can be displayed.
(5)Show in list
Sets items to be displayed in the Settings list. Tap the icon to show a list of settings, then tap the settings you want to appear in the Settings list.
(6)Settings list
These are the items that can be edited with an animation curve. Tapping the eye icon shows/hides the information related to that animation curve.
(7)Animation curve
Displays settings that can be edited with animation curves on a graph. The Y axis corresponds to camera placement, layer transformations, opacity, and other settings. The horizontal axis is the time.
By modifying the animation curves, you can adjust the transformation timing and the camera movement and rotation recorded in keyframes.
Animation curves are displayed in red for X, green for Y, and orange for others.
(8)Keyframe
Layer transformation, opacity, and other settings are recorded. By adjusting keyframes, you can adjust the transformation timing and camera position and angle.
A "slope" is attached to the keyframe. Manipulating the slope control point allows you to adjust the bend of the line between keyframes.
Command Bar

(1)Graph Editor
Click this to switch the Timeline palette between the standard view and Graph Editor view.
(2)Drag to zoom
When on, you can drag to zoom in and out on the Timeline palette. Dragging to the left scales down the view, while dragging to the right scales up the view. To edit keyframes, tap this again to turn it off.
Memo | On Windows/macOS, you can zoom in and out on the Timeline palette by holding down the right mouse button and dragging, even if Zoom by Drag is turned off. You can also zoom in and out with the mouse wheel. |
(3)Go to start
You can move to the first frame on the Timeline palette.
(4)Go to previous frame
Selects the frame before the selected frame on the Timeline.
(5)Play/Stop
(6)Go to next frame
Selects the frame after the selected frame on the Timeline.
(7)Go to end
You can move to the last frame on the Timeline palette.
(8)Loop play
When turned on, after the animation playback is finished, it returns to the beginning and plays the animation on loop.
(9)Snap to X-axis
Snap to the X-axis when editing keyframes.
(10)Snap to Y axis
Snap to the Y-axis when editing keyframes.
(11)Add keyframe
(12) Keyframe interpolation
(13) Delete keyframe
(14) Unpair handles
Add keyframe
Keyframes can be added to adjust animation curves.
Select a frame to add as a keyframe.
Select an interpolation method from Keyframe interpolation on the Timeline palette and tap Add keyframe. Keyframes will be added to all the animation curves inside the frame.
Memo | Depending on the interpolation method selected from Keyframe Interpolation, the animation curve may change significantly by adding a keyframe |
Add a keyframe to a specific animation curve
Select an interpolation method from Keyframe interpolation on the Timeline palette, then hold Alt and tap the animation curve. A keyframe will be added at the tapped position. Keyframes will not be added to other animation curves inside the same frame.
Remove keyframe
You can delete a keyframe by selecting it and tapping Delete keyframe on the Timeline palette. If multiple keyframes are selected, they can be removed together.
Keyframes can also be removed by tapping the Animation menu > Edit track > Delete or holding Alt and selecting the keyframes you want to remove.
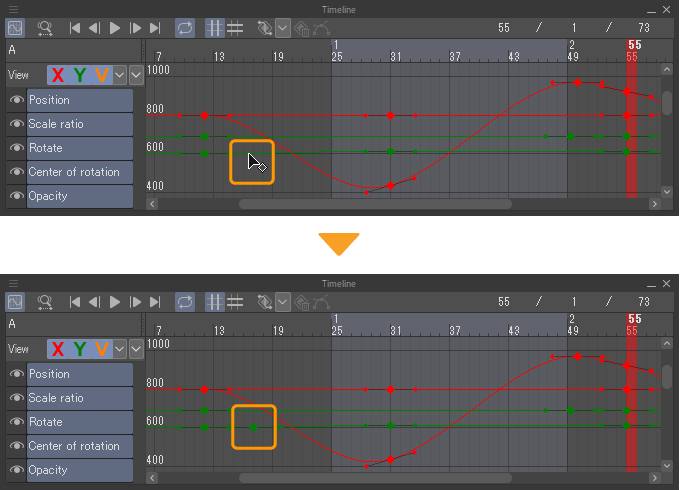
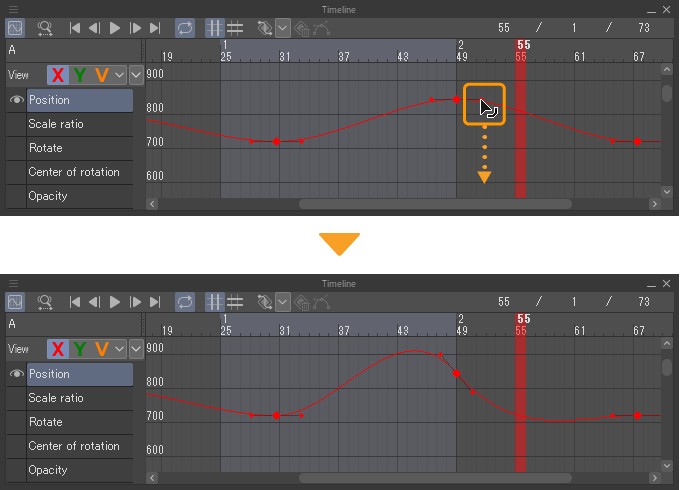
Move keyframe
To move a keyframe while using the Graph Editor, select the keyframe and drag it.
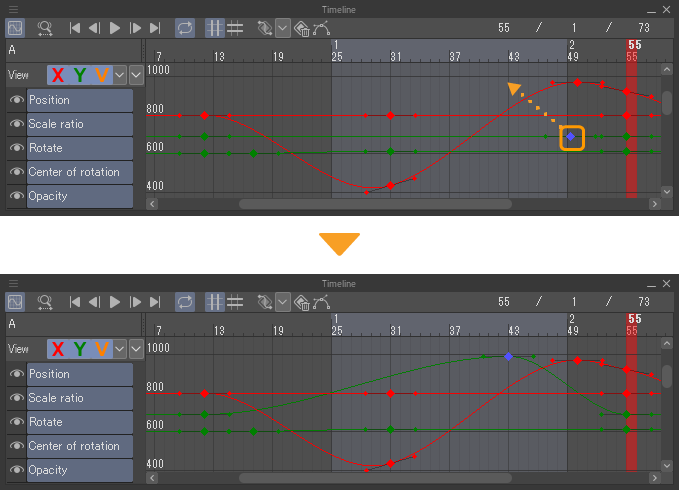
·If you drag a selected keyframe after pressing Shift, you can confine movement to the X-axis or Y-axis direction. The direction in which you can move is the direction in which you first dragged.
·If Snap to X axis or Snap to Y axis on the Timeline palette is turned on, it will snap to the grid showing the frames and tracks on the Timeline palette and be easier to move vertically or horizontally.
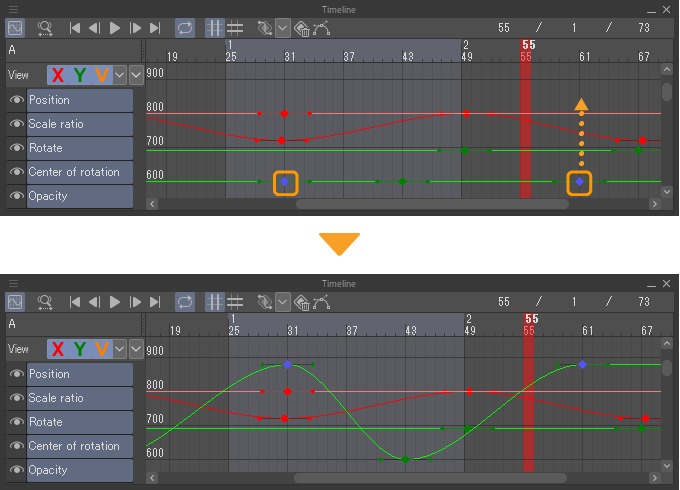
Move multiple keyframes
When multiple keyframes are selected, you can select any one to drag them. The selected keyframes will move in the direction you drag them to.
Even if you have multiple keyframes selected, you can use the Shift key to limit the direction of movement or snap to the grid.
In addition, when multiple keyframes are selected, you can hold down Ctrl + Shift while dragging to expand or shrink the keyframes.
·If you drag along the x-axis while holding Ctrl + Shift, the leftmost keyframe will remain in place while the selected keyframes shrink or stretch along the x-axis.
·If you drag along the y-axis while holding Ctrl + Shift, the selected keyframes will shrink or stretch along the y-axis. The graph is scaled around a value of 0.
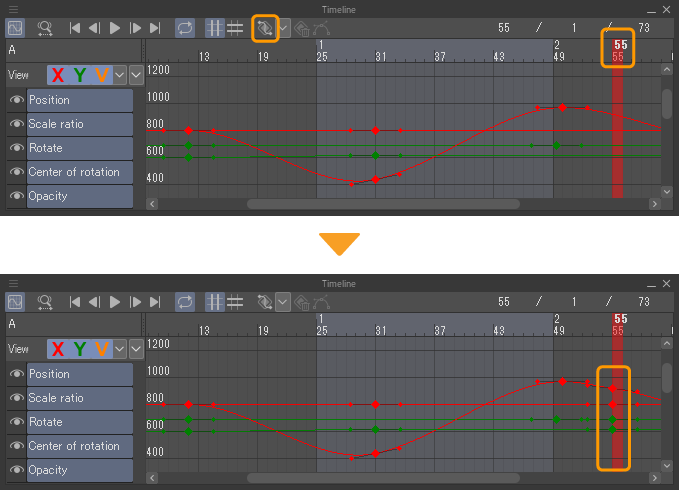
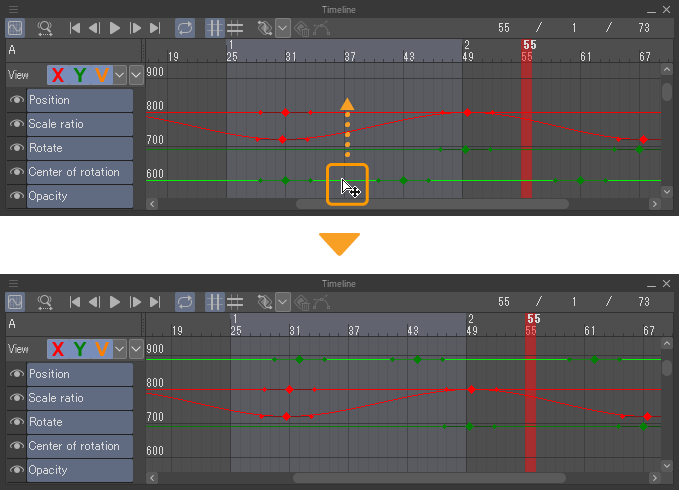
Move whole animation curve
If you drag any part other than the animation curve keyframes, the animation curve will move in its entirety.
Adjusting the animation curve
To do this, drag the control points on the tangents to adjust the curve.
Adjusting either side of the animation curve separately
Select the keyframe you want to adjust and either tap Unpair handles from the Timeline palette or tap the Animation menu > Animation curve > Unpair handles.
The keyframe shape switches to a rectangle, allowing the left and right control points to be manipulated separately when adjusting the curve.

Selecting the same keyframe again and tapping Unpair handles will cancel the adjustments made for each control point on the left and right, and the keyframe shape and control point adjustments will return to their original values.