Using frames
Animations are made up of frames placed on the timeline. See this section for how to add and adjust frames.
Inserting a frame
Select the position (timing) where you want to insert the frame on the Timeline palette. You can insert a frame by selecting Animation menu > Timeline > Insert frame. In the Insert frame dialog, enter the number of frames to be inserted in Number of frames, and tap OK. A new frame is added at the position of the selected frame.
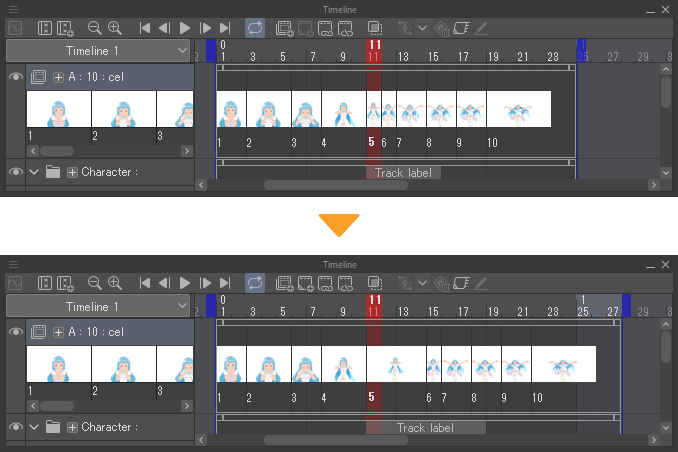
·Inserting a frame causes the frame’s clip and area label to become longer. However, movie and audio tracks will not go any longer than the original movie or audio file length.
·Clips, specified cels, labels, and keyframes after the selected frame, will be moved behind the inserted frame segment. The end position of the timeline will also move backward.
·However, if Split clip is turned on in the Insert frame dialog, the keyframe will be hidden outside of the clip.
Memo | For DEBUT/PRO, the maximum number of frames that can be used on a timeline is 24. |

(1)Number of frames
Enter the number of frames to insert.
(2)Show selected layer only
When on, this inserts a frame only on the selected track (layer). Frames will not be inserted into other tracks. The timeline’s end position will not change.
(3)Split clip
When on, inserts the selected frame into a new frame and splits the clip into before and after sections. Clips will not be placed on inserted frames.
(4)Preview
Shows a preview of the Insert frame dialog box’s settings on the Timeline palette and the canvas.
Deleting a frame
Select the position (frame) where you want to delete the frame on the Timeline palette. You can delete a frame by selecting Animation menu > Timeline > Delete frame. In the Delete frame dialog, enter the number of frames to be deleted in Number of frames, and tap OK. Deletes the number of frames set in the Delete frame dialog box from the position of the selected frame.
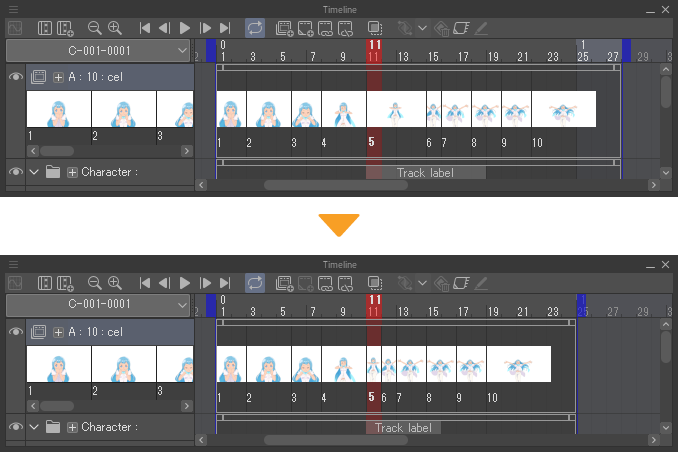
·Deleting a frame causes the frame’s clip and area label to become shorter.
·Clips inside the deleted frame will also be deleted.
·Cel specifications inside the deleted frame will also be deleted.
·Any keyframes inside a deleted frame are combined into one. However, if Split clip in the Delete frame dialog box is turned on, the keyframe will be hidden outside of the clip.
·Clips, specified cels, labels, and keyframes after the selected frame, will be moved forward to cover the deleted frame segment. The end position of the timeline will also move forward.
·However, if Split clip is turned on in the Delete frame dialog, the keyframe will be hidden outside of the clip.

(1)Number of frames
Sets the number of frames you want to delete.
(2)Show selected layer only
Deletes frames from the selected track (layer) only. This frame will not be deleted from other tracks. The end position of the timeline will not change.
(3)Split clip
Deleting a frame separates the clip into two clips.
(4)Preview
Shows a preview of the Delete frame dialog box’s settings on the Timeline palette and the canvas.
Navigating frames
Selecting a frame
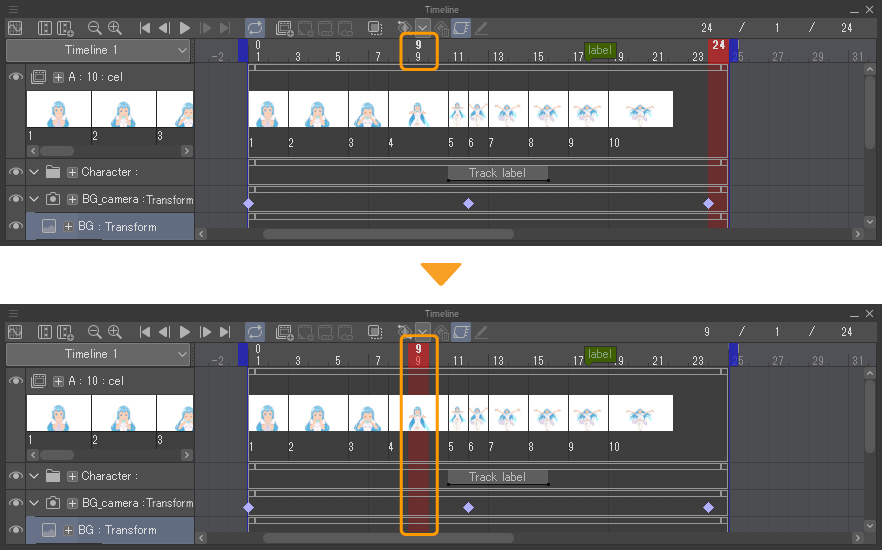
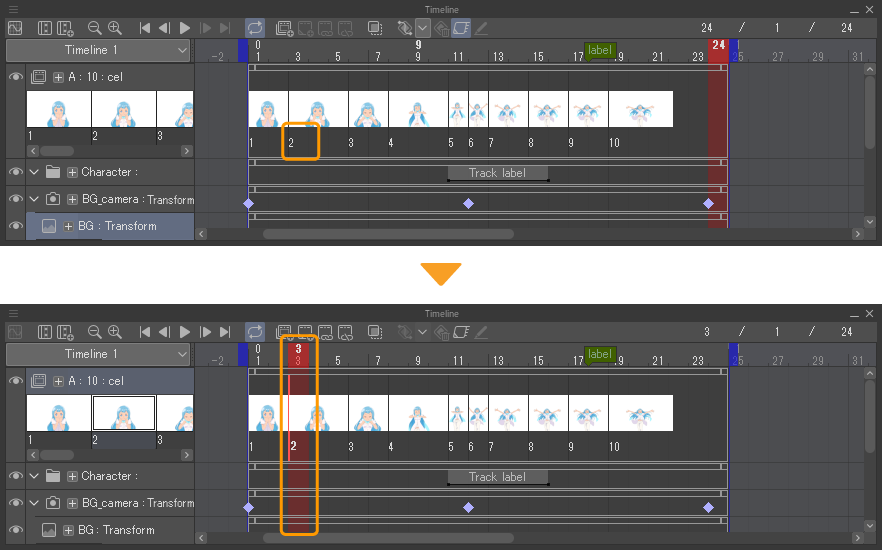
Tap a frame number in the Timeline palette to select a frame.
 p
p
Selecting a frame in a specific track
Click the frame to be selected in the track on the Timeline palette. The track and frame will both be selected.
Moving a frame to a specified position
You can change the selected frame using menu commands. Operations using menu commands can be performed using shortcut keys or by recording the operation with the Auto Action palette.
Go to start: Select Animation menu > Move frame > Go to start to select the first frame in the Timeline palette.
Go to end: Select Animation menu > Move frame > Go to end to select the last frame in the Timeline palette.
Go to previous frame: Select Animation menu > Move frame > Go to previous frame to select the previous frame from the currently selected frame in the Timeline palette.
Go to next frame: Select Animation menu > Move frame > Go to next frame to select the next frame back from the currently selected frame in the Timeline palette.
Previous keyframe: If a keyframe is set for the currently selected track, you can change the frame to be selected based on the keyframe. Select Animation menu > Move frame > Previous keyframe to select the previous keyframe from the currently selected frame in the Timeline palette.
Next keyframe: If a keyframe is set for the currently selected track, you can change the frame to be selected based on the keyframe. Select Animation menu > Move frame > Next keyframe to select the next keyframe from the currently selected frame in the Timeline palette.
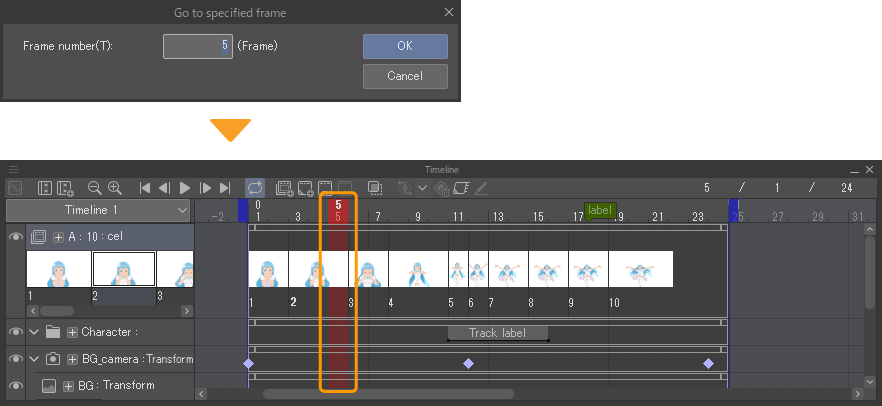
Go to specified frame: Tap Animation menu > Move Frame > Go to specified frame to show the Go to specified frame dialog. Enter the frame to be selected in Frame number and tap OK. The specified frame will then be selected in the Timeline palette.
Go to timeline label
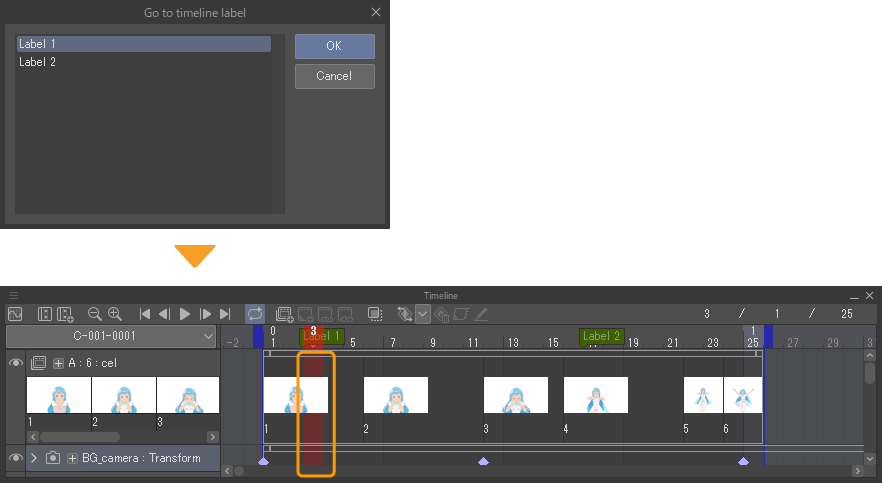
Using the timeline as a guide, you can change the frame that will be selected. Select the Animation menu > Move frame > Go to timeline label. In the Go to timeline label dialog, select the name of the timeline label and tap OK. The frame with the selected timeline label is selected.
Edit Timeline sub tool
Select the Operation tool > Edit timeline sub tool to move the selected frames.
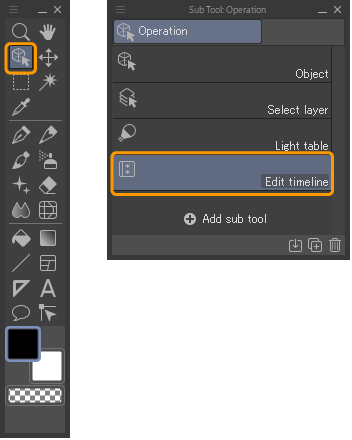
The Edit timeline sub tool can also be selected by tapping Edit timeline on the Timeline palette.

Navigating to surrounding frames
Select the Timeline sub tool and drag on the canvas to navigate to surrounding frames. By default, dragging to the left moves to the previous frame, and dragging to the right moves to the next frame.
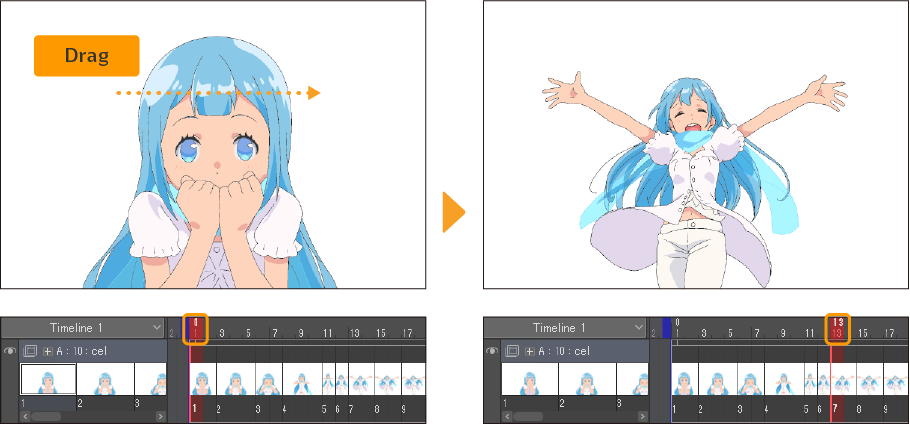
Go to next frame
Select the Timeline sub tool and tap on the canvas to move to the next frame.
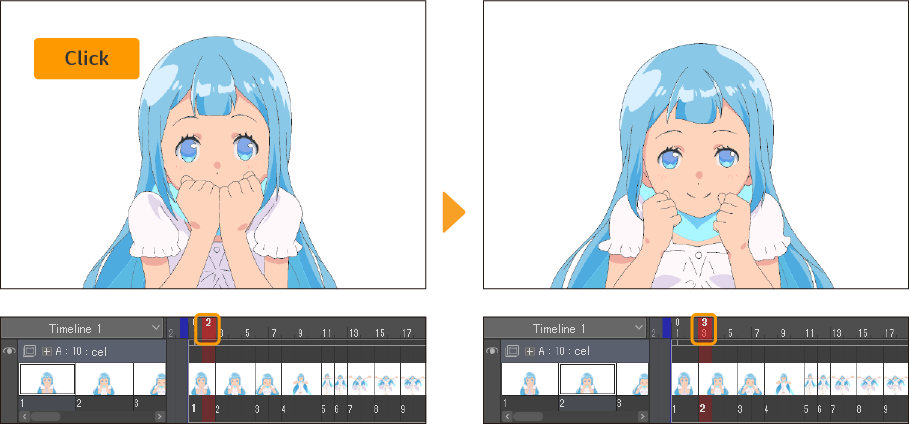
Go to previous frame
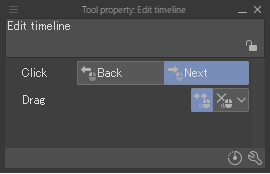
You can change the direction the canvas moves when tapped by selecting Click in the Tool Property palette of the Edit Timeline sub tool. Select Previous to go to the previous frame with each tap. Select Next to go to the next frame.
