Group work (Windows/macOS)
This function allows group work by multiple users on projects consisting of multiple pages.
To use this function a user must upload the group work data onto a shared network server or shared folder. The Administrator role will be assigned to the user who uploaded the group work data and will be able to assign members.
The users working on the project obtain the group work data and create work folders on their own computers. Users who download the files will be assigned the User role. Users who are assigned pages to edit by the Administrator will become Assigned members.
Each user edits pages in their work folder and the edited content is reflected in the group work data on the network.
Important | Please upload the group work data onto a hard disk or server that is shared by one network when using the group work function between Windows and macOS. This feature cannot be used in the cases stated below: ·If the group work data is shared from a Windows computer, it will not be able to be opened on Mac OS X 10.9 or earlier. ·If the group work data is shared from a macOS computer, it will not be able to be opened from a Windows environment. |
Prepare group work data
Select the Page management File you want to enable group work on and go to the Story menu > Group work > Prepare group work data.
In the Prepare group work data dialog select where you will upload the group work data and file rules, then press OK. The Prepare group work data dialog box closes and the group work data is uploaded. The user that filled in the Prepare group work data dialog will be set as Administrator.
Contact your team members and tell them where you uploaded the group work data and your username.
Important | ·You cannot change the settings entered in the Prepare group work data dialog after the group work data has been uploaded. ·If you have a File object included in the group work data, that linked file will not be included in the group work data. You will need to put the File object’s linked file in a shared folder for other users to access it. |
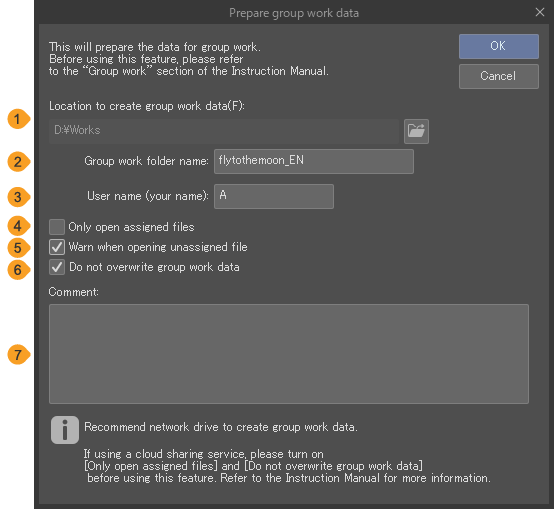
(1)Location to create group work data
You can specify where to put your group work data when working collaboratively.
Memo | When using the macOS file share feature to share your group work data you will need to set access permissions for all users who are working on the group work data through your macOS settings. If you want to use the group work function then you need to set all users to have the permission to read and write files. Make sure that you have set it to apply to the items in the folder from the gear icon. Please check the macOS guide on how to use the file sharing feature through a macOS help site. |
(2)Group work folder name
(3)Username (your name)
This sets the name of the user who set the Prepare group work data dialog for the project. This Username will be used when you assign members to files or unassign them. After you upload the group work data you will not be able to change the Username.
(4)Only open assigned files
You can set what file permissions assigned members have. If you have this on then only assigned members can open the pages assigned to them by the Administrator. You will not be able to open files not assigned to you. Even the Administrator will not be able to open the pages unless they have been assigned to them.
(5)Warn when opening unassigned file
If you have the above setting on and you have not been assigned the file, opening the file will result in a warning message. You cannot turn this on if you have Only open assigned files checked on.
(6)Do not rewrite over group work data
When turned on, the group work data cannot be overwritten.
If users besides the Administrator executes the Reflect change on group work data command then a new folder will be created in the group work data folder. A copy of the pages will be saved in the new folder.
The Administrator will then have to reflect the changes onto the group work data for the file to be updated. When the Administrator performs Update work folder the files edited by other users will be read as conflicting files.
The Administrator then needs to Resolve conflict so that the edited files will be reflected in the group work data file. The Administrator also has sole power to assign and unassign members.
Important | We recommend setting Do not overwrite group work data on if you are sharing the group work data over an online file sharing service. If you create the group work data on a file sharing service, there may be a long time lag for changes to be reflected. Because of this, turning Do not overwrite group work data off may result in the data not being correctly overwritten. |
(7)Comment
You can write in comments or contact details regarding the group work data in this section.
Administrator work folder
After performing Prepare group work data, a management file will appear in the Administrator’s work folder. The Administrator can edit and manage the file with this. Please do not delete either of the following files until the group work is finished.
CollaborateLocal. tclo
A file recording the editing status, etc. of group work data. Deleting this file will result in the loss of the Administrator role. You cannot reset the Administrator or add Administrators for the group work data.
Submit
This folder is created if Do not rewrite over group work data is turned on. Files edited and submitted by the members will be saved here.
Work folder
Group work data is saved in this folder and files will be added while working collaboratively. Please do not delete any of the following files until the group work is finished. Neither the Administrator or other members can open the group work data from Clip Studio Paint.
Collabo
This folder contains files recording the editing status, assigned member info etc. for the group work data.
Submit
This folder is created if Do not rewrite over group work data is turned on. Files edited and submitted by the members will be saved here.
Obtain group work data
Download the data from the folder specified in Prepare group work data to the computer you will work from to create a work folder.
Select the Story menu > Group work > Obtain group work data. In the Obtain group work data dialog specify where the group work data is located, then specify where a Work folder will be created on your computer and tap OK.
The Obtain group work data dialog box closes and the work folder is created in the specified location. You can edit files from the work folder.Obtain group work data to become a User of that file.
Important | After obtaining the group work data, a file labeled “CollaborateLocal. tclo” will be added to the User’s work folder to record editing progress. Please do not delete this file. If deleted the User will lose access and become unable to participate in the group work. |
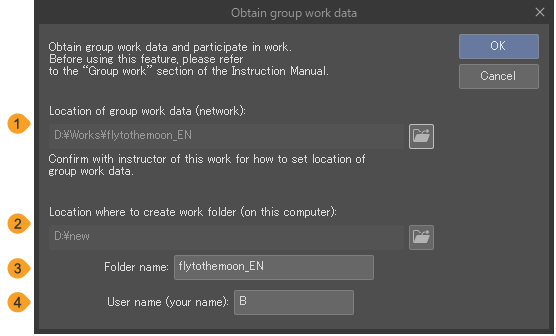
(1)Location of group work data (network)
Specify where the group work data is as directed by the Administrator.
(2)Location to create work folder (on this computer)
Specify where to create a work folder for editing the data when working on group work data.
(3)Folder name
(4)User name (your name)
Enter your name as a username when you perform Obtain group work data. This Username will be used to when assigning or unassigning files. Before starting group work, please alert the other users as to what usernames to use.
Assign member
The Administrator can assign members by page to set who will be working on what page.
Memo | If Only open assigned files and Do not overwrite group work data are both turned off in the Prepare group work data dialog, then users other than the Administrator can also assign members. |
1Select the pages from the Page Manager and go to the Story menu > Group work > Assign member.
You can select multiple pages to assign to a user. However, you will only be able to assign work to one user at a time.

2When you have Give instructions to other users on in the Assign member dialog you can enter the name of the member to assign work.
3Select the applicable pages from the Files to assign menu and then tap OK.
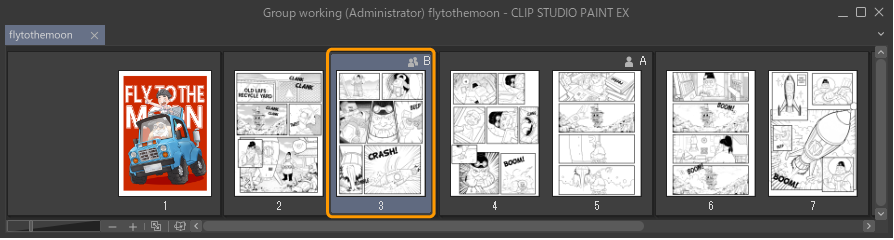
An icon and Username will be displayed on the selected pages in the Page Manager.
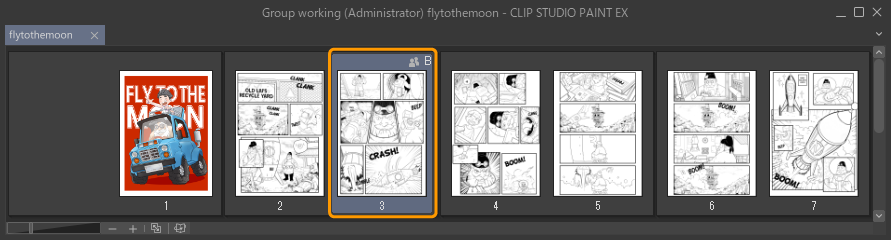
If you want to assign multiple users to work on a page open Assign member again and select other members to assign to the applicable pages. Icons and Usernames equivalent to the number of members assigned will be displayed on the selected pages in the Page Manager.
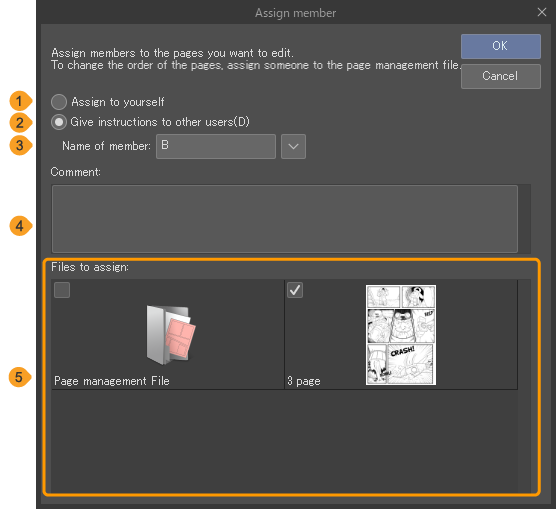
(1)Assign to yourself
(2)Give instructions to other users
(3)Name of member
Enter in the username of the person you want to assign work. Please enter in the Username that was set by the member when obtaining the group work data. If you want to assign the Administrator it will be the Username set in Prepare group work data. Tap the button on the right side to see what names you have entered in the past. This name history will display up to 10 past names.
(4)Comment
Enter a comment such as work instructions.
(5)Files to assign
A menu displaying available files to assign members to. It will display whatever pages were selected in the Page Manager as well as the Page management file. Check the box to assign the file.
If a user is assigned the Page management file then they can add and remove pages as necessary. Please alert the Administrator when adding or deleting pages.
If you want to put a user in charge of the Management file, please refer to "Prepare group work data". If Only open assigned files and Do not overwrite group work data are turned on. then you will not be able to add or delete pages.
Reflect change on group work data
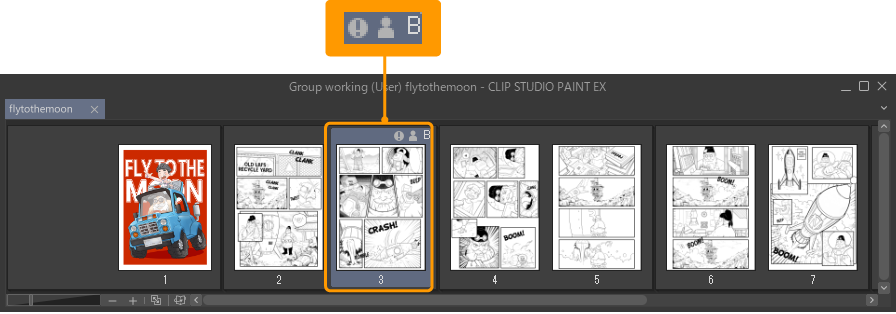
This will upload the pages edited in your work folder to the group work data. Pages that don’t have edits reflected in the group work data will display a round icon from the Page Manager.
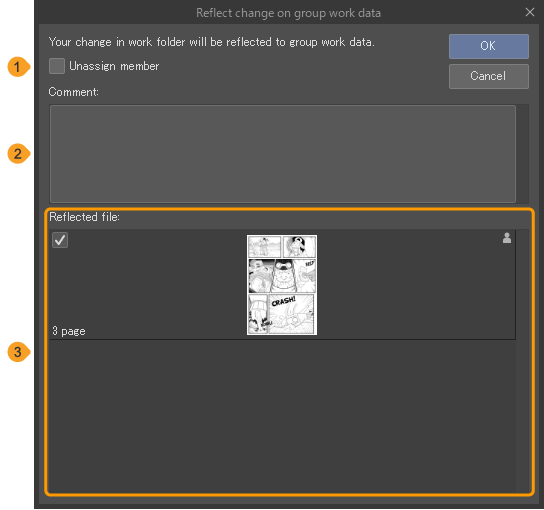
Select the Story menu > Group work > Reflect change on group work data. In the Reflect change on group work data dialog, select the Reflected file to reflect the page changes. If you added or deleted pages, select the management file.
Enter necessary information in the Comment box. If Unassign member is on, then the work will be reflected onto the group work data and will also unassign the member.
Tap OK in the Reflect change on group work data dialog to get the Changes reflected dialog. Check the content of the dialog and tap OK.
When a member performs Reflect change on group work data a new file will be created in the group work data. Reflecting changes on the same page through Reflect change on group work data will result in the same number of files added to the group work data.
Conflicting Pages
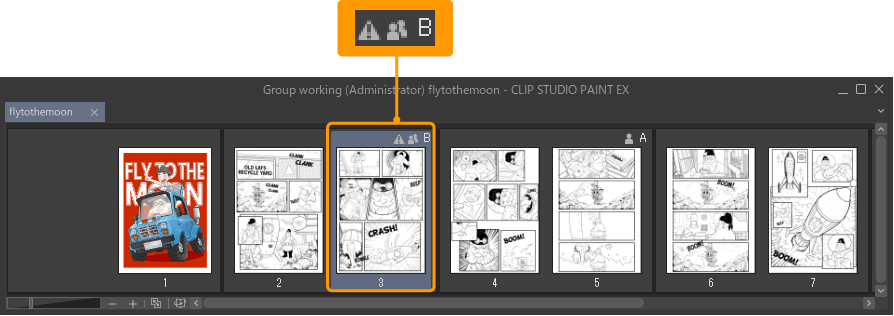
When the same page is being simultaneously updated by different users the page files will result in a conflict. A triangular icon will be displayed on the thumbnail of the page in the Page Manager to indicate a conflict.
When there is a file conflict the other user data will be stored in the work folder in a new separate file. This file is called a Conflict.
Memo | When a conflict occurs in the page management file, perform Obtain group work data and create a new work folder. Once you have made edits like adding and deleting pages in this new work folder, perform Reflect change on group work data and the group work data management file changes will be reflected. |
Discard changes to work folder
Discards the edited changes from the work folder and resets the group work data to the state it was in when downloaded initially. This is useful if you want to start your work over from scratch.
Select the Story menu > Group work > Discard changes to work folder. In the Discard changes to work folder dialog select the files you want to discard changes for and tap OK.
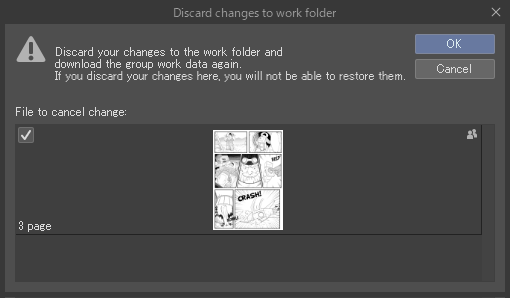
Check the contents of the dialog and tap OK. The page will be redownloaded from the group work data and will be reflected in the Page Manager.
Please note that when multiple users are editing a page, you may download the page with edits made by other users.
Update work folder
Select Story > Group work > Update work folder to update your work folder to reflect the changes made by other users.
If the same page is being simultaneously updated by different users, the page files will result in a page conflict.
Unassign member
The Administrator can unassign members by page.
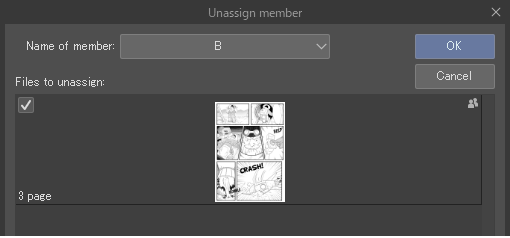
1Select the pages you want to unassign a member from the Page Manager and go to the Story menu > Group work > Unassign member.
2In the Unassign member dialog, select Name of member and Files to unassign and then tap OK.
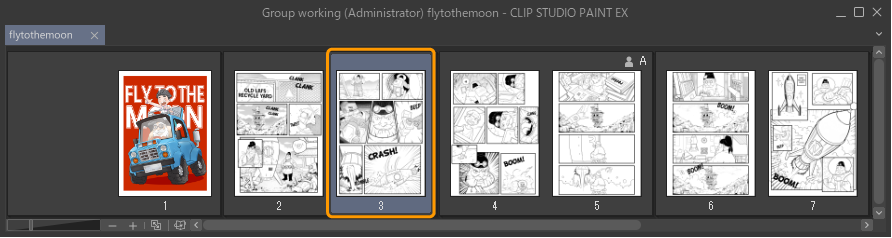
Once the member is unassigned, you should see their icon and name erased from the Page Manager.
Memo | ·Please see "Reflect change on group work data" to see how to have members unassign themselves. ·If Only open assigned files and Do not overwrite group work data are both turned off in the Prepare group work data dialog, then users other than the Administrator can also unassign members. |
Open conflicting file
When a page conflict occurs, you can open the conflicting file in the work folder and edit it. This is useful when working with a larger group of people.
Select the conflicting page from the Page Manager, then go to the Story menu > Group work > Open conflicting file.
When you are an assigned member
Open the conflicting file in your work folder. Opening the file you were editing can reflect the changes from the conflicting file.
When you are the administrator
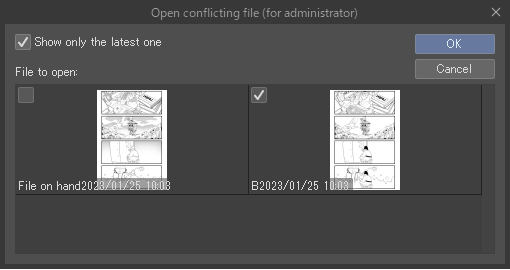
If you have Do not overwrite group work data turned on, then the Open conflicting file (Administrator) dialog will appear. Select the file you want from File to open and then tap OK.
The number of files available in File to open will be dependent on the number of times the users performed Reflect change on group work data. If you have Show only the latest one on, then only the latest file reflected by each member through Reflect change on group work data will be shown.
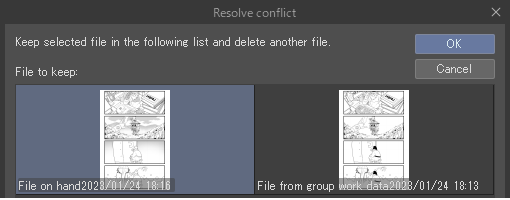
Resolve conflict
When a page conflict occurs, you can select the file you want to keep and resolve the conflict. Use Open conflict to check files and delete as necessary from the conflicting files that the multiple members reflected changes for.
Select the conflicting page from the Page Manager, then go to the Story menu > Group work > Resolve conflict.
When you are an assigned member/user
The Resolve conflict dialog will appear. Select the data you want to keep from the group work data and your edited files and tap OK. The selected files will be reflected in the Page Manager and the conflict icon will disappear.
Even if you have Do not overwrite group work data turned off, the Resolve conflict dialog will appear.
When you are the administrator
If you have Do not overwrite group work data turned on, then the Open conflicting file (Administrator) dialog will appear. Select the data you want to keep from File to keep and tap OK. The selected files will be reflected in the Page Manager and the conflict icon will disappear.
The number of files available in File to keep will be dependent on the number of times the users performed Reflect change on group work data. If you have Show only the latest one on, then only the latest file reflected by each member through Reflect change on group work data will be shown.
Show log
Select Story > Group work > Show log to check the Reflect change on group work data log.
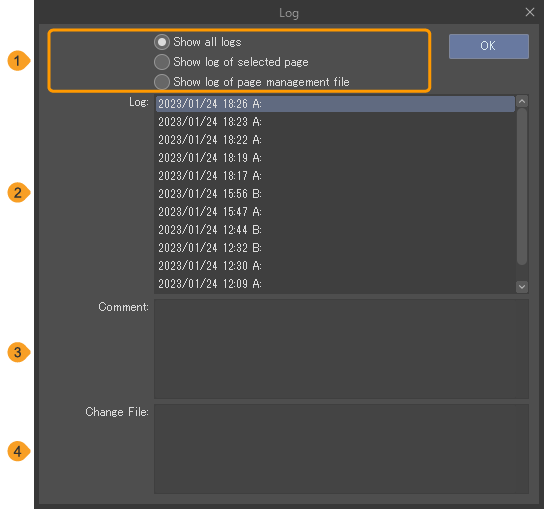
(1)View content
You can choose what content to view in the Log dialog. The options are Show all logs, Show log of selected page, and Show log of page management file.
(2)Log
A list of group work data logs. The date on which the group work data was uploaded, serial number, name of assigned members and comments are displayed here. Select a log to display details in Comment and Change file.
If you have Do not overwrite group work data turned on then there will be no serial numbers displayed.
(3)Comment
The selected log will have the timestamp for when Reflect change on group work data was performed and any comments.
(4)Change File
The selected log will show changes to the number of pages. It also displays other information regarding changes. Like Add, Update, Delete, Submit, and Decline.
Submit will appear when Do not overwrite group work data is on and a user has performed Reflect change on group work data. This creates a duplicate file without overwriting the group work data.
Decline will appear when Do not overwrite group work data is on and the Administrator deletes a work file submitted by a user to resolve a file conflict.
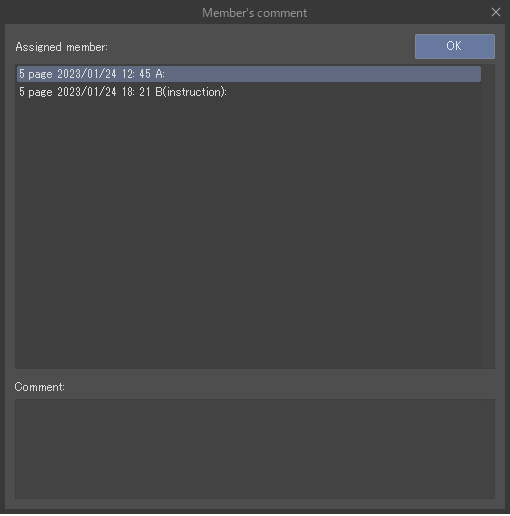
Show member's comment
Go to the Story menu > Group work > Show member's comment to open the Member's comment dialog and check assignment status and comments.
You can check the pages assigned, date assigned, username, and comments here. Select this to display detailed comments in Comment. The comment is entered in when you perform Assign member.
Show group work settings
Select Story > Group work > Show settings to check the Show settings dialog which will show the settings for the group work data currently being edited. Here you can check the location of group work data, work folders, usernames, and member permissions.
You can also check what status Only open assigned files, Warn when opening unassigned file, and Do not overwrite group work data were set to when the Administrator prepared the group work data.
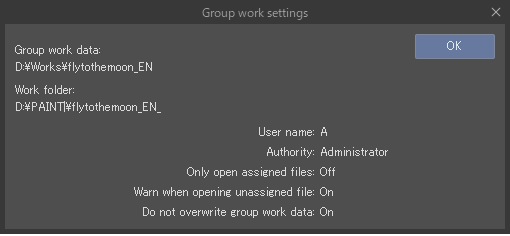
Show settings will show you the current settings, but you will not be able to change them here.