Managing fonts
On Windows and macOS, Clip Studio Paint uses the device fonts. When you install a new font to your device, it will automatically appear in the font list in Clip Studio Paint.
On iPad, Clip Studio Paint comes with default fonts, and you can add other fonts installed to your device by using the Add font from device button.
On Android and Chromebook devices, you can only use the default fonts in Clip Studio Paint. You cannot add other fonts installed to your device.
Font list
The font list displays the list of available fonts. Click the drop-down arrow beside the font name in the Tool Property palette to open the Font list.
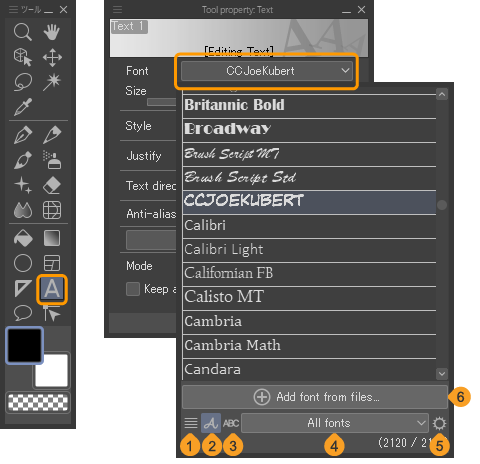
The buttons underneath the font list offer different settings for managing fonts.
(1)Display font name
This setting shows the font names in the same plain font.
(2)Display font name in specific font
This shows the font name in each font.
(3)Display text in specific font
This shows the selected text in each font.
(4)Font list name
This dropdown lets you choose whether to view all fonts, or a custom list.
(5)Font list settings
Opens the Font list settings dialog where you can manage font lists.
(6)Add font from files (iPad only)
If fonts installed on your device do not appear in the font list, you can add them here.
Making new font lists
You can create custom font lists to more easily find and manage your favorite fonts.
To create a new font list, select the Font list settings button to open the following dialog.
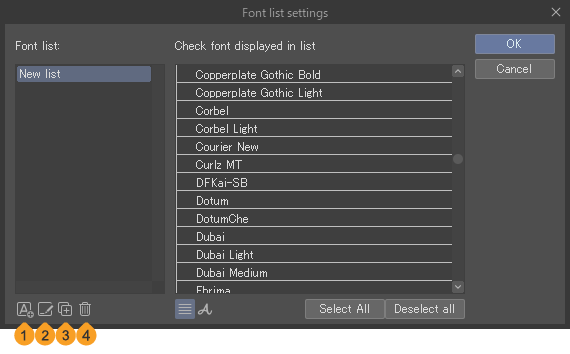
(1)Create new font list
(2)Change name of font list
(3)Duplicate font list
(4)Delete font list
Create a new font list by selecting the Create new font list button at the lower left. While the font list is selected, check fonts in the right list to add them to the font list. Any fonts with a check mark will appear in the list.
To rename the list, double-click it or use the Change name of font list button.
When you have finished managing your font lists, select OK in the dialog to close and save any changes. Your new font list will now appear in the Font > Font list name dropdown.
Search fonts
You can search font names using the search box at the top of the font drop-down. Tap the drop-down arrow beside the font name in the Tool Property palette to open the Font list.
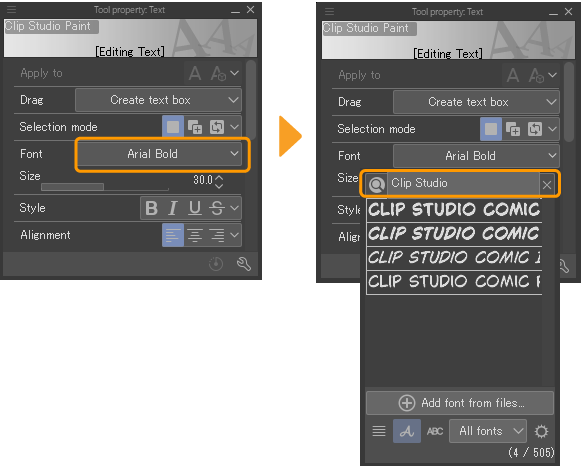
To cancel a search, delete the entered text or tap the X button at the right side.
Mixing fonts
Mixing fonts allow you to use different fonts for each type of character, for example, to mix alphabet characters and Japanese characters.
You can set up a mixing font from the Sub Tool Detail palette for the Text tool.
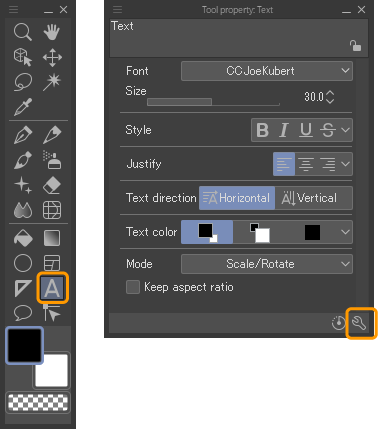
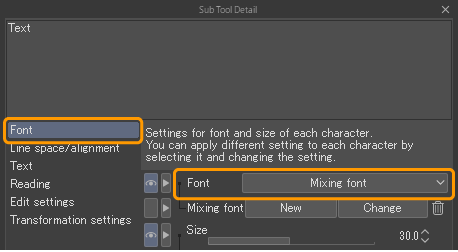
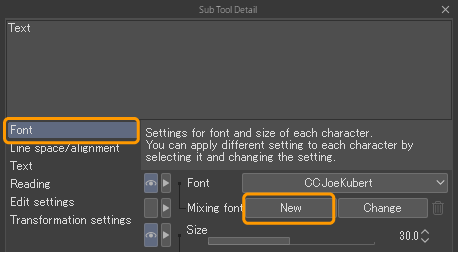
From the Sub Tool Detail palette, go to the Font category > Font.
Select the font you want to use for the mixing font, and then select New next to Mixing font.
In the Create mixing font dialog box, create the mixing font.
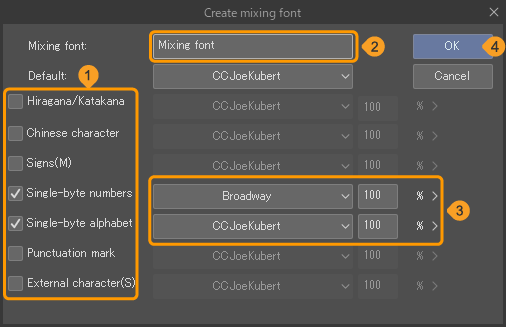
1Enter a Mixing font name.
2Check the character type that you want to use in the mixing font.
3Set the font type and size.
4Click OK to complete the mixing font.
Once created, the name of the mixing font will appear in the Sub Tool Detail palette > Font.
